

For Couples
OVERALL the style is clean, straight, and tac sharp. Balanced and not often soft, vibrant and with pop. Skin tones and colors are true as possible (done mostly in post).
This guide is designed to make sure that the photos we capture are consistent with our style and service throughout the years. The shots shown are what we call “safety shots”. We encourage creativity after the safety shot is captured.
Before every wedding you should have arrived earlier than the start time to scout your locations for portraits, group shots, etc. As you get better, you’ll be able to create the shots you want/ need in any venue even without scouting.
Here’s what the second photographer focuses on:
Groom Getting Ready:
Below I’ll illustrate some examples of getting ready and what to aim for and what to avoid.
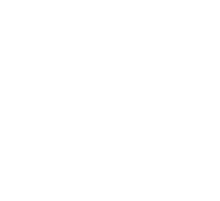
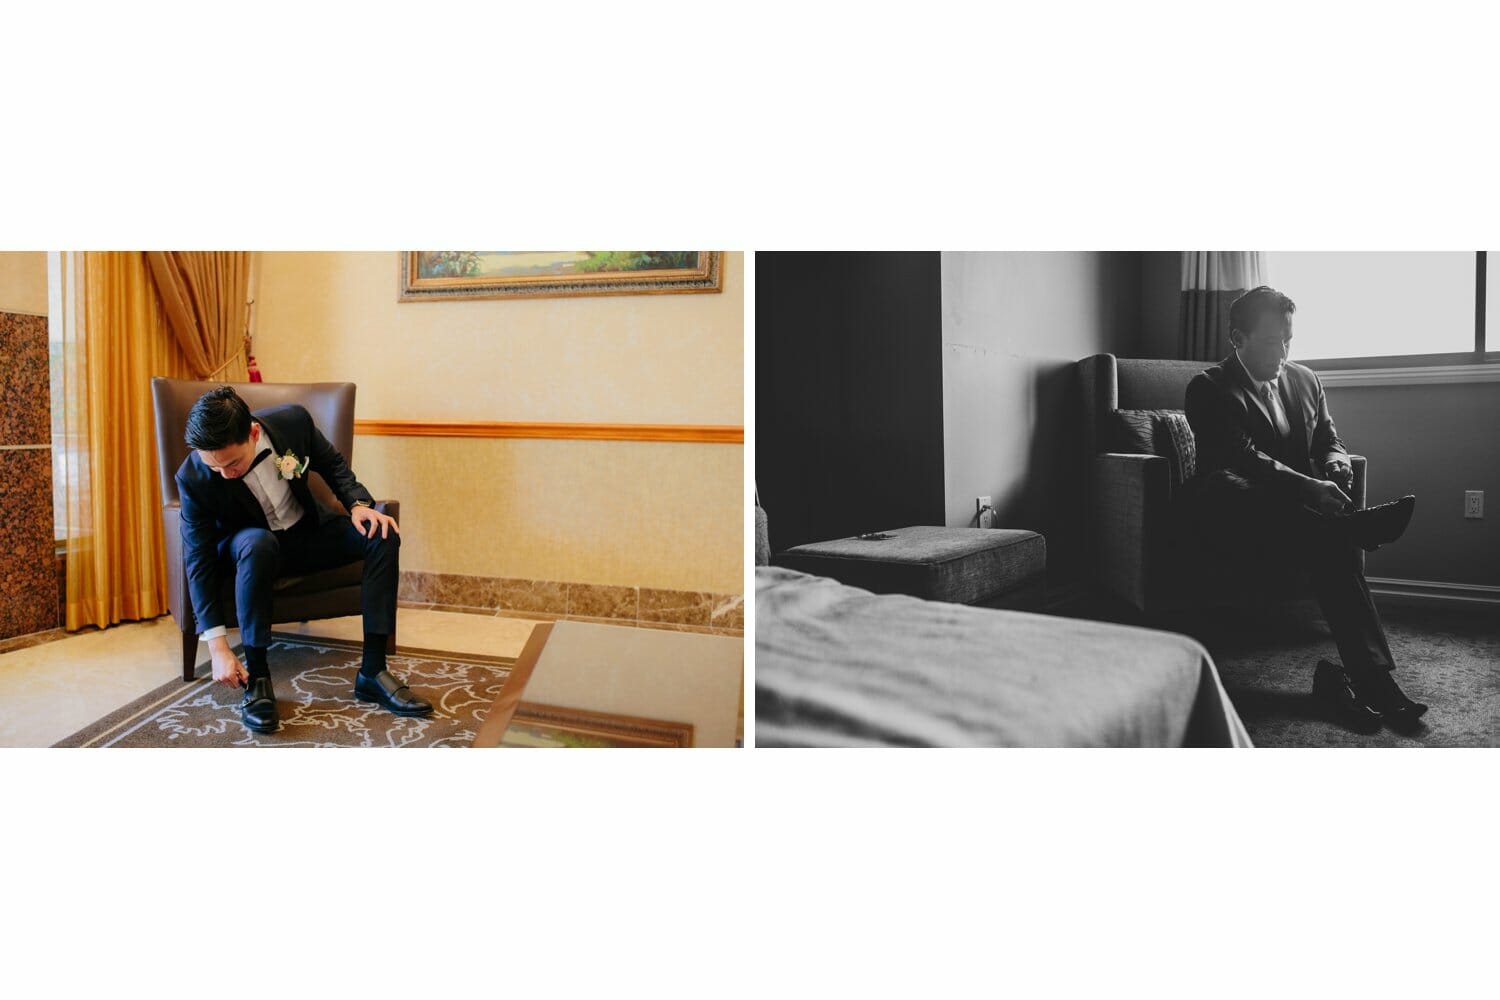
Below is an example of what to avoid:
Right to left: the first image is decent, but doesn’t show the room, plus the background is unpleasing.
The second image is too backlit with the window light clashing with the white t-shirt.
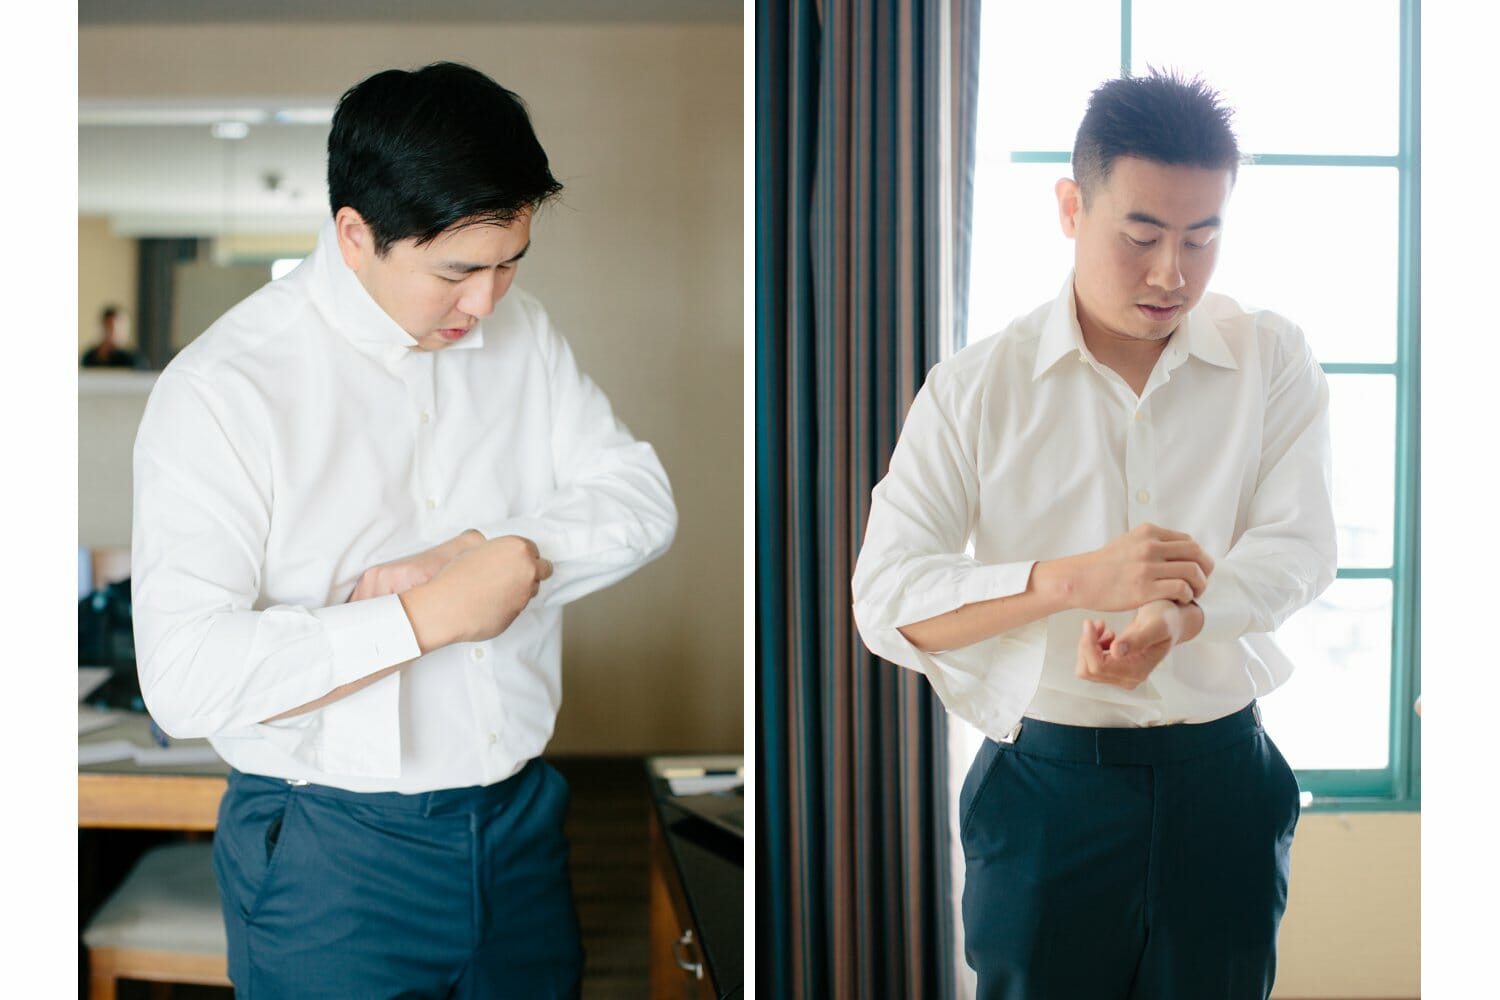
Avoid: Profiles of the groom aren’t ideal and the bed is messy.
Always clear the room of trash, plastic sheets, etc. for a clean look.
Please don’t have the groom look directly into the camera for getting ready photos. It’s supposed to look candid.

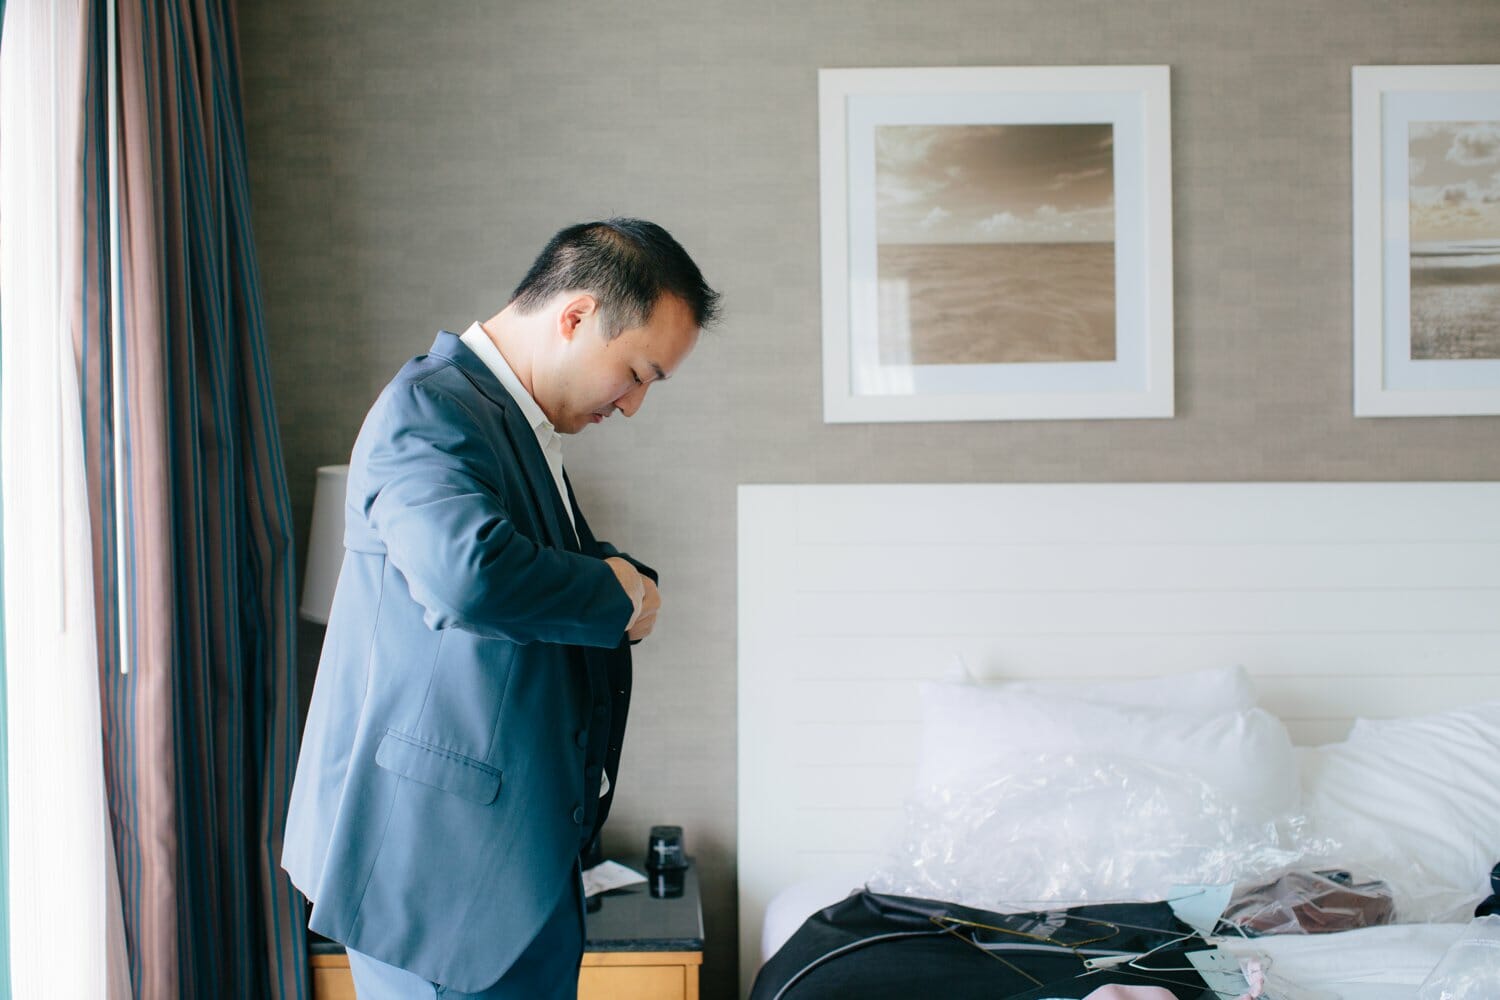
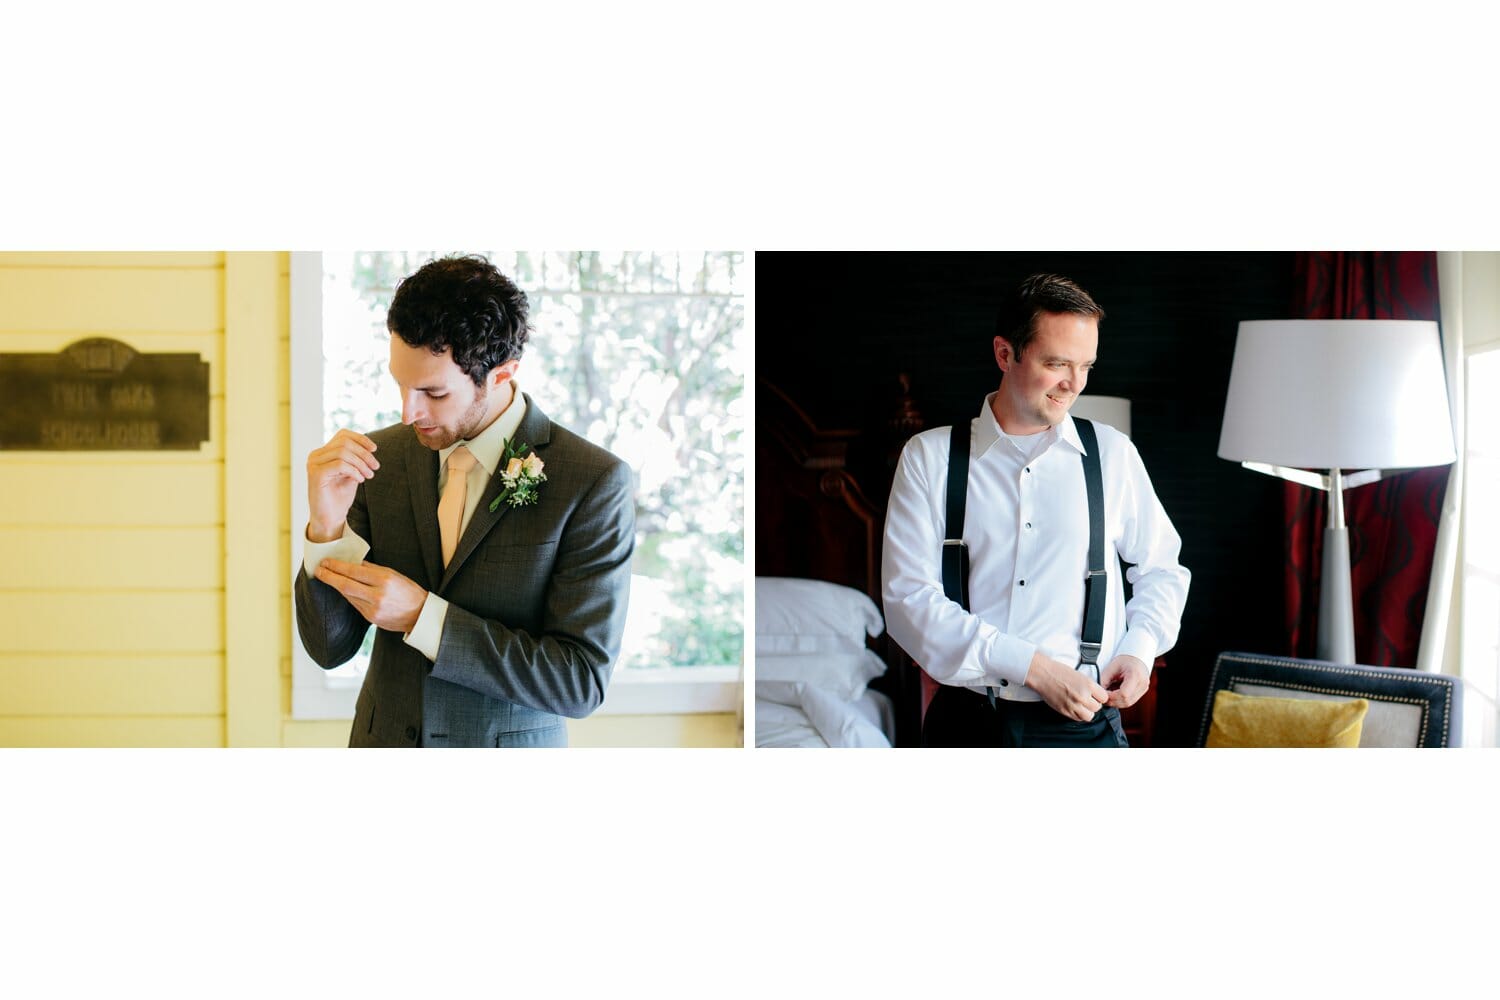
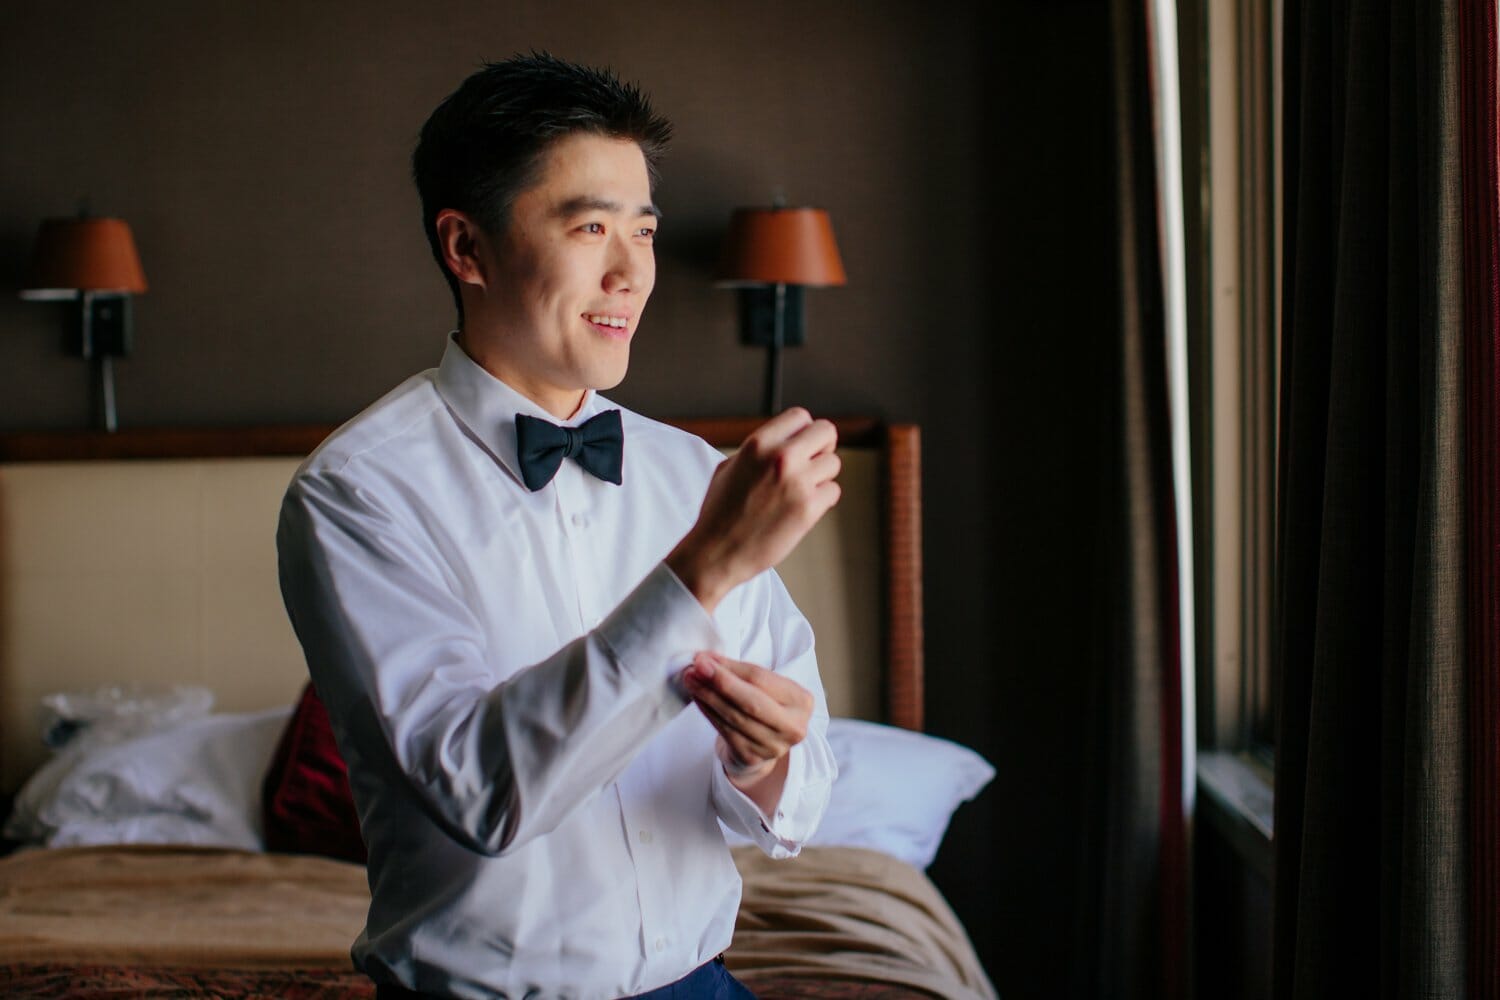
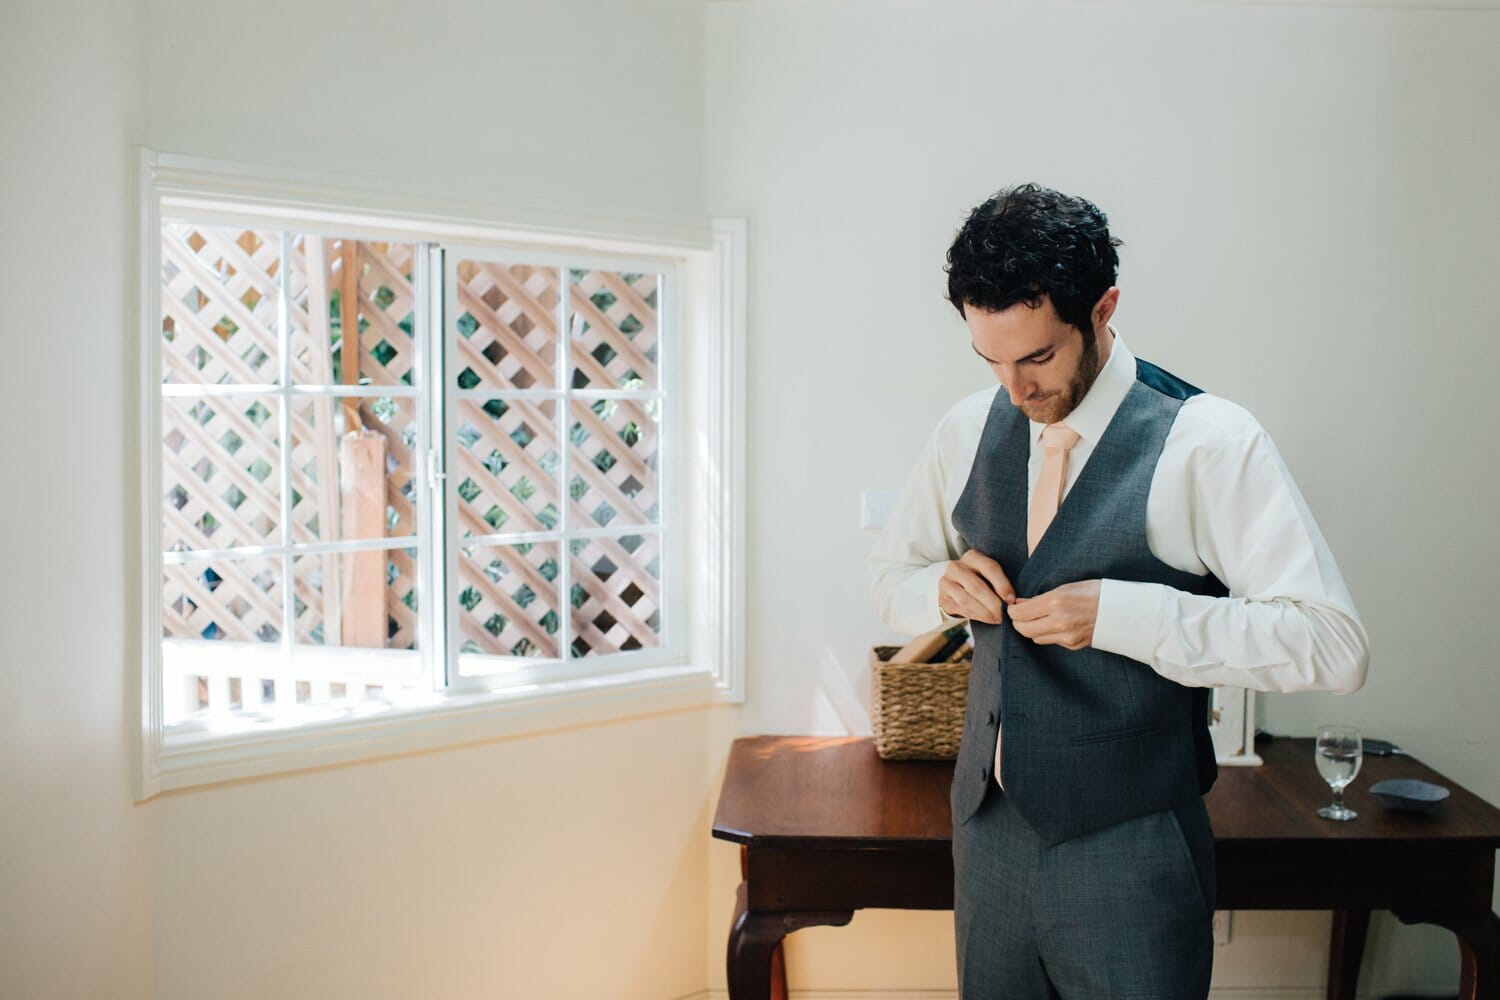
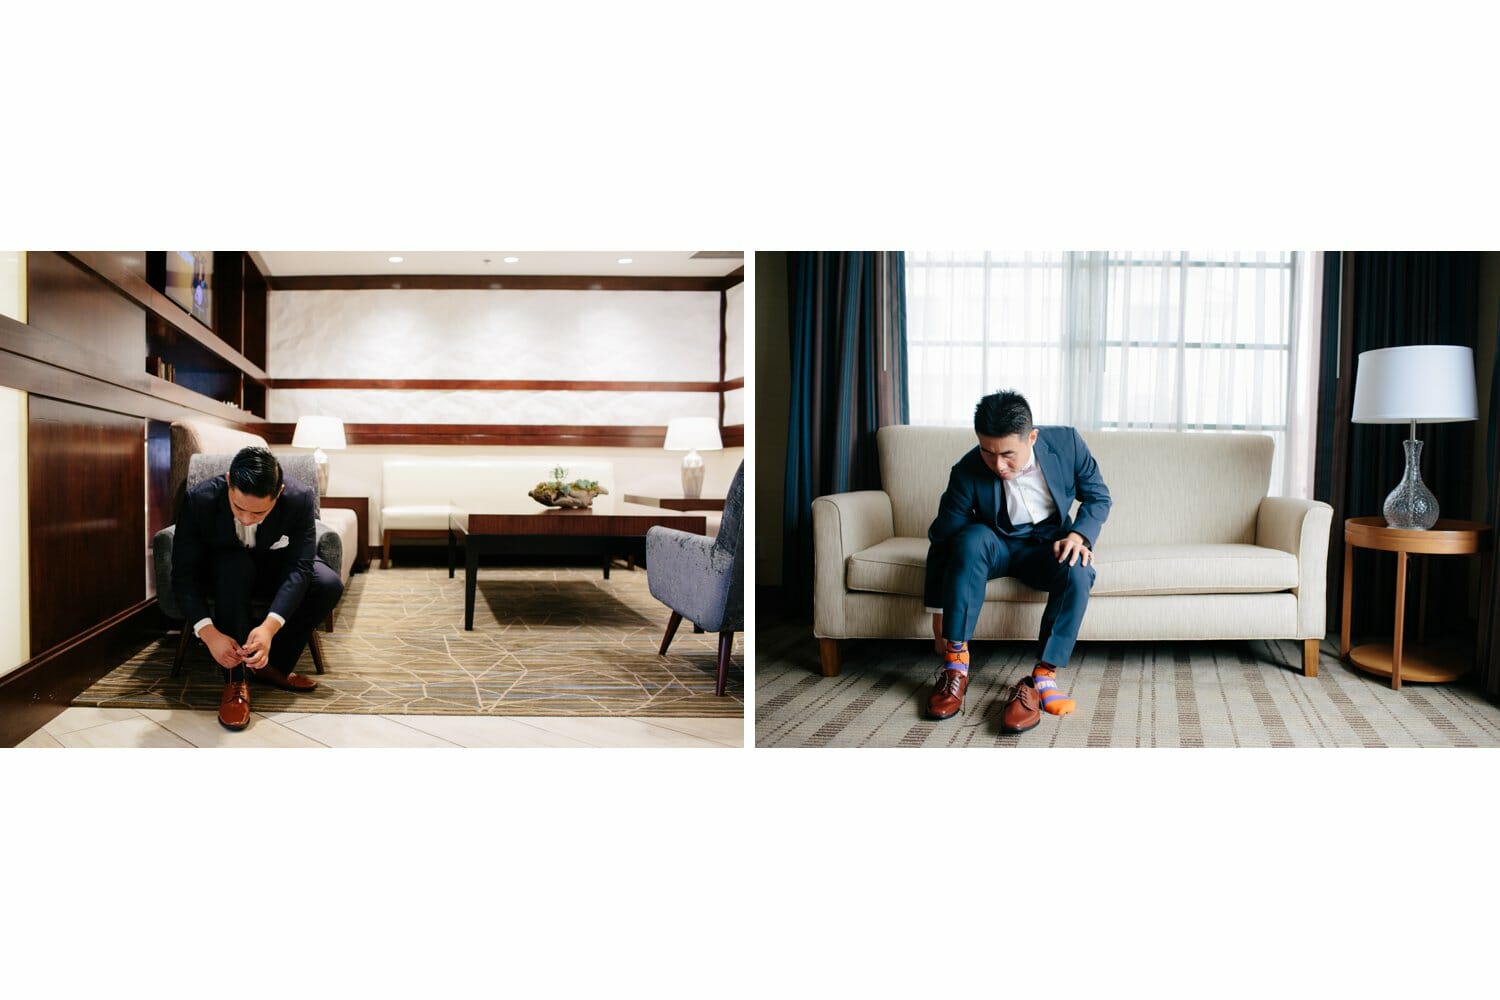
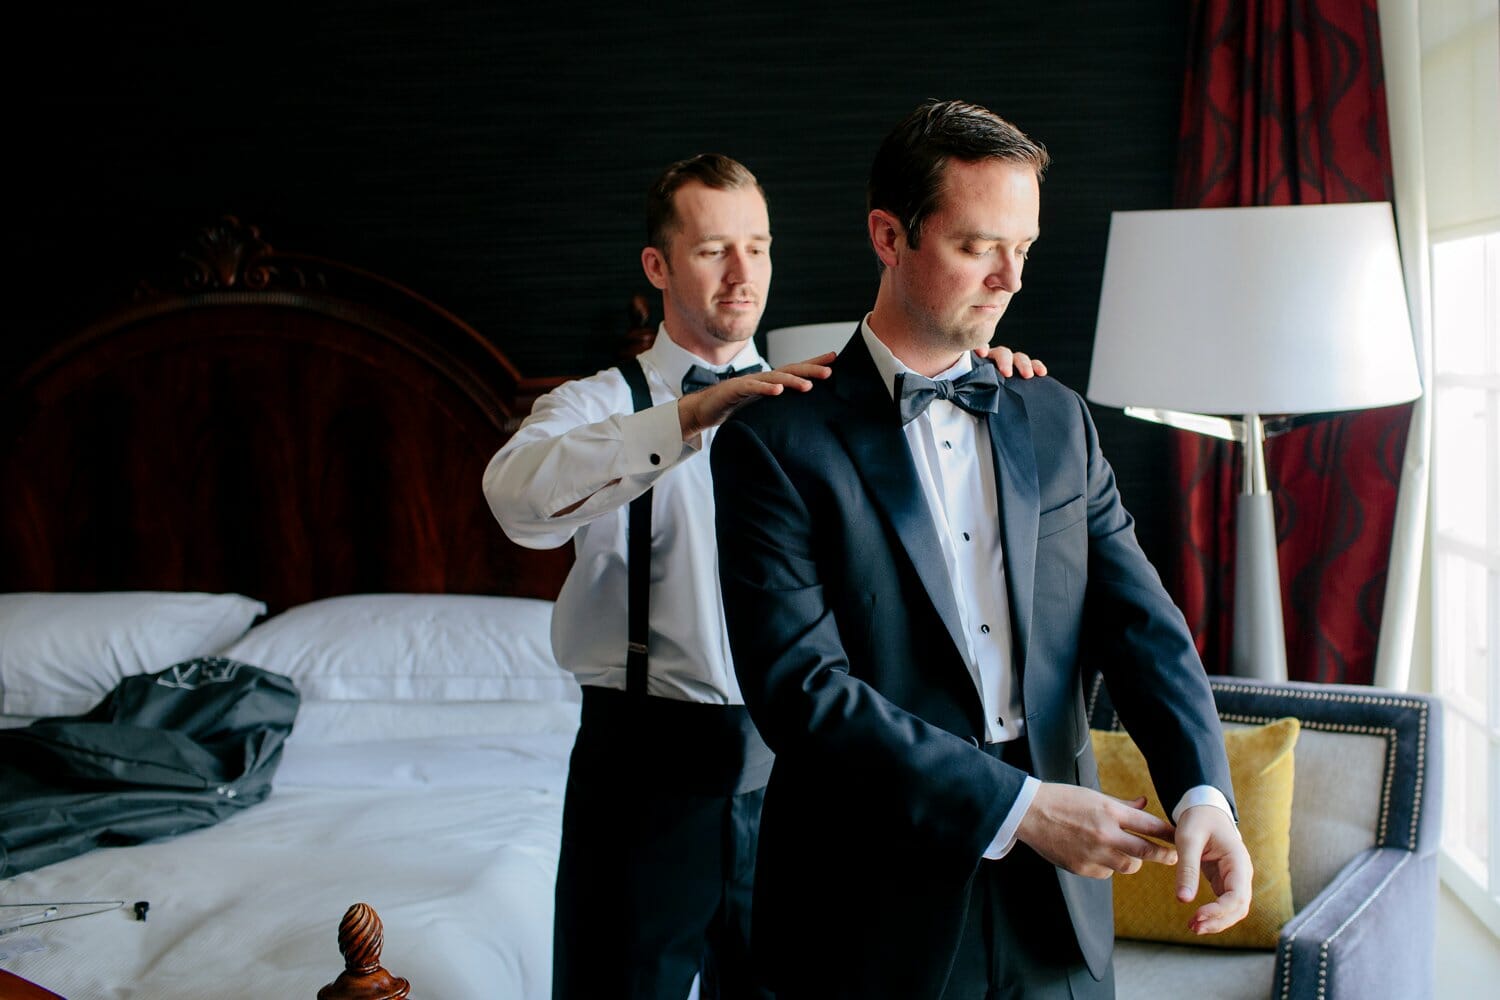
Below are great examples of using natural light with the groom getting ready. The first one is back lit, but doesn’t clash with the dark colored suit and the leaves break up the window light.
The second is ideal placement of the groom. The window provides great natural exposure, expression is right, and composition is full.
Settings: 35mm 1/200, 2.0-2.8f, ISO variable.
Putting on the shoes:
These are shots to avoid:
The shots below: It feels cramped and parts of him are cut off. This is a framing issue.
Every photograph should feel intentional. If it’s a close up moment vs. a full body vs. medium shot.
NEVER shoot the groom this way. Distortion of the shoes, TV in the shot, not straight, etc. It’s absolutely unusable.

Rental shoes SHOULD NEVER be photographed unless requested from the bride.
If you do shoe shots, tie the laces!
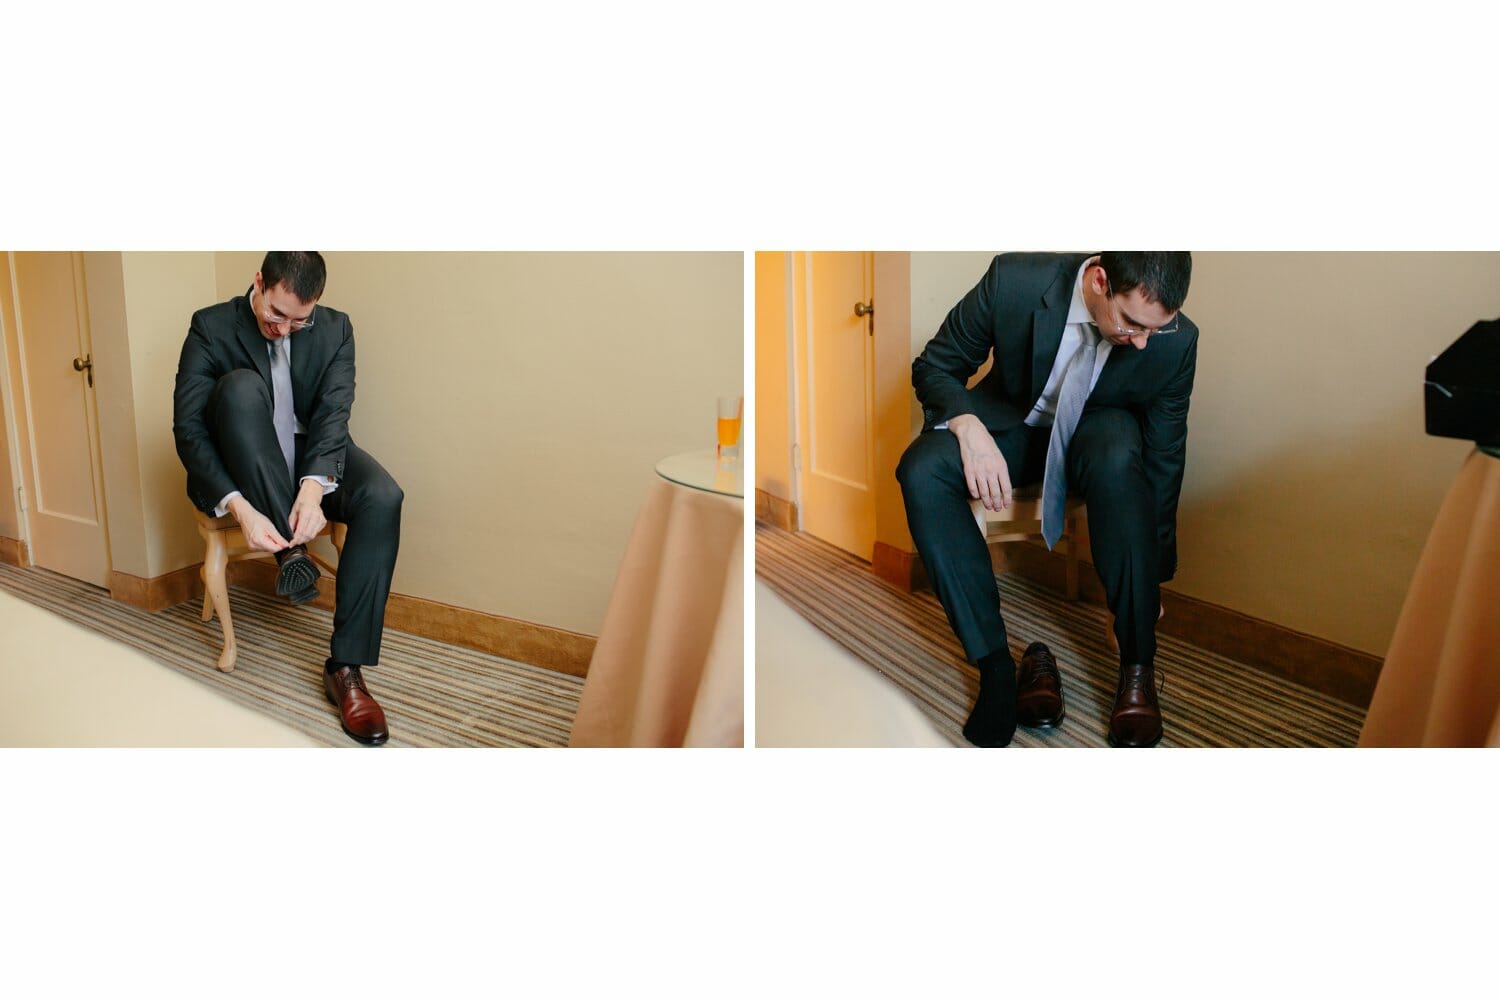
These below are decent yet his legs are swallowed by the chair.
These are better because the legs are more defined and he looks taller, that is, it’s a more attractive pose for him. The angle is more pleasing and this framing should be aimed for every time.
Leg placement should look masculine, strong and balanced. Most men will sit this way anyway.
If you do not have room, try your best to make the room you need! Own each shot create.
Settings: 35mm 1/200, 2.0-2.8f, ISO variable.

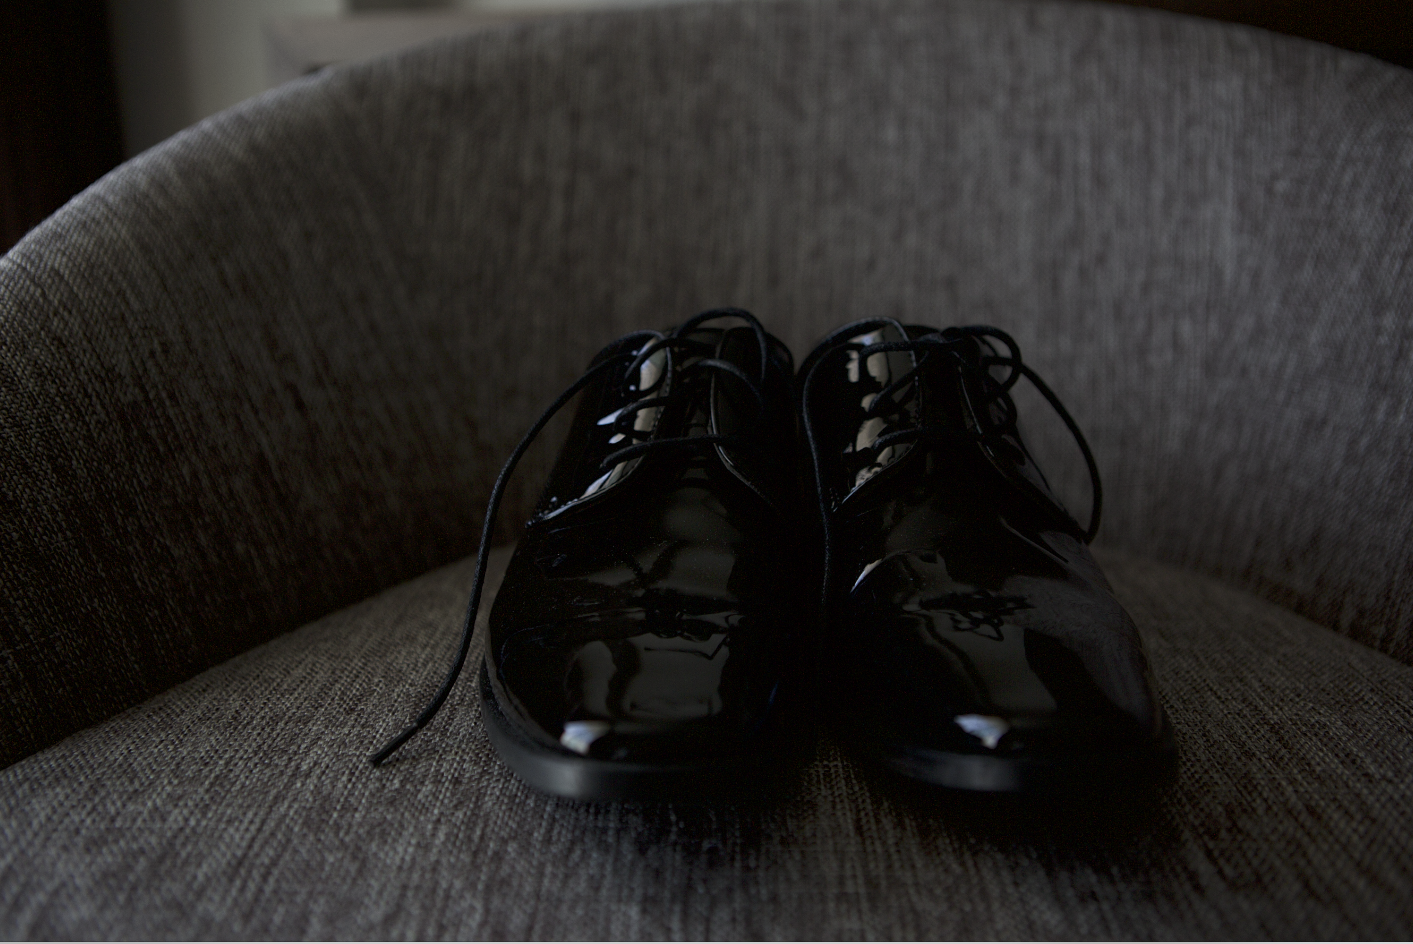
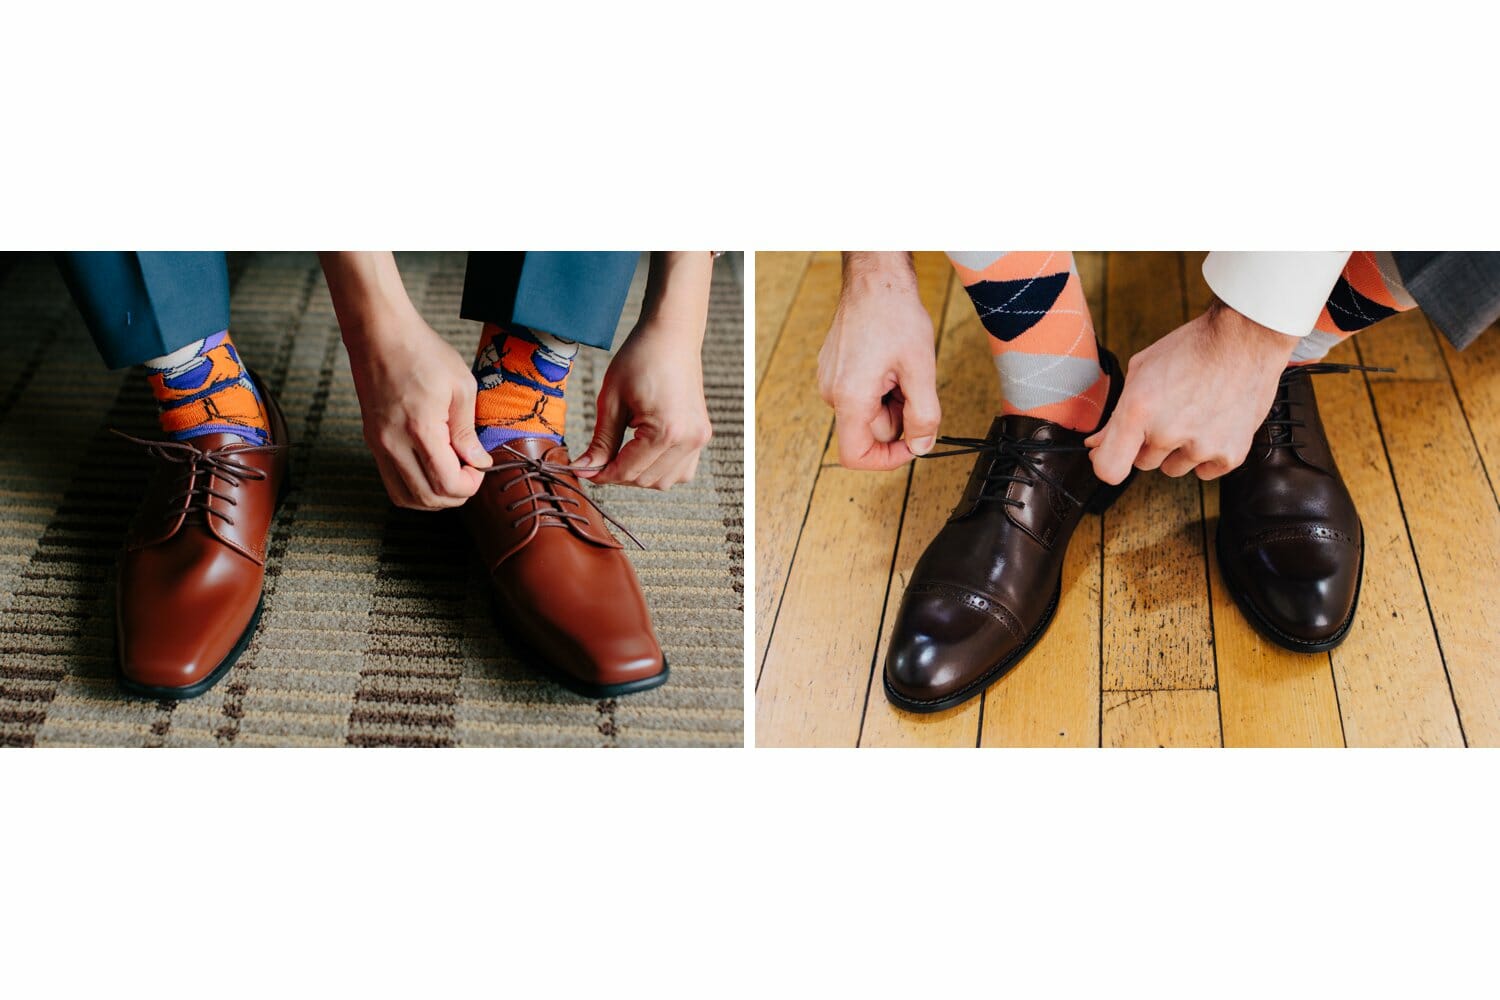
Tying the laces and putting on shoes:
Grooms love to show off their socks and shoes. Even if the shoes are rentals, we’ll capture it for the client.
Settings: 50mm 1/200, 2.0-2.8f, ISO variable.
Boutonnière shots:
Here’s examples of decent shots, but not ideal. For any groom this pose and framing of the grooms outfit should look clean.
Issues: the first image the face is facing the camera and causing a double chin, with teeth showing and it clashes with the main subject of the shot. *Can this be cropped out in post? Yes, but we don’t shoot to make mistakes on-camera, only to fix it in post.
DO NOT Shoot the boutonniere on the wrong side. It MUST be on the left and pinned on the lapel.
The second image is ok, but the suit can be pulled tighter down at the first button. I often would tell grooms to “look to the right, while I pull the lapels down to the first button”
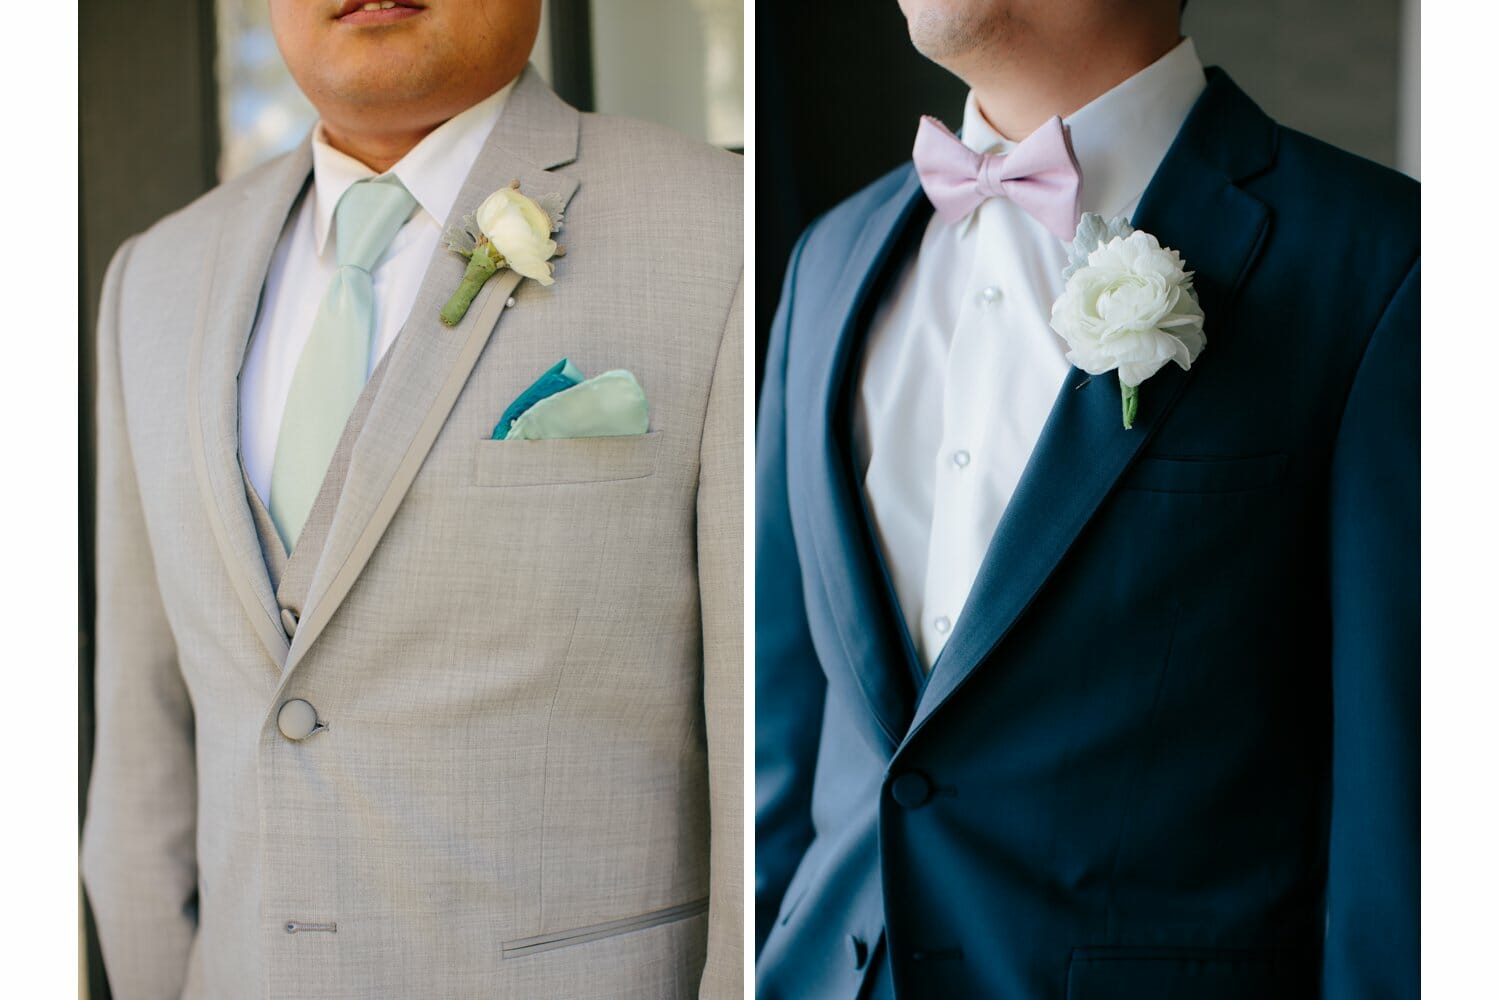
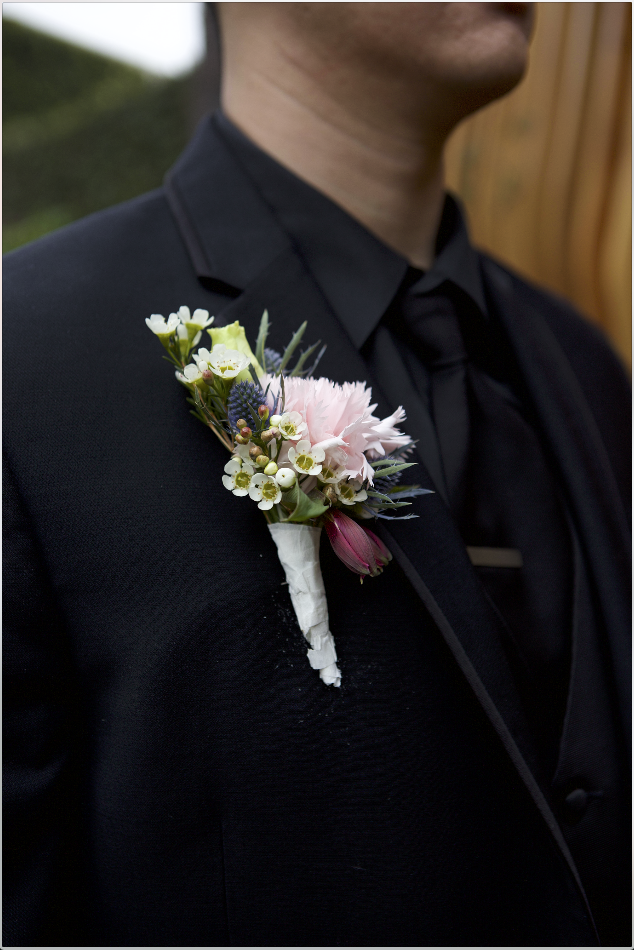
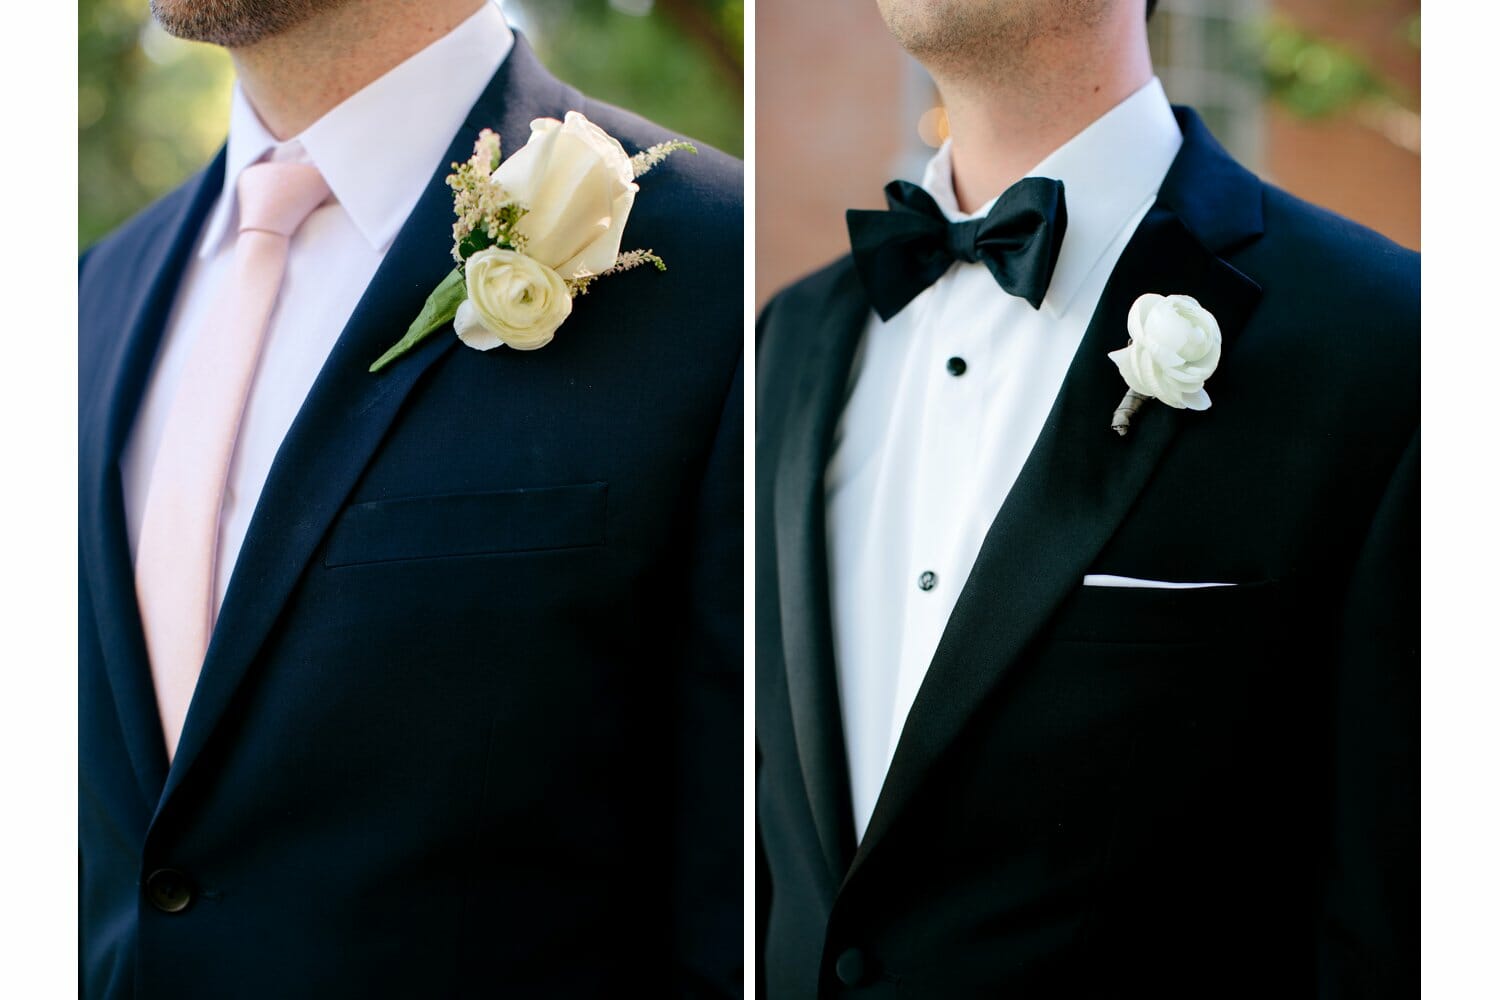
Here’s the great examples of this shot done right. Clean, simple and backdrop is also pleasing. You can never go wrong with greenery in the background.
Settings: 50mm 1/200, 2.0-2.8f, ISO variable.
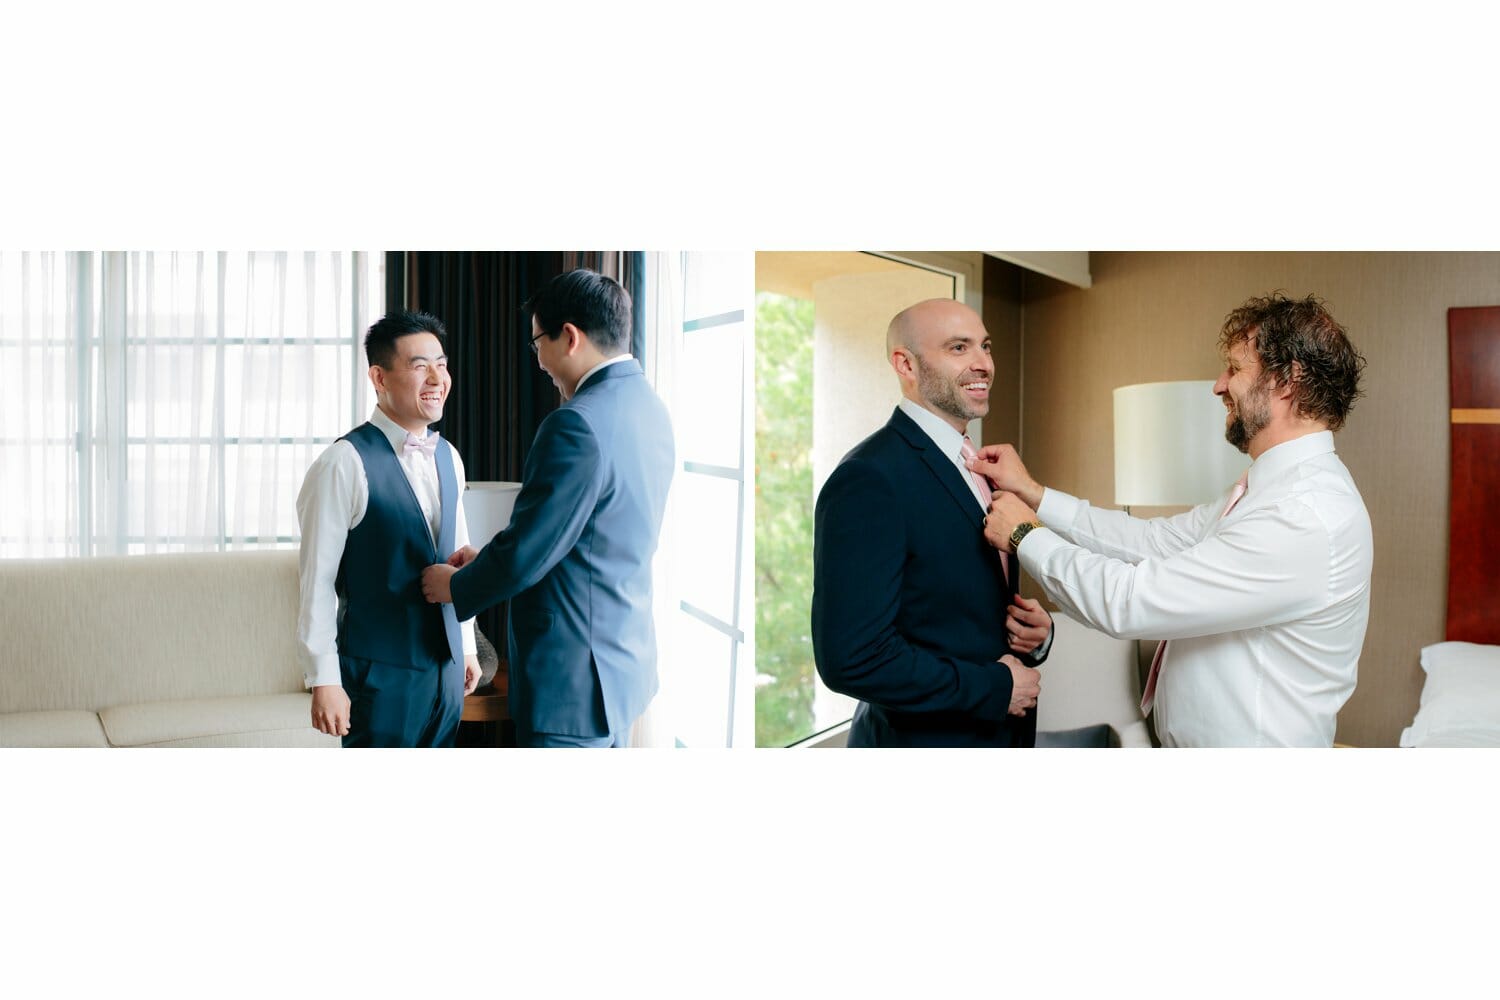
Pinning the boutonnière should be captured like this:
Settings: 50mm 1/200, 2.0-2.8f, ISO variable.

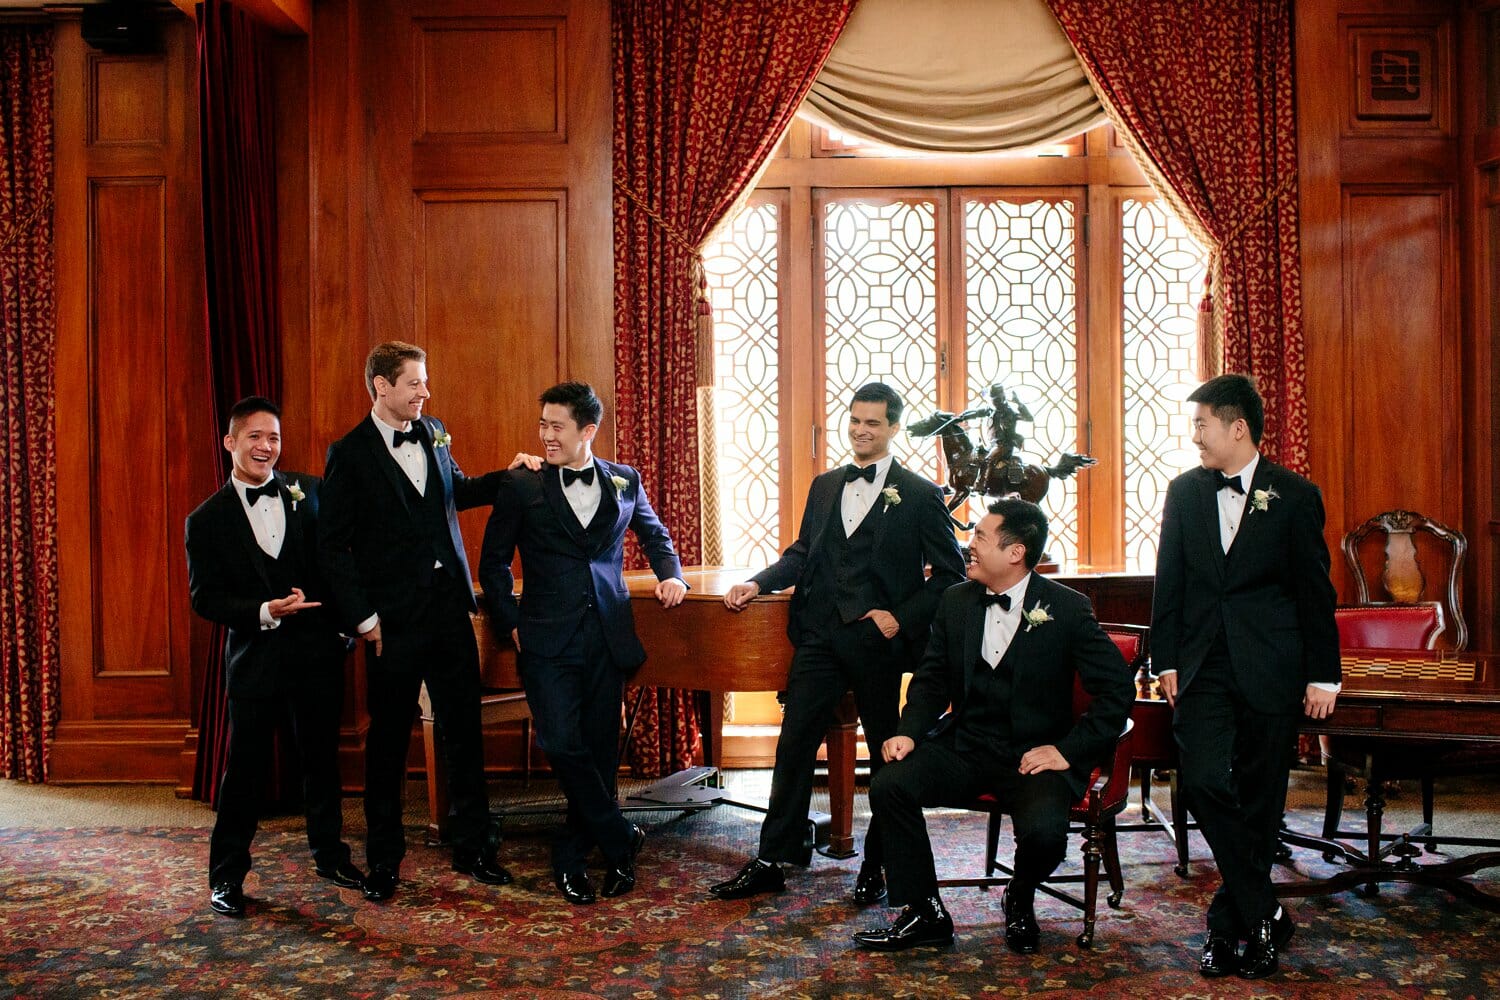
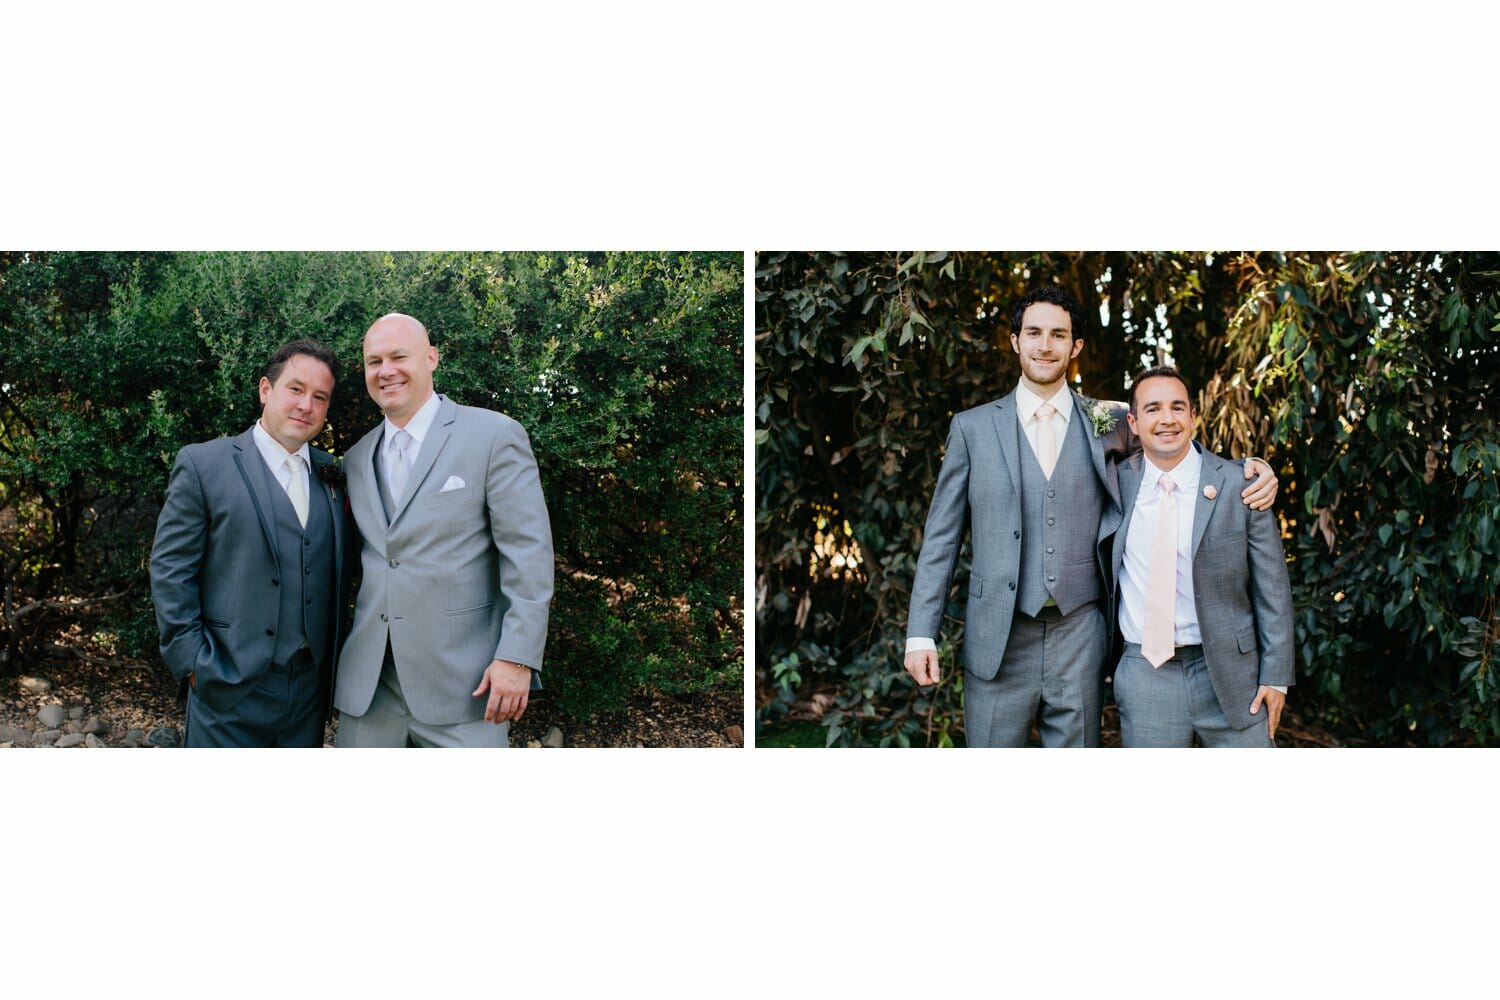
Best man, groomsmen shots can be captured like this: Good composition, candid moments, no cut off fingers.
Settings: 35mm 1/200, 2.0-2.8f, ISO variable.
Settings: 35mm 1/200, 2.0-2.8f, ISO variable.
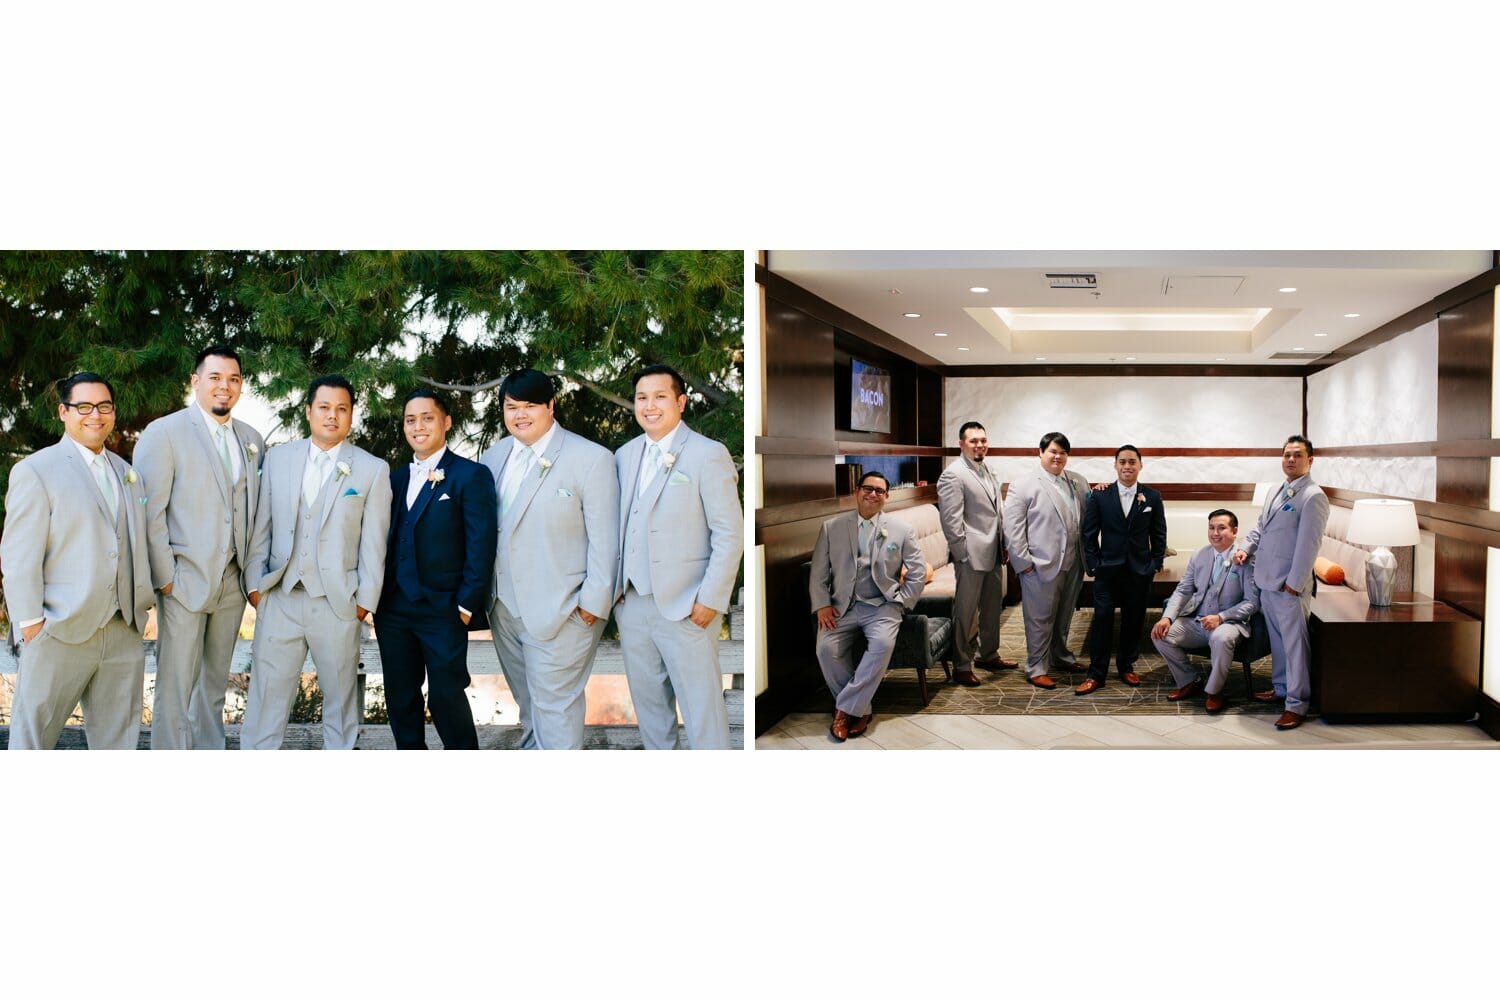
Groomsmen group shots:
These are examples of shots to avoid.
They are too cramped or un-balanced. As you experiment to “find your shot” please delete your unfavorable shots from the card as they take up unnecessary room and time for editing in post.
Group shots are a balance of the surrounding area and posing of the guys to create a balanced photo.
First shot: too cramped, arms of groomsmen on either side of the photo are too close to the edge of the photo.
Second shot: right side is empty and lacking
Settings: 35mm 1/200, 4.5-11f, ISO variable.
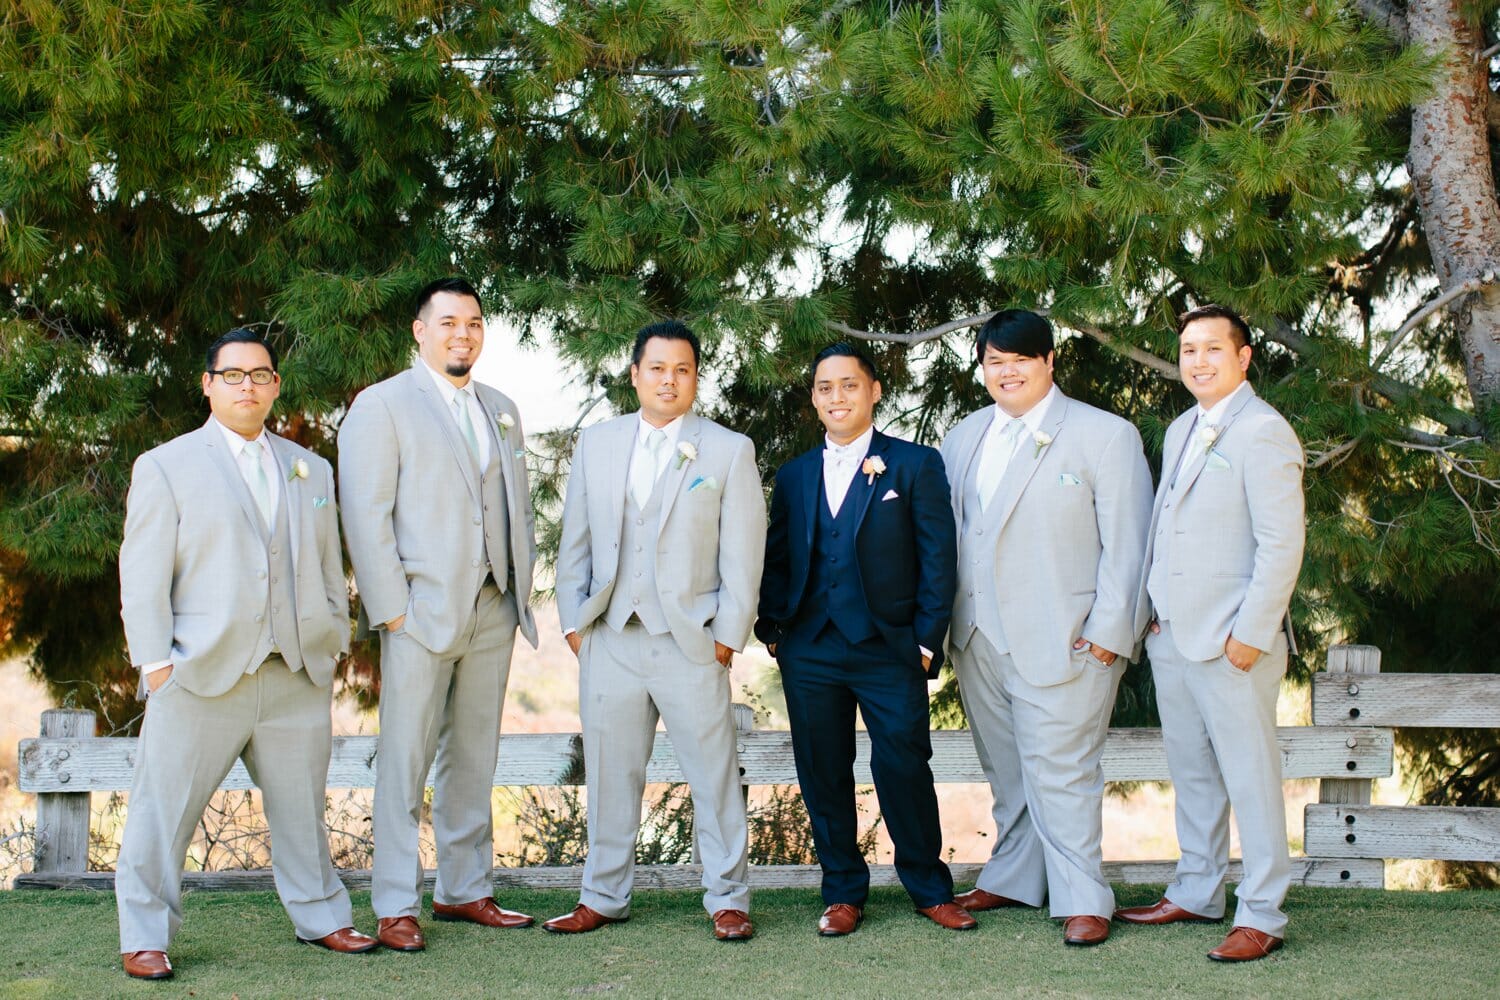
Simply adjusted, this group shot is well balanced now.
Also make sure everyone is in focus, with a f4.5 and higher for 3 or more people. Zoom in and be sure everyone is sharp! This applies to every group shot. Clients may want to blow up or print these photos.
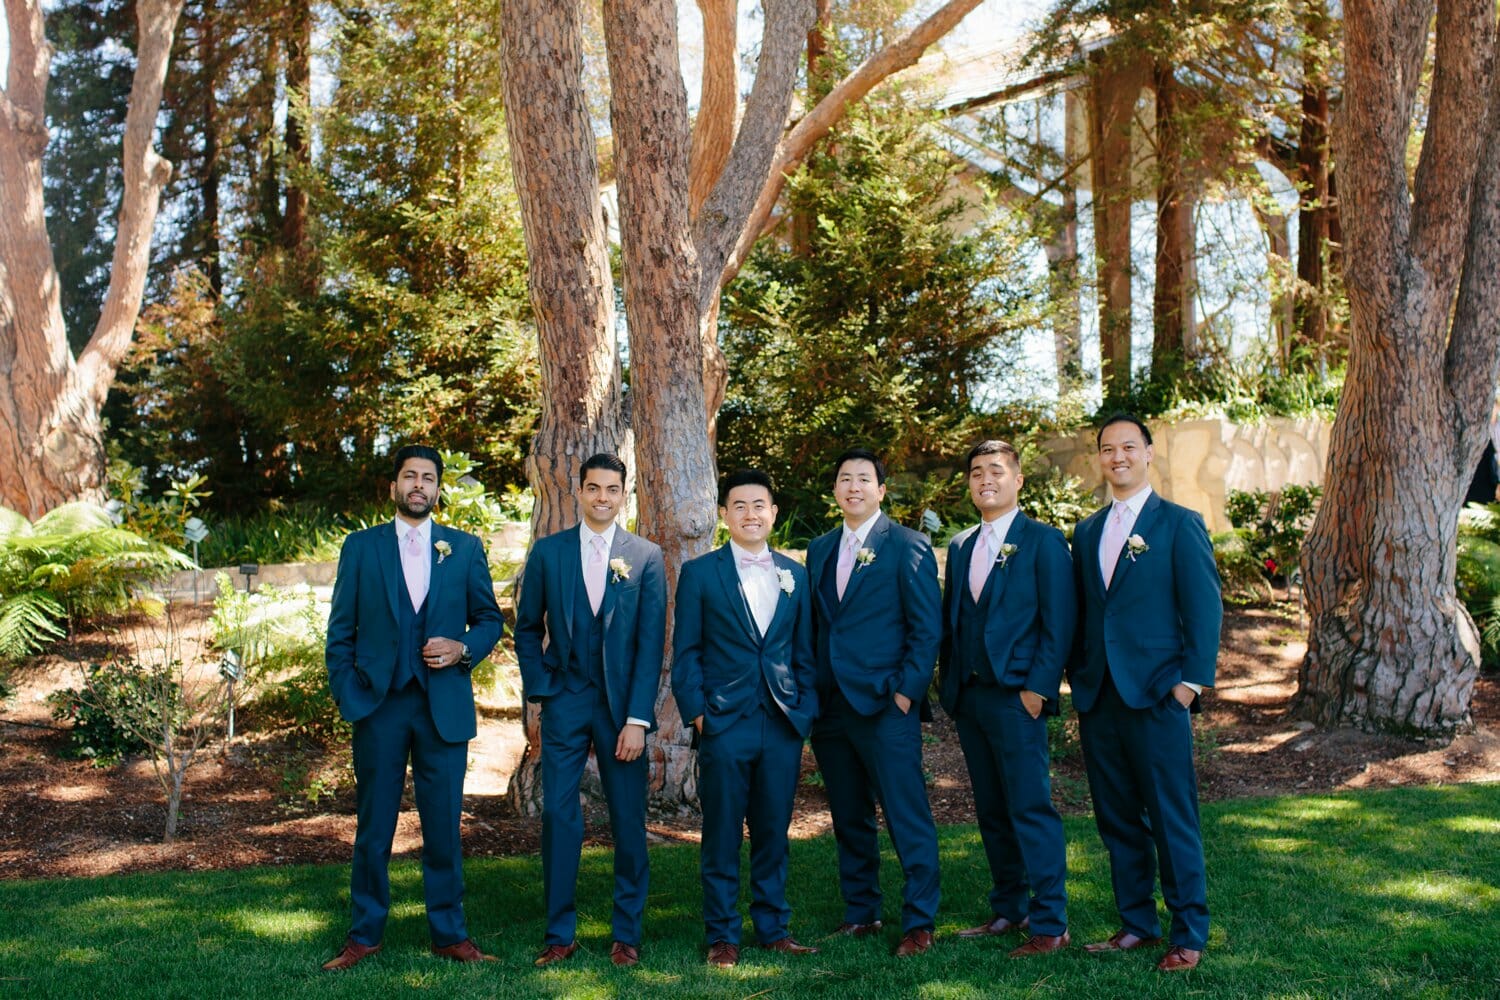
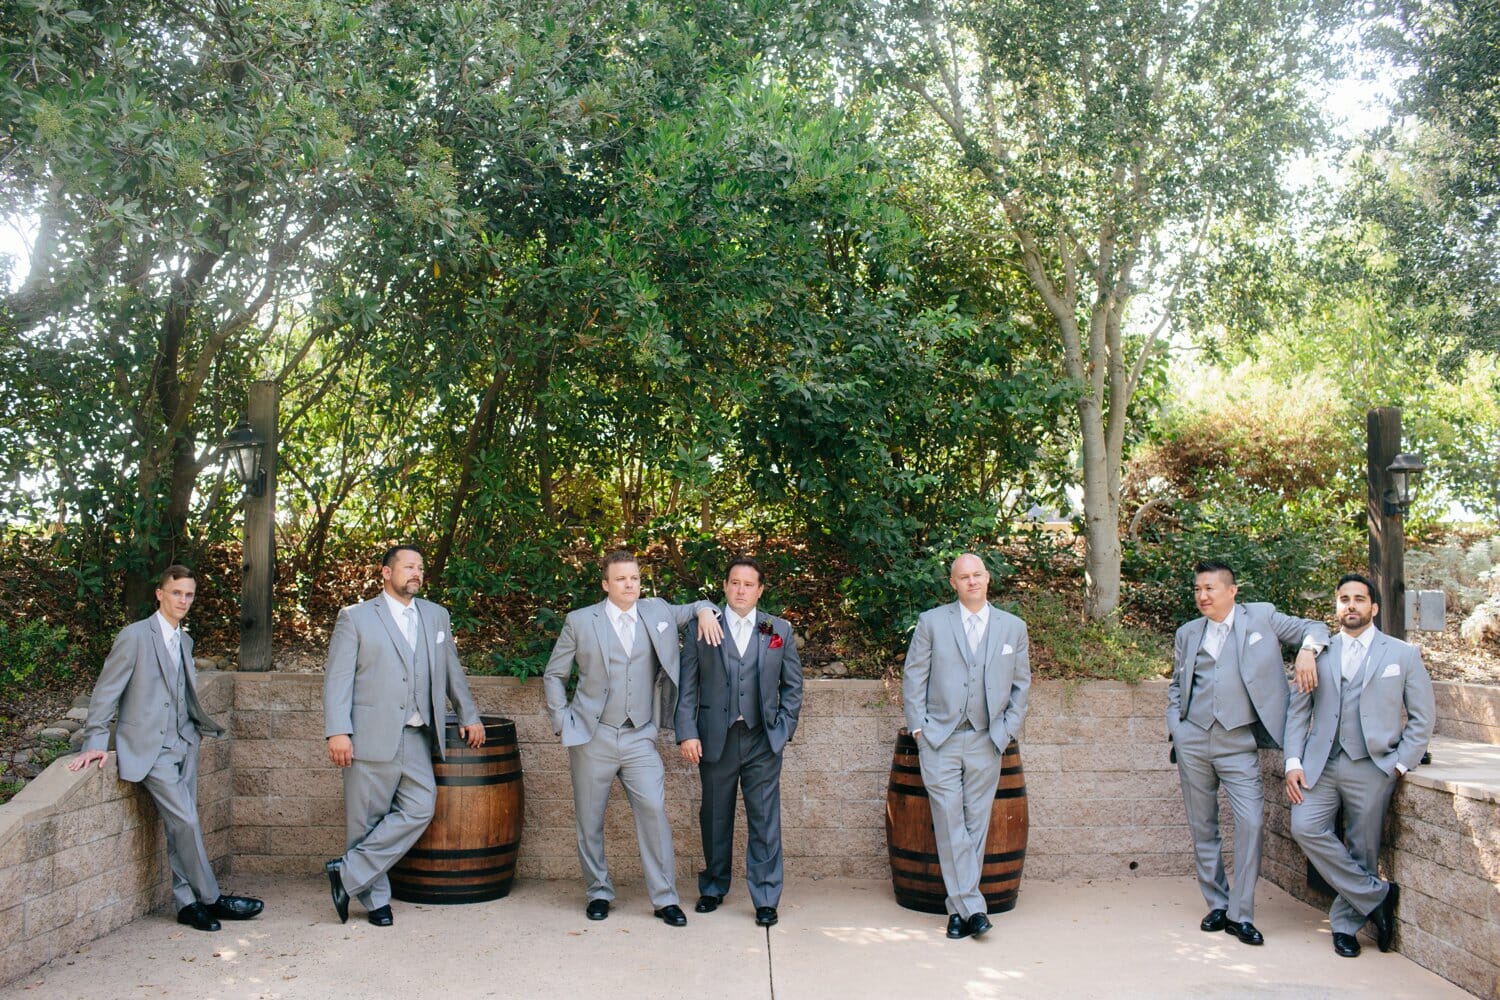
Model these images below for some excellent guy group shots and poses.
Settings: 35-24mm 1/200, 4.5-11f, ISO variable.
Groom with each groomsmen:
These shots below are usually never blogged, but very important. It’s safe to get a vertical of the whole body and then a medium shot, then lastly a horizontal medium shot.
Also it’s imperative that your camera is as level with their eyes as possible. Some grooms are very tall or taller than you, give yourself enough room so that you’re not shooting below their chin making them look bigger than they are.
Settings: 50mm 1/200, 2.0-2.8f, ISO variable.
Note the third image in the sequence below, is good posing but there’s an exit sign it. It’s best to shoot that again without it.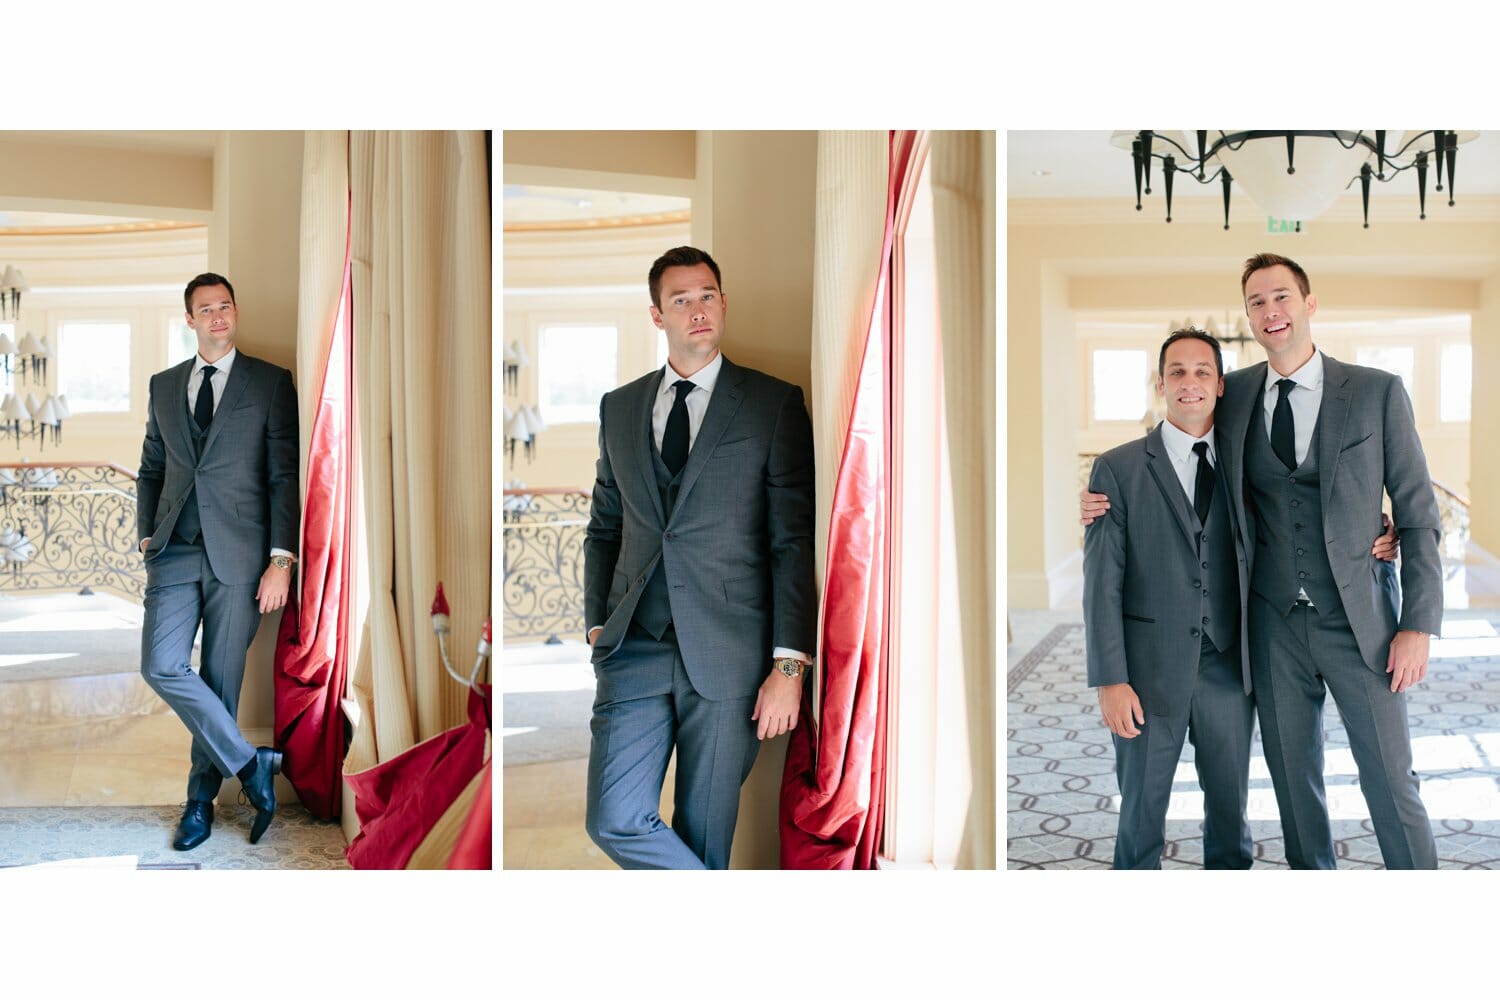
Note: Medium shots are at least, just above the knee and never cut off any fingers.
Again, be sure that everyone is in focus: f3.5 at least.
Settings: 50mm 1/200, 3.5-4.0f, ISO variable.
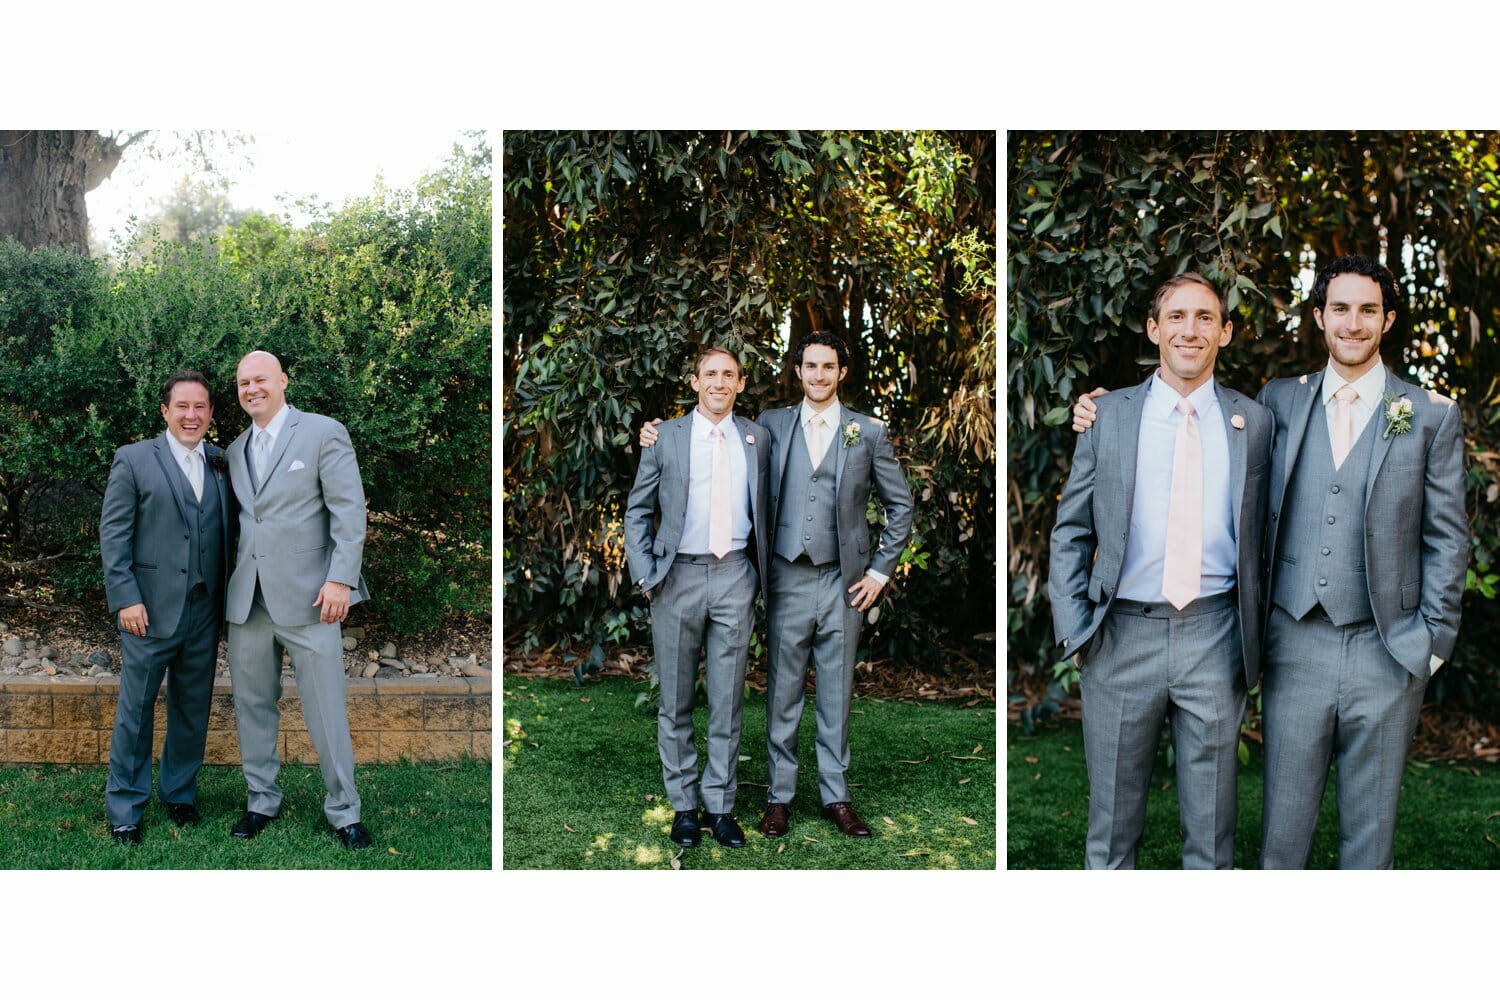
Settings: 50-35mm 1/200, 3.5-4.0f, ISO variable.
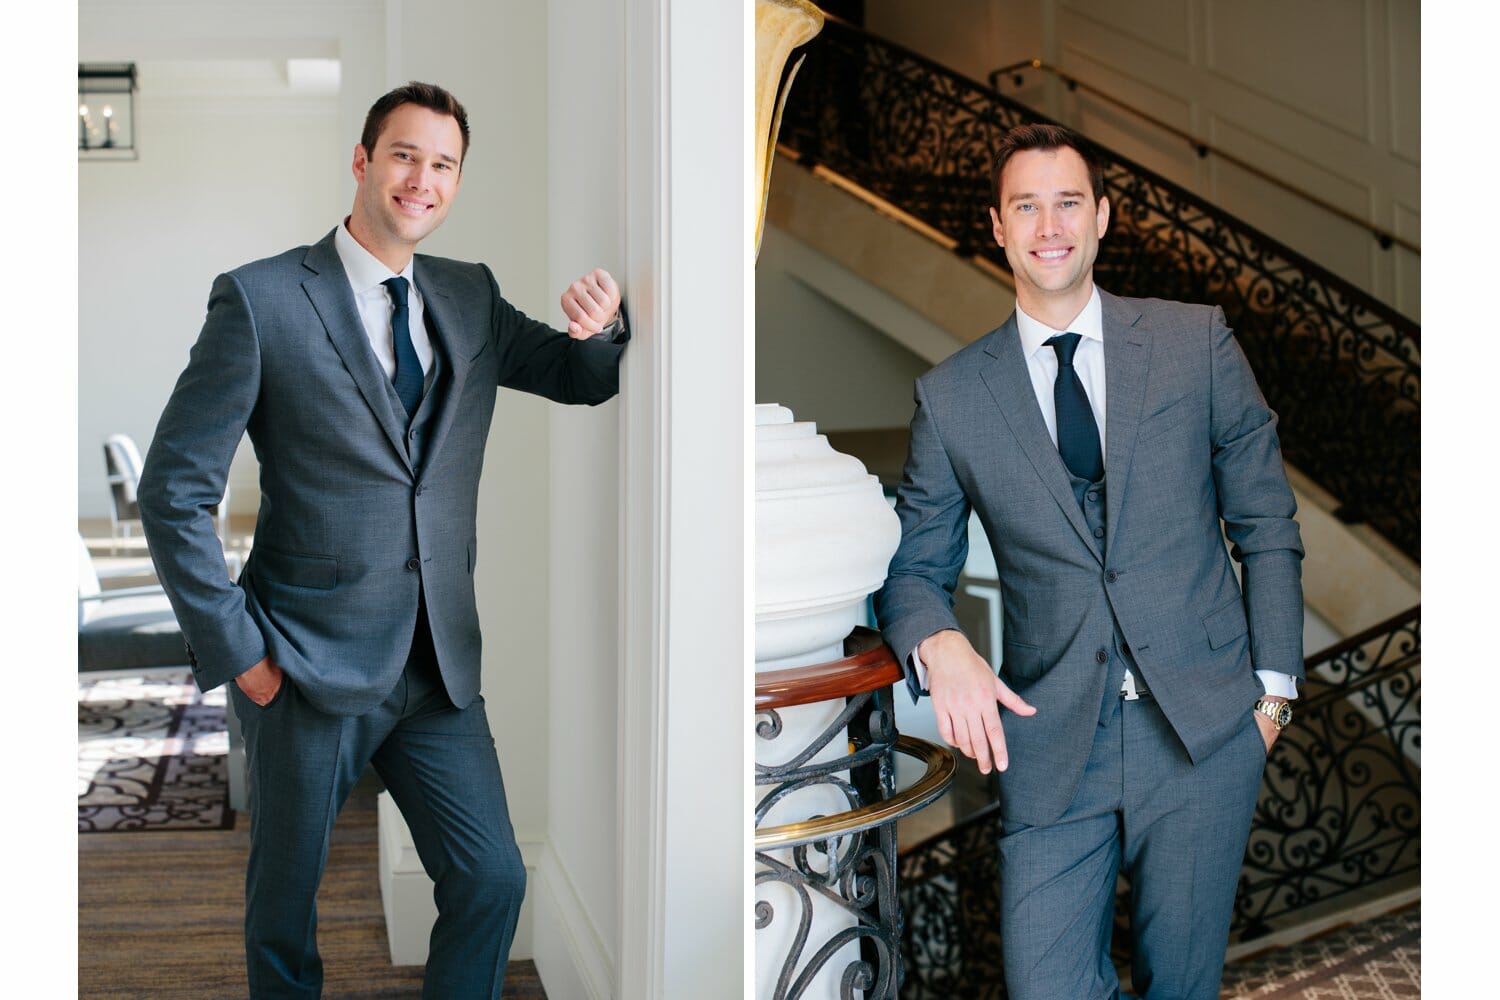
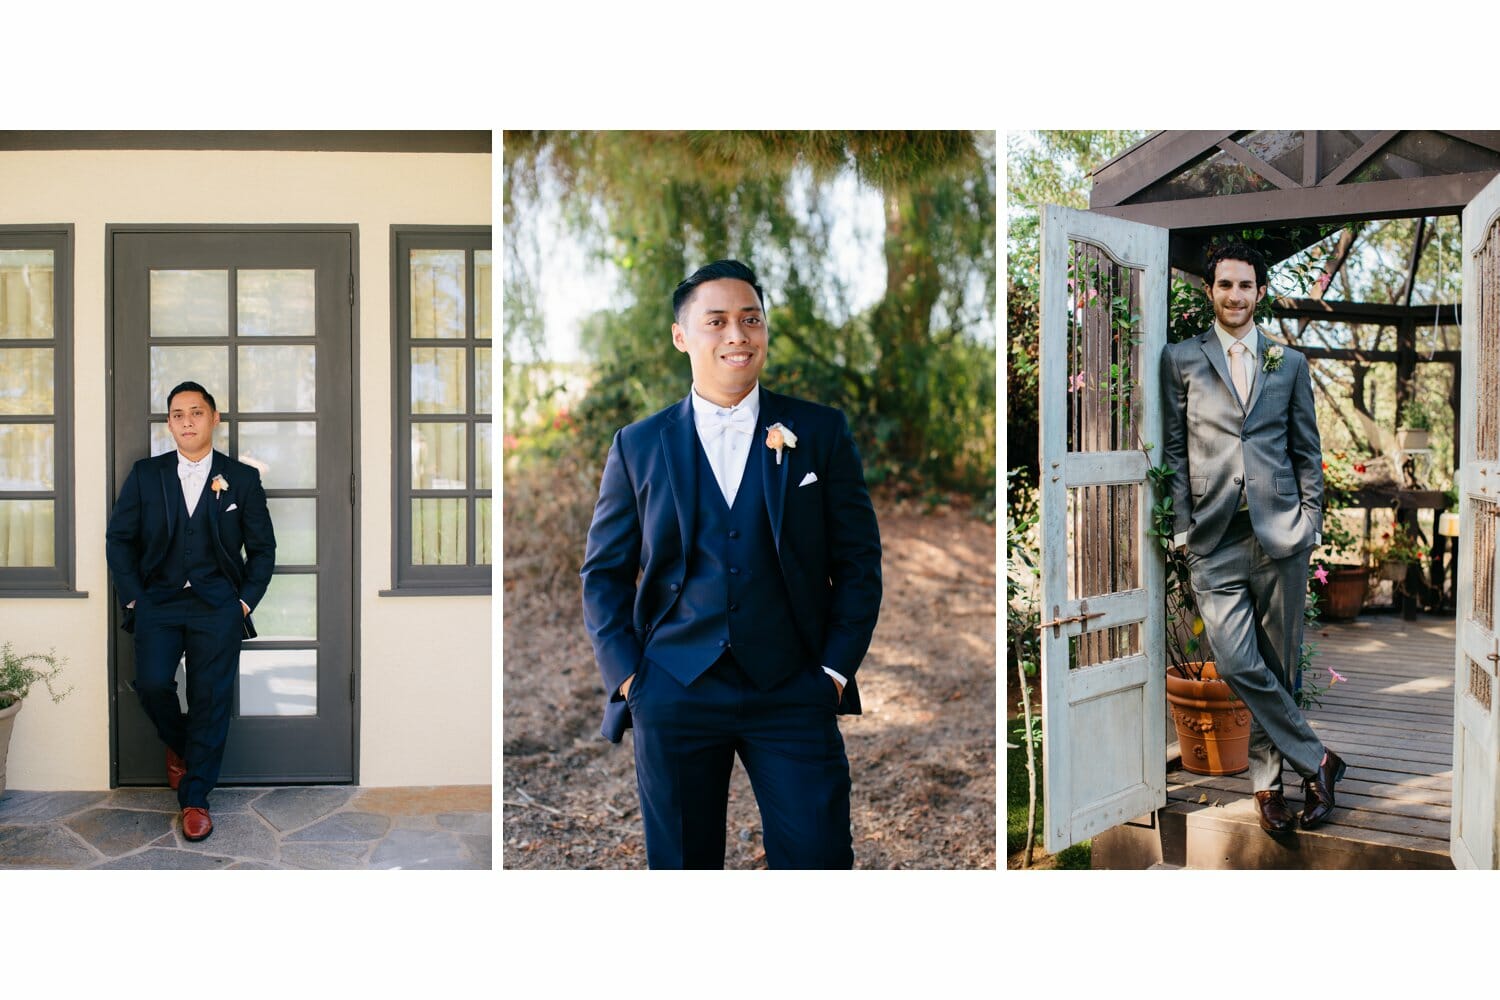
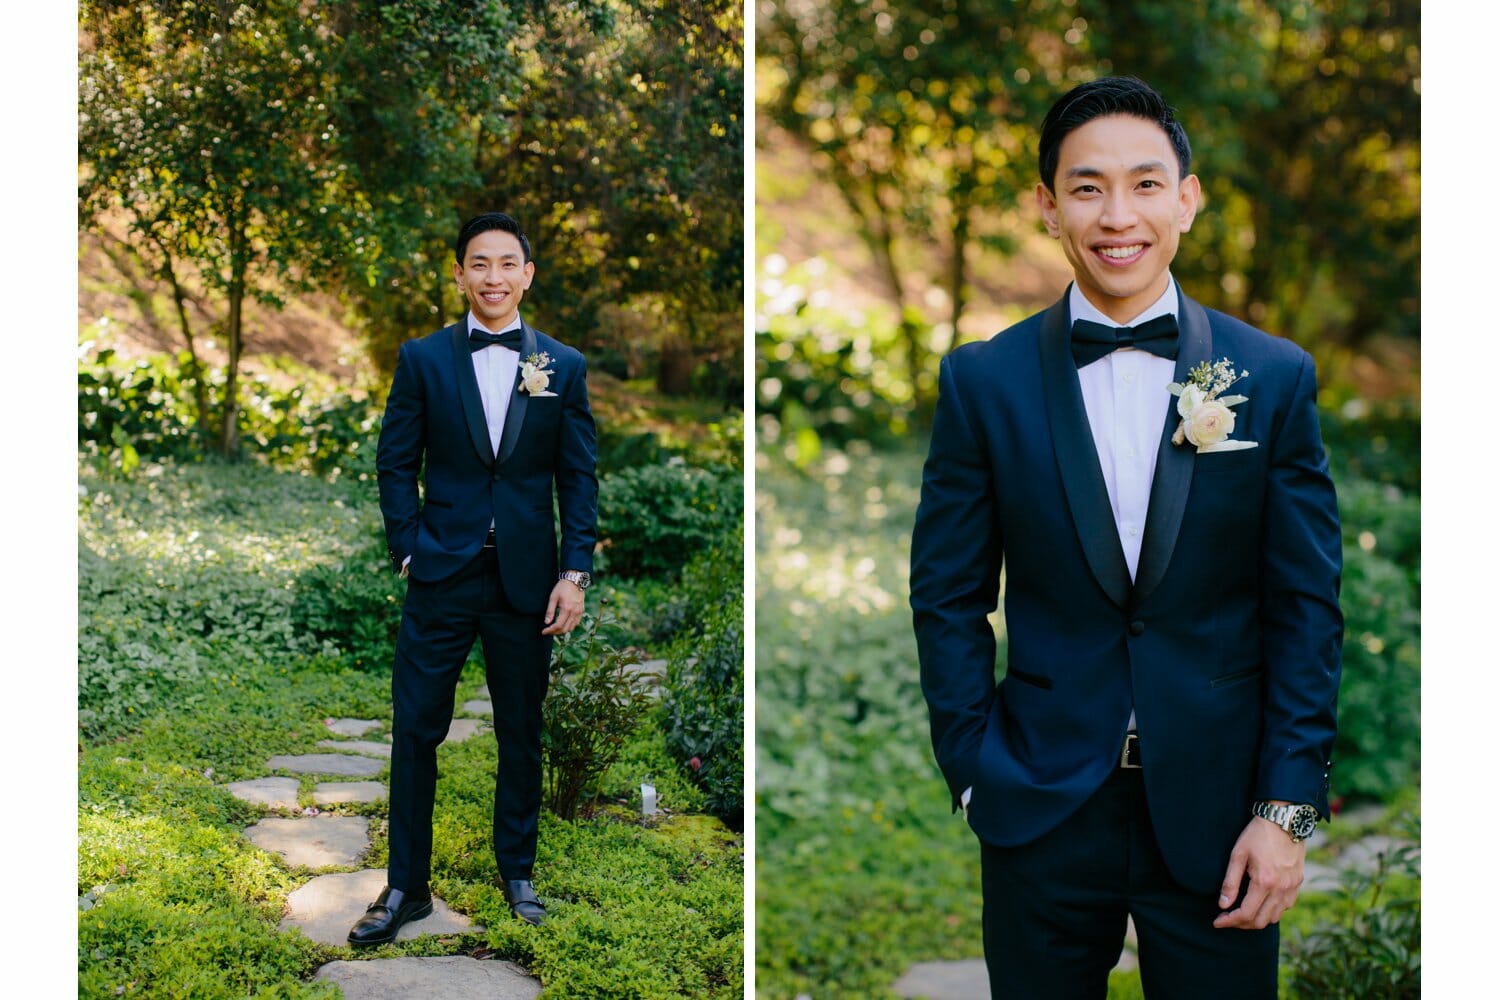
Groom Portraits:
It’s safe to keep these clean and simple first, then feel free to experiment with different ideas.
The first image is okay, but the plant that’s cut off makes the image imbalanced, a horizontal shot would have been better.
The second and third images are ideal, simple and well balanced.
Settings: 50mm 1/200, 2.0-2.8f, ISO variable.
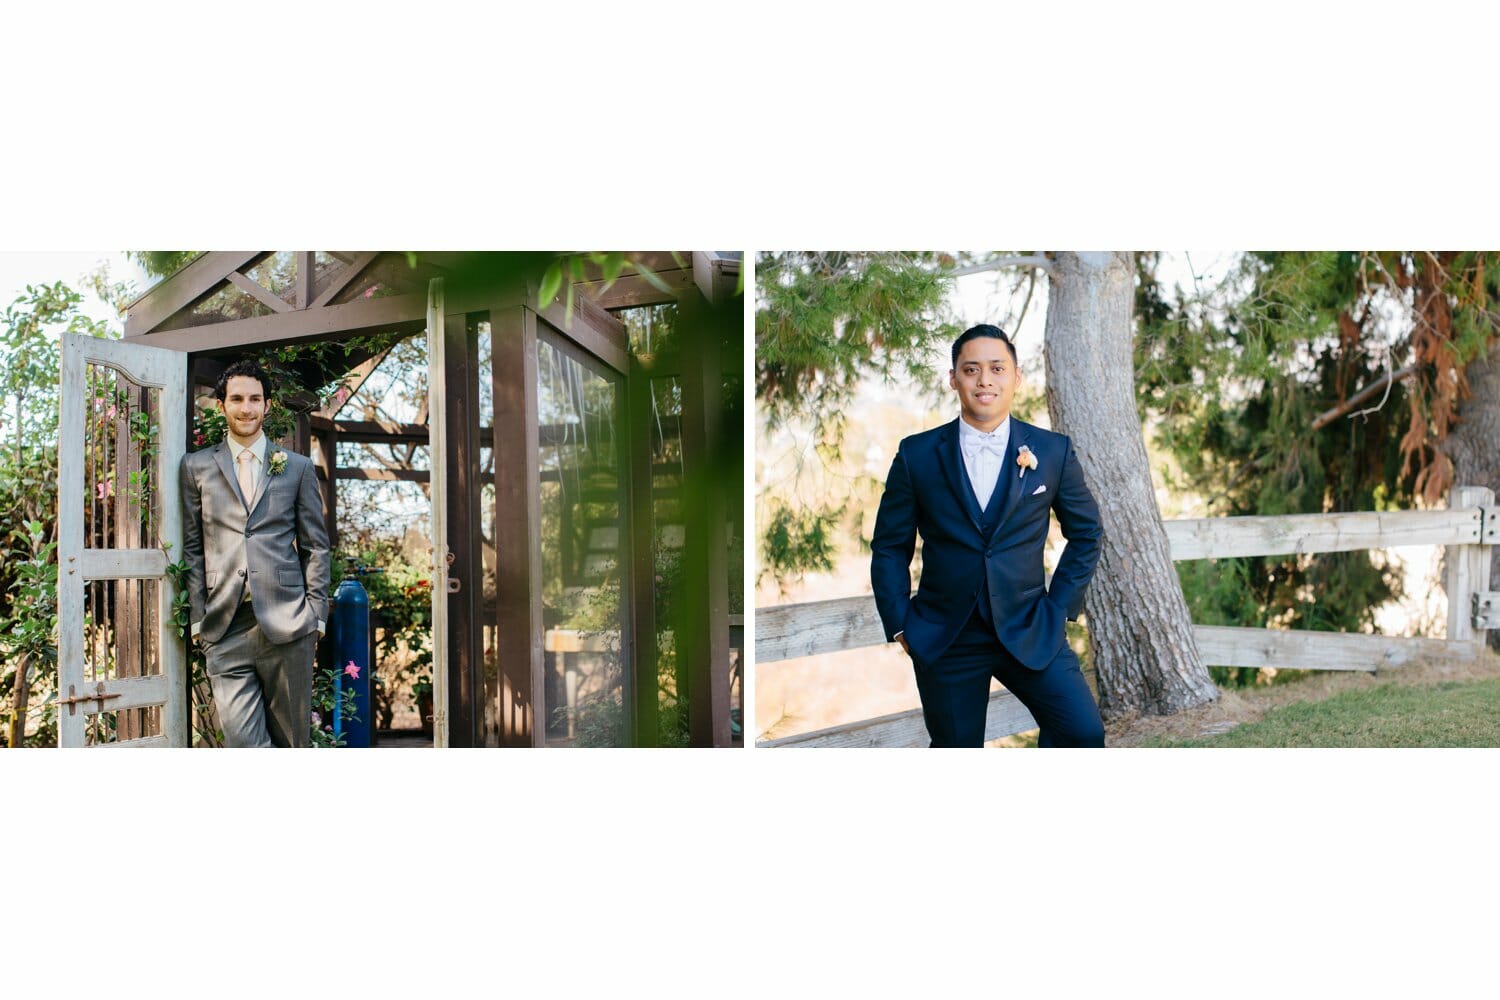
For every vertical shot, a horizontal shot should be shot as well. Cover all your bases. Once you have the safety shots, milk your surroundings for every shot you can, that is your time to learn and play with light as you see fit. Otherwise, you’ll dampen your creativity over time by shooting template shots all the time.
**Rule of thumb: always try to outdo yourself on every wedding. Serious photographers don’t need to be told this, but it couldn’t hurt to mention.
Settings: 35mm 1/200, 2.0-2.8f, ISO variable.
Settings: 35mm 1/200, 2.0-2.8f, ISO variable.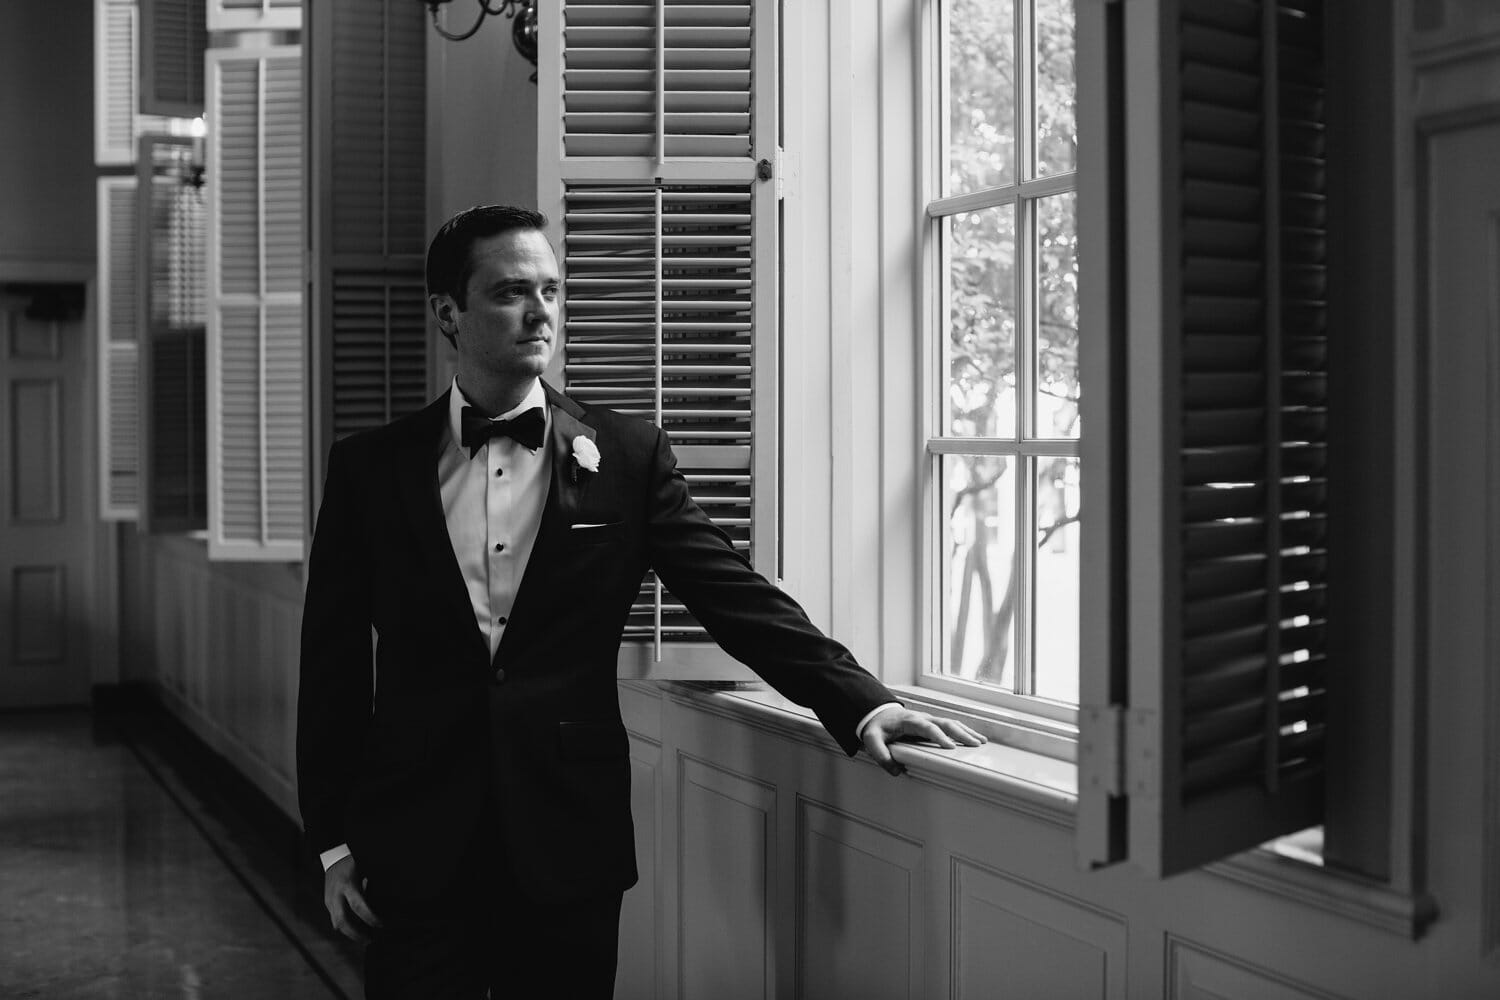
Settings: 50mm 1/200, 2.0-2.8f, ISO variable.
Settings: 35mm 1/200 can vary) , 2.0-2.8f, ISO variable. 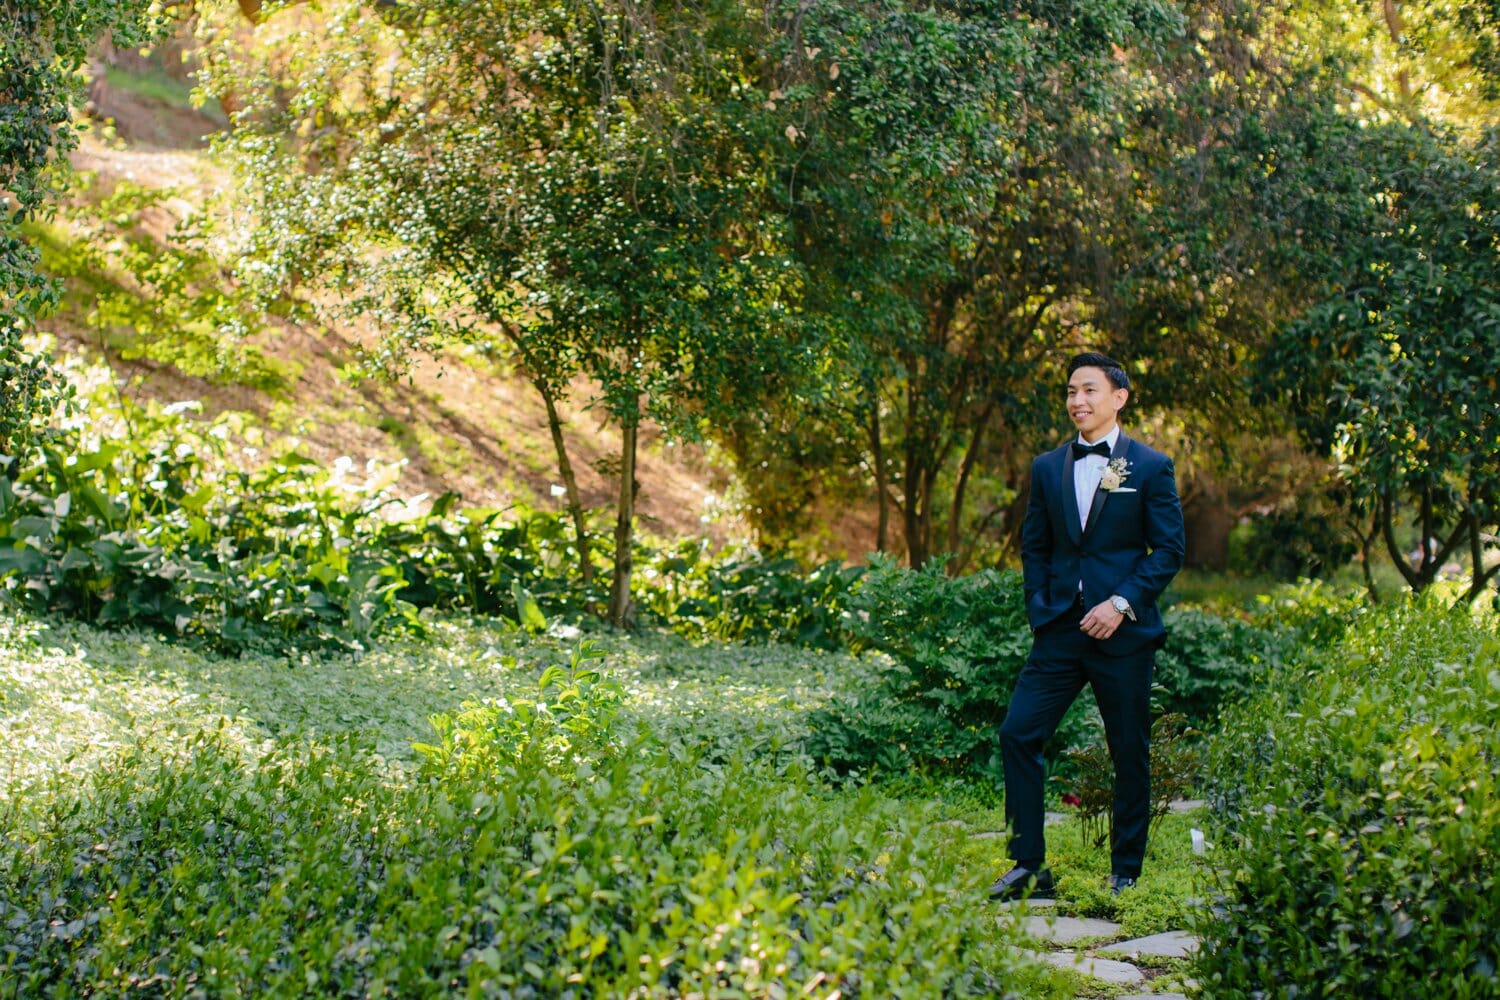
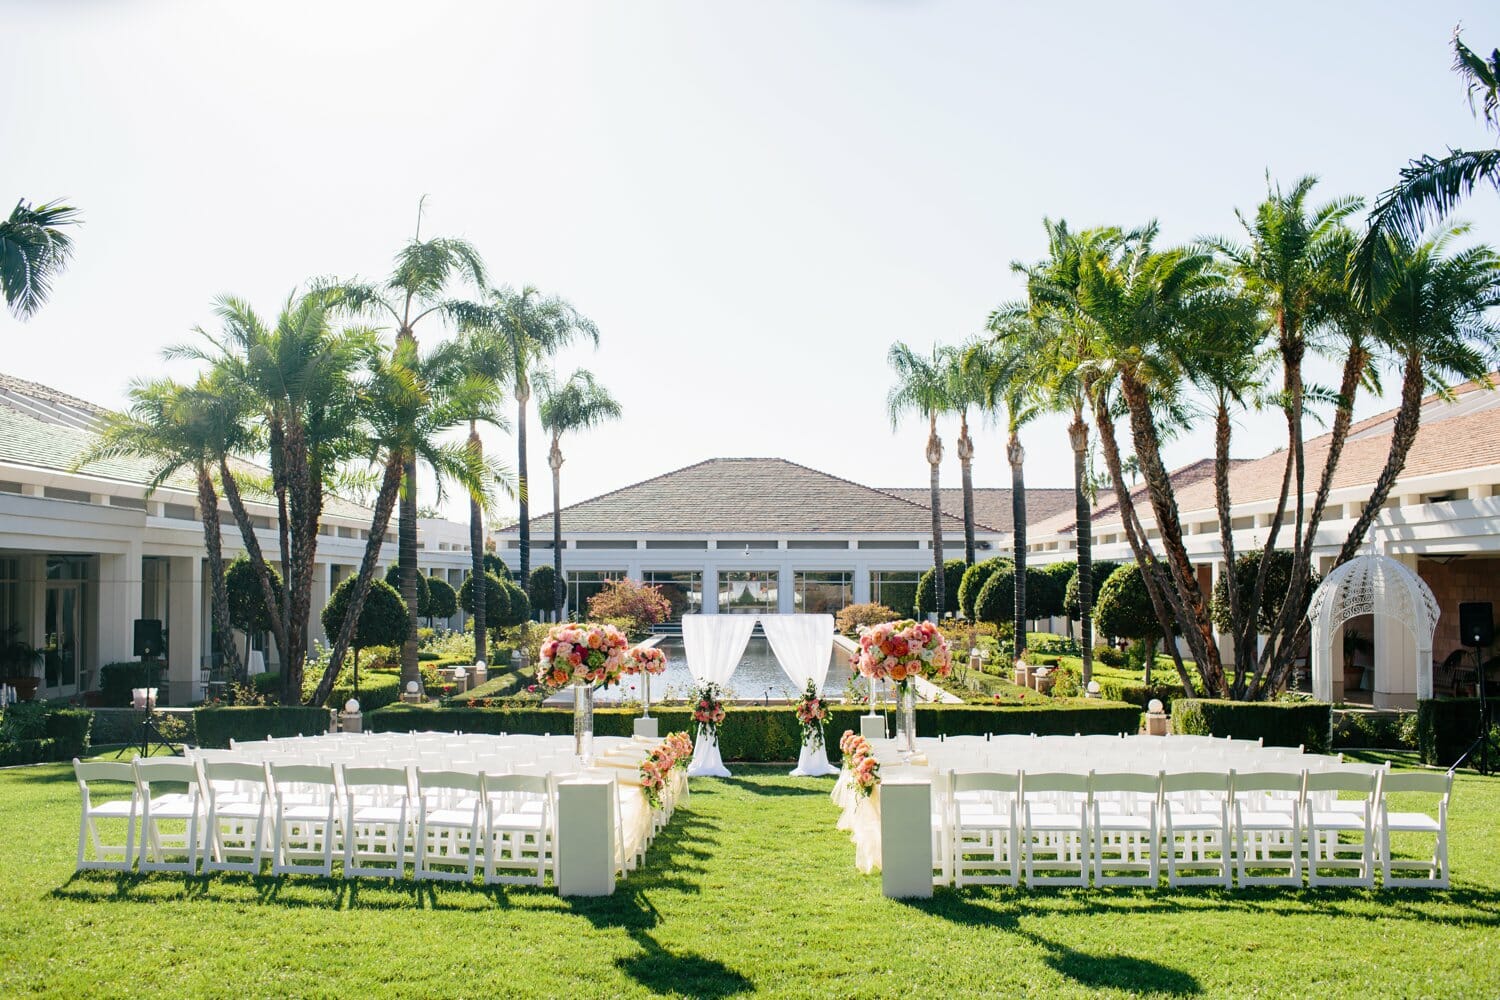
Ceremony:
Usually the lead photographer may be off with the couple for some bride and groom portraits before the ceremony. This is your time to capture details of the ceremony site.
Always get the setting in a wide shot. If you can capture scenic/ aerial photos of the area that’s good too.
Settings: 35-24mm 1/200 (vary), 4.5-22f, ISO 100

A safe rule of thumb that when shooting the ceremony is start wide and then go in for the individual details.
Settings: 35-24mm 1/200 (vary), 4.5-11f, ISO100
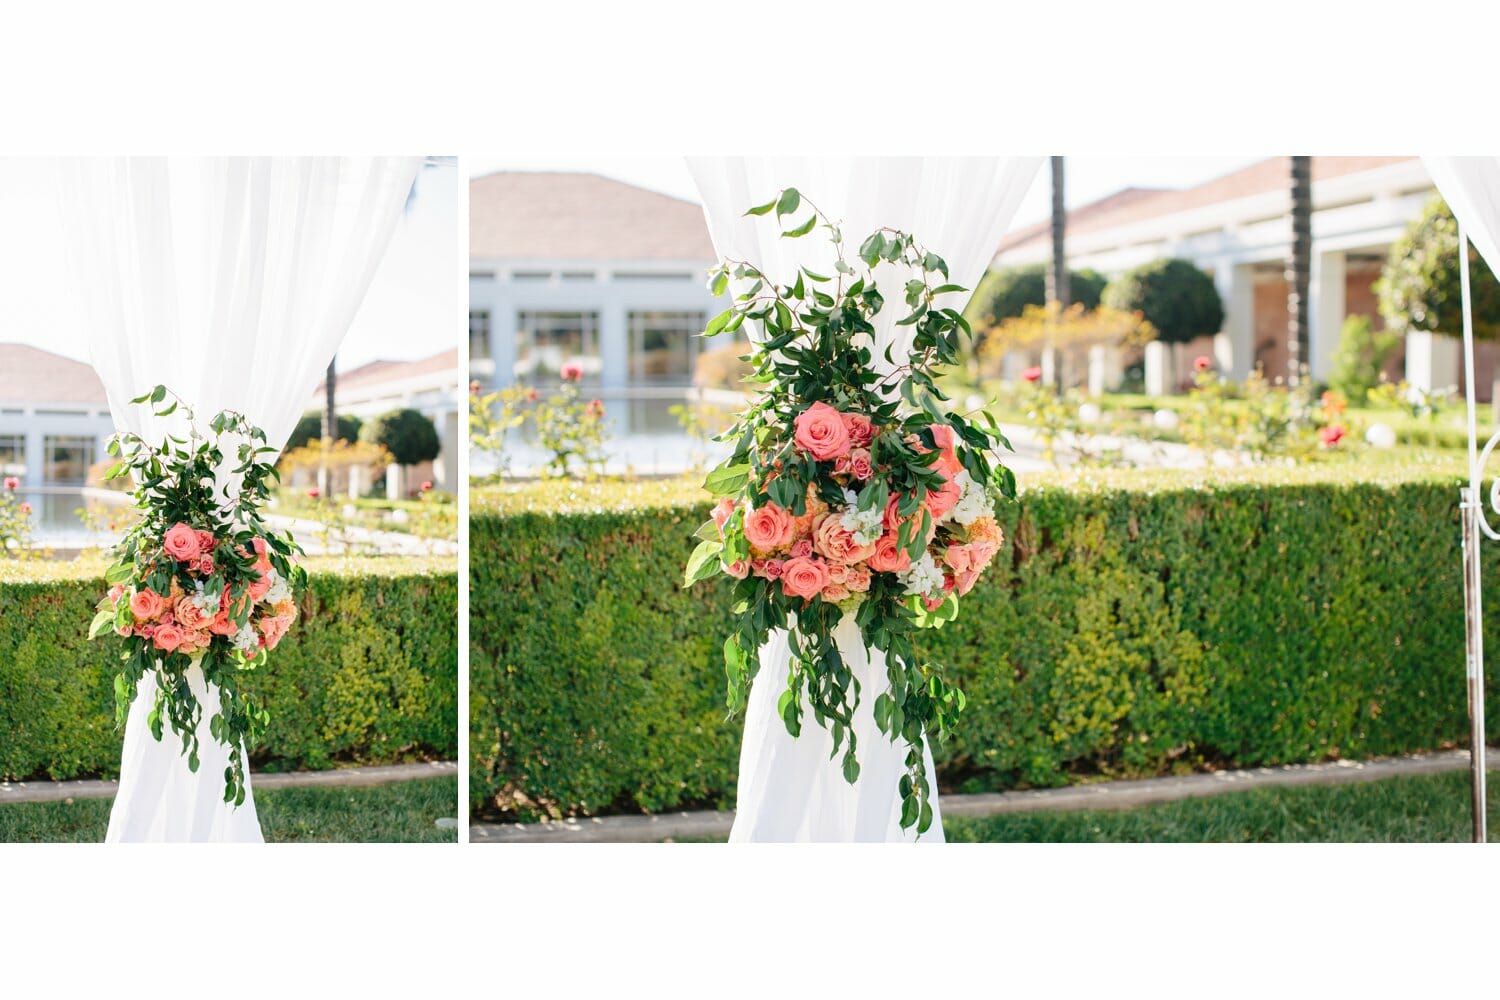
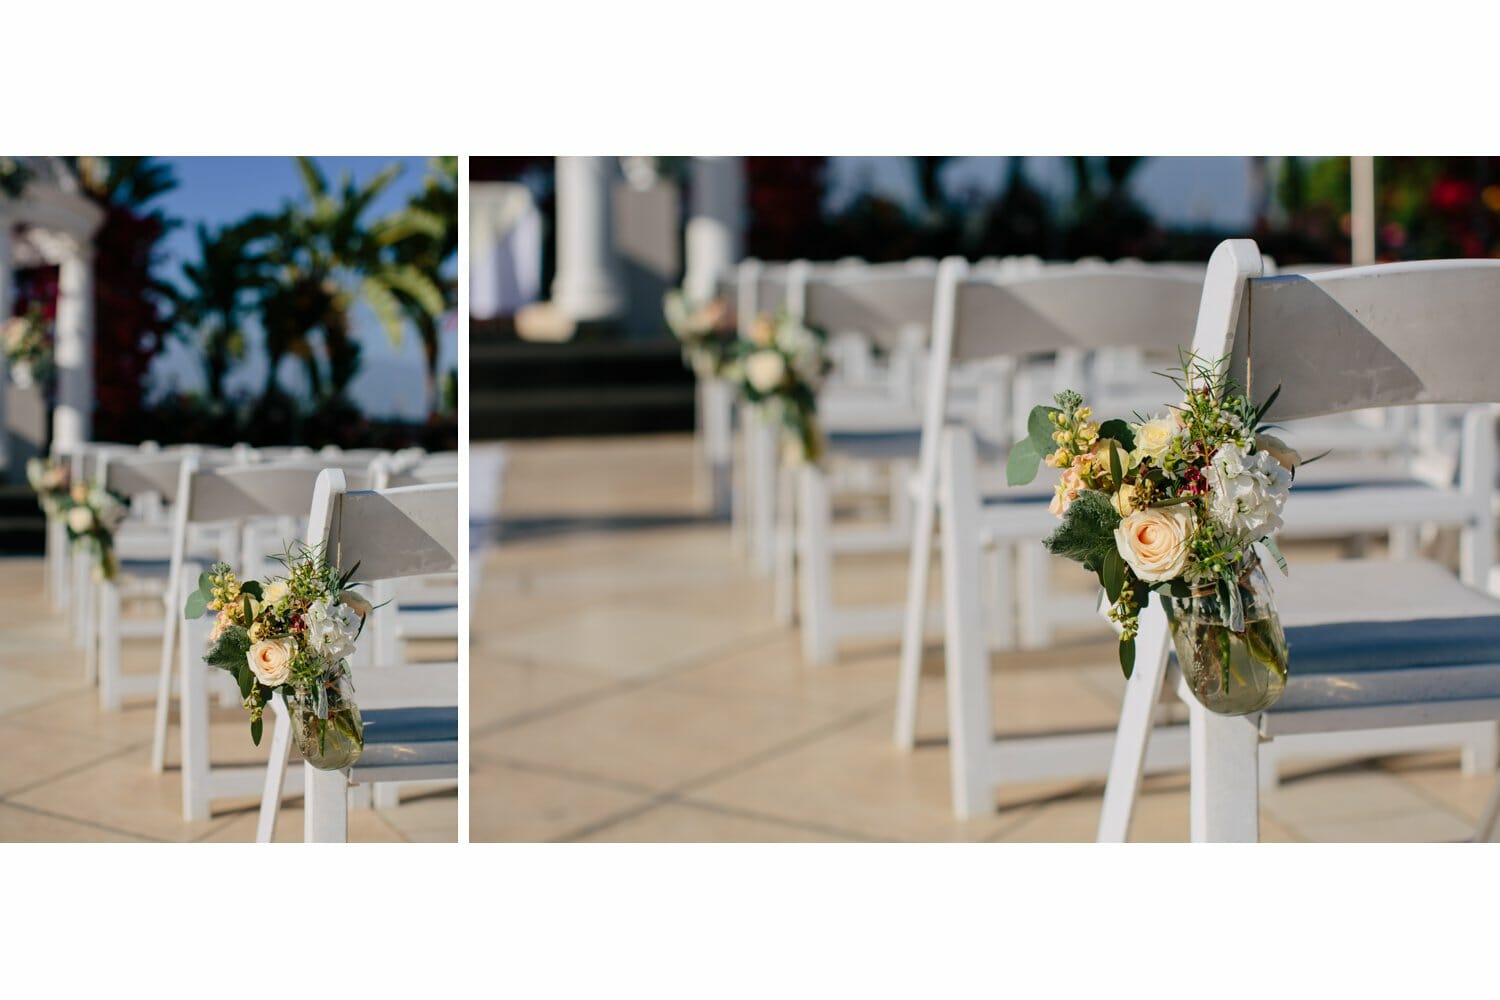
Always shoot the floral arrangements vertically and horizontally. Make sure the background is free of speakers, exit signs, trashcans, or other unfavorable things.
Settings: 50mm 1/200(vary), 3.5-4.0f, ISO 100
Exhaust every shot. Shooting wide to medium are ideal.
Settings: 35mm 1/200(vary), 3.5-4.0f, ISO 100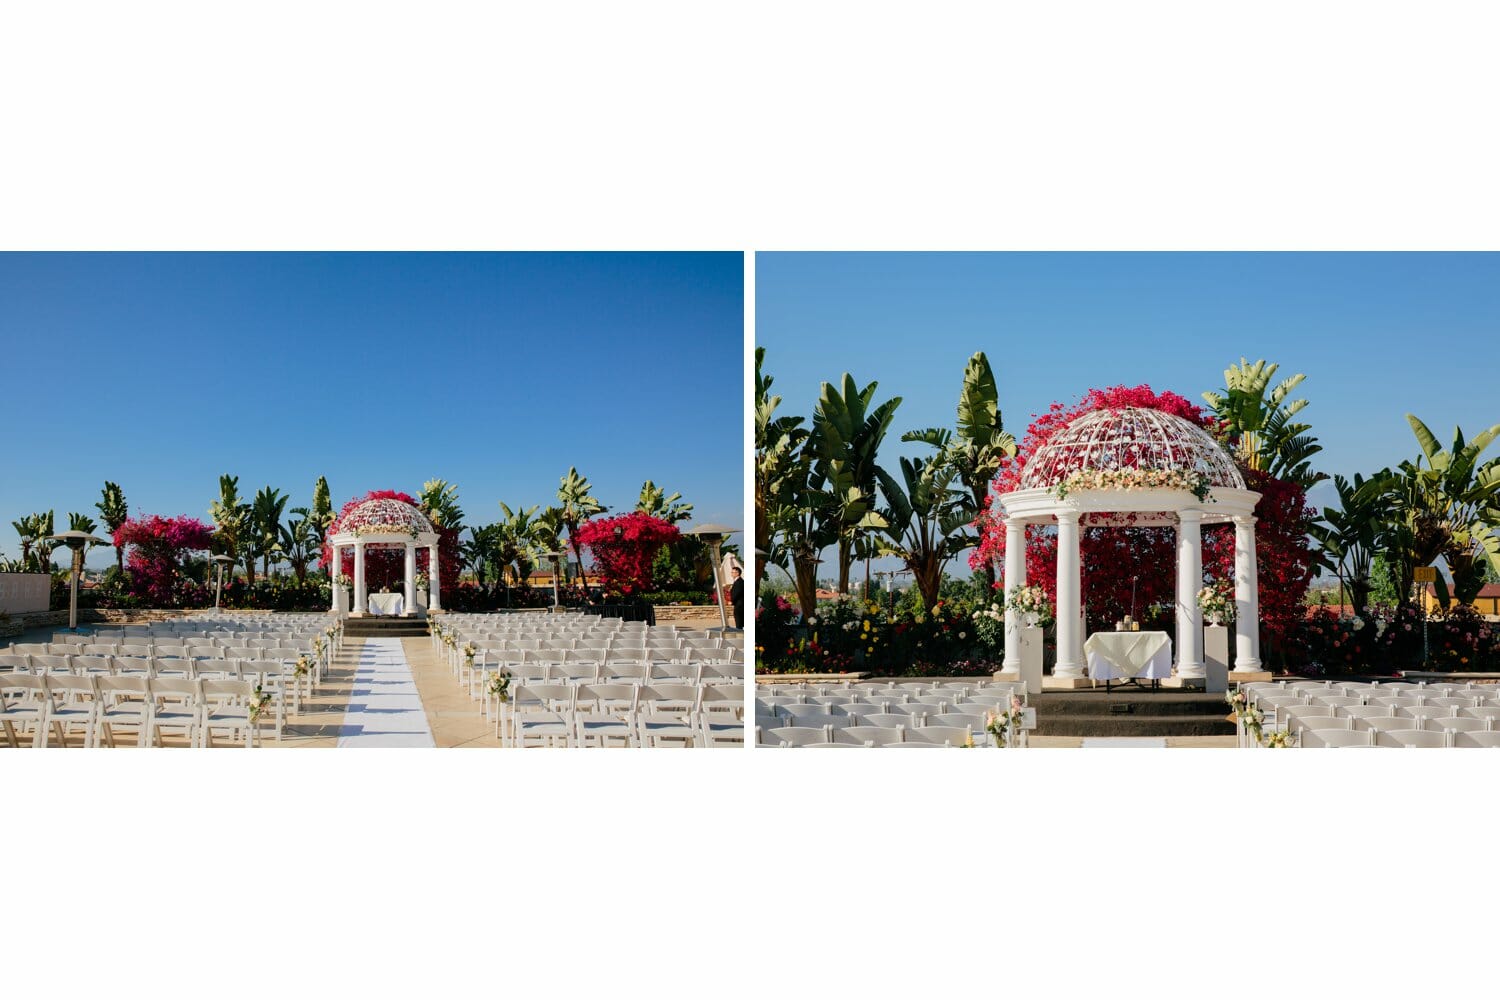
The chairs may be shot like this:
Settings: 50mm 1/200 (vary), 2.0-2.8f, ISO 100
Other wedding details like sand ceremonies, unity details may be shot like this:
Settings: 50mm 1/200(vary), 2.0-2.8f, ISO 100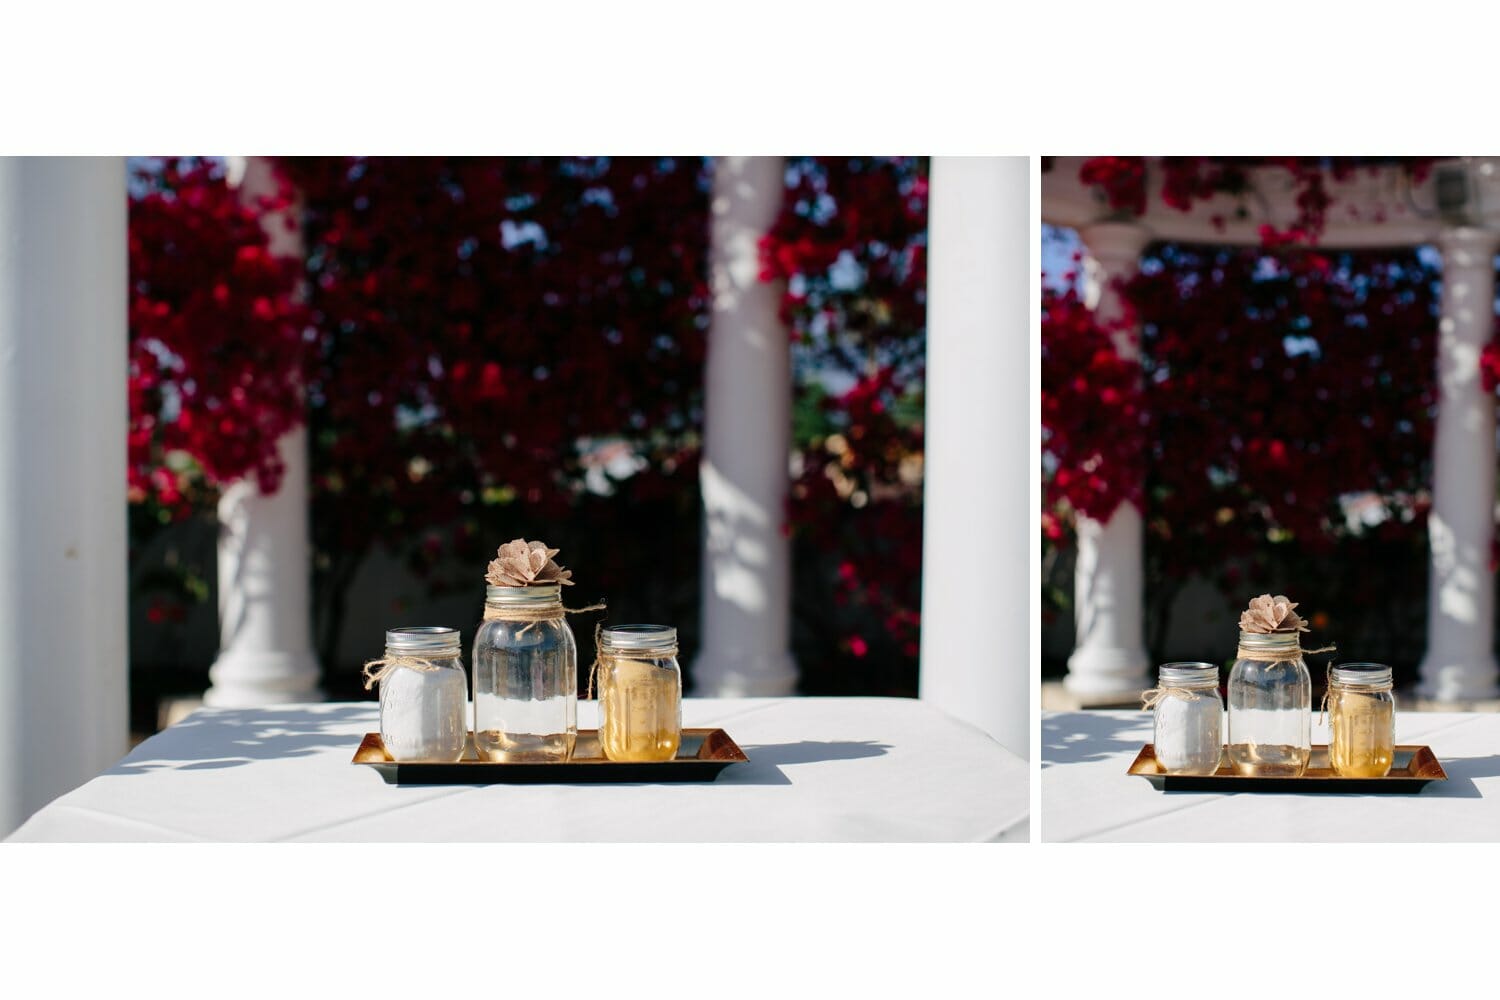
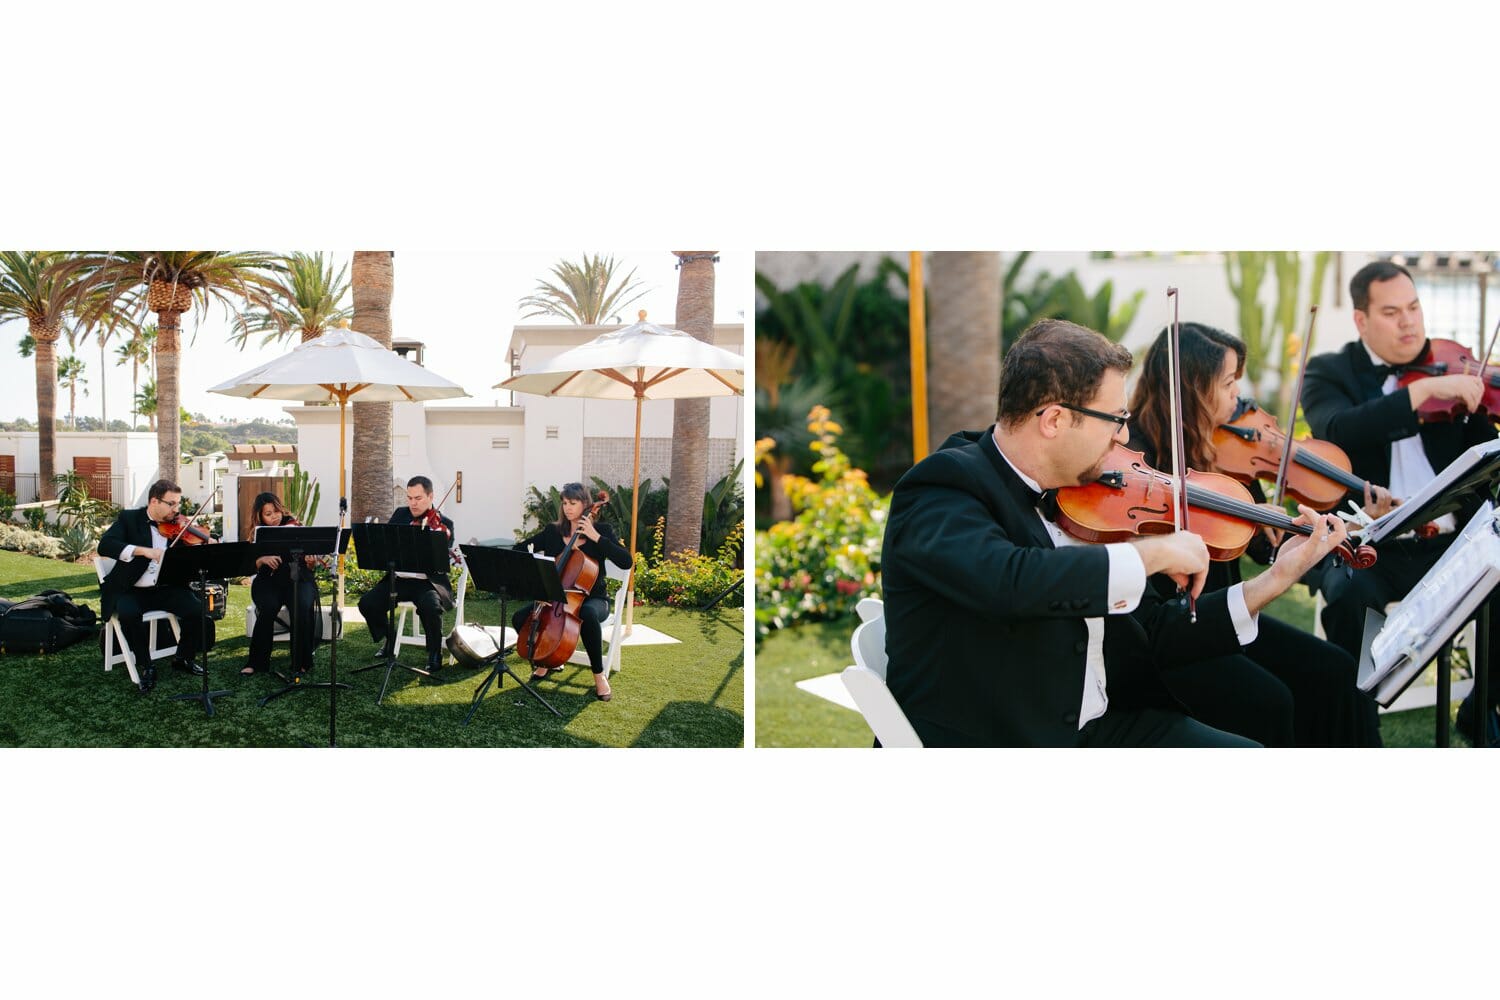
During the Ceremony:
This is the most important part. Not only is the second photographer capturing their designated shots during the ceremony, they are also shooting backup shots.
For example, while the lead is responsible for capturing most of the shots, the second will shoot them too just incase something happens. It’s just another form of safety that we follow (cameras have failed before, or the lead has missed important moments, like the kiss)
Sometimes there will be a quartet playing, capture that.
Settings: 35mm 1/200, 3.5-4.0f, ISO 100
Candids before sitting down:
Settings: 35mm 1/200(vary), 3.5-4.0f, ISO 100 and 70-200mm 1/200 (vary), 2.8-3.5f, ISO 100
Also the second will always start at the back of the ceremony, while the lead is in the front.
Settings: 70-200mm 1/200(vary), 2.8f, ISO 100
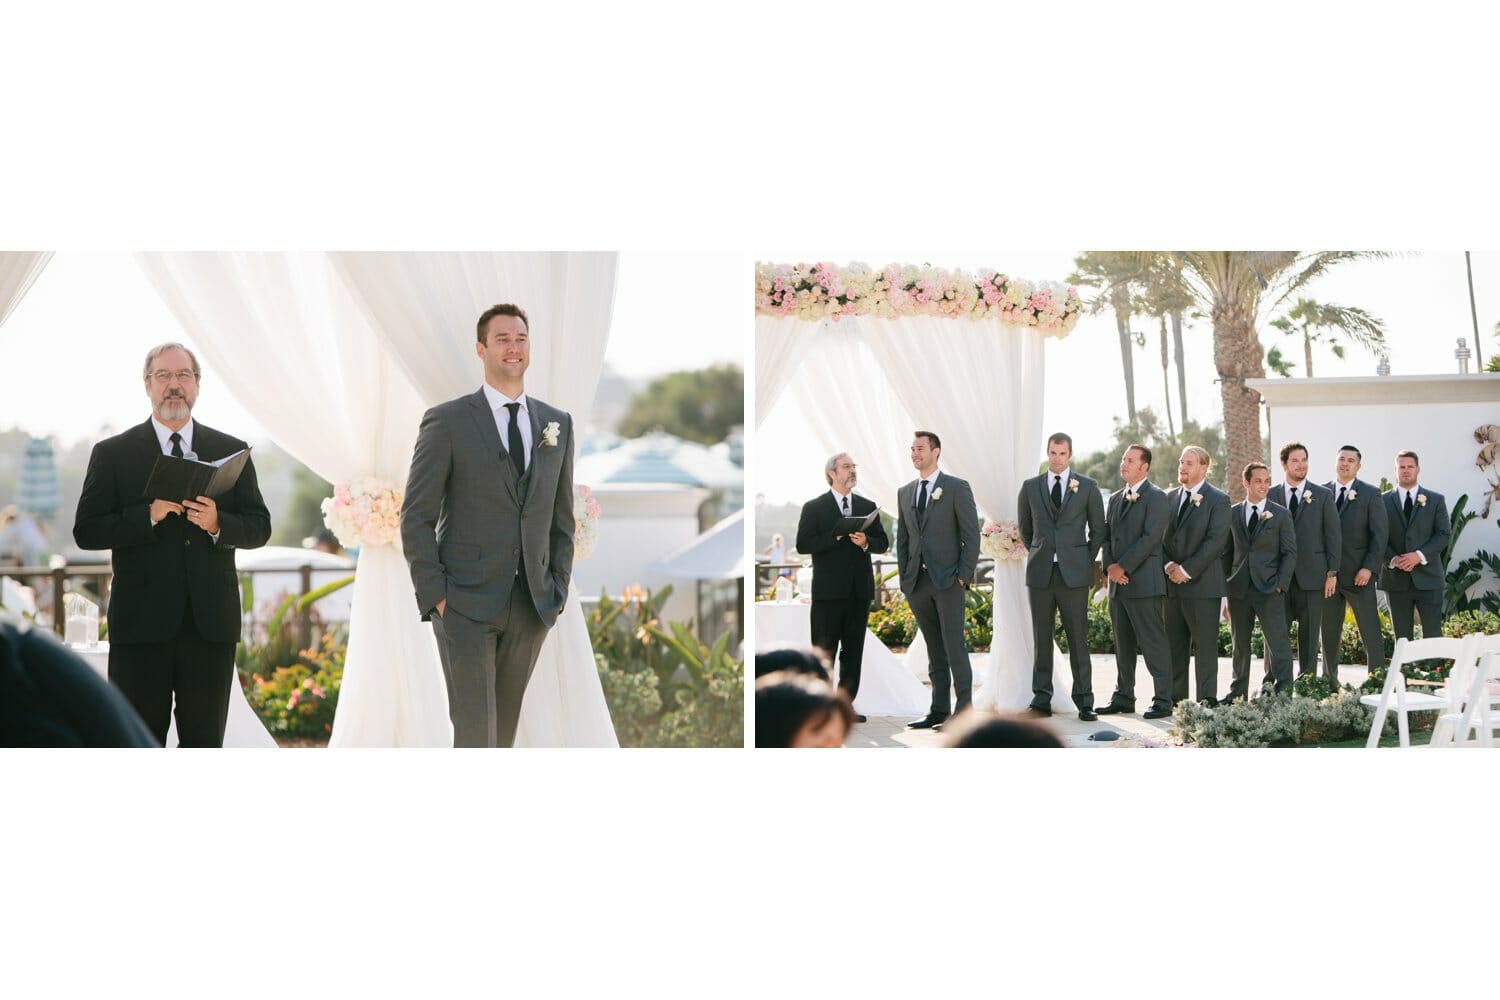
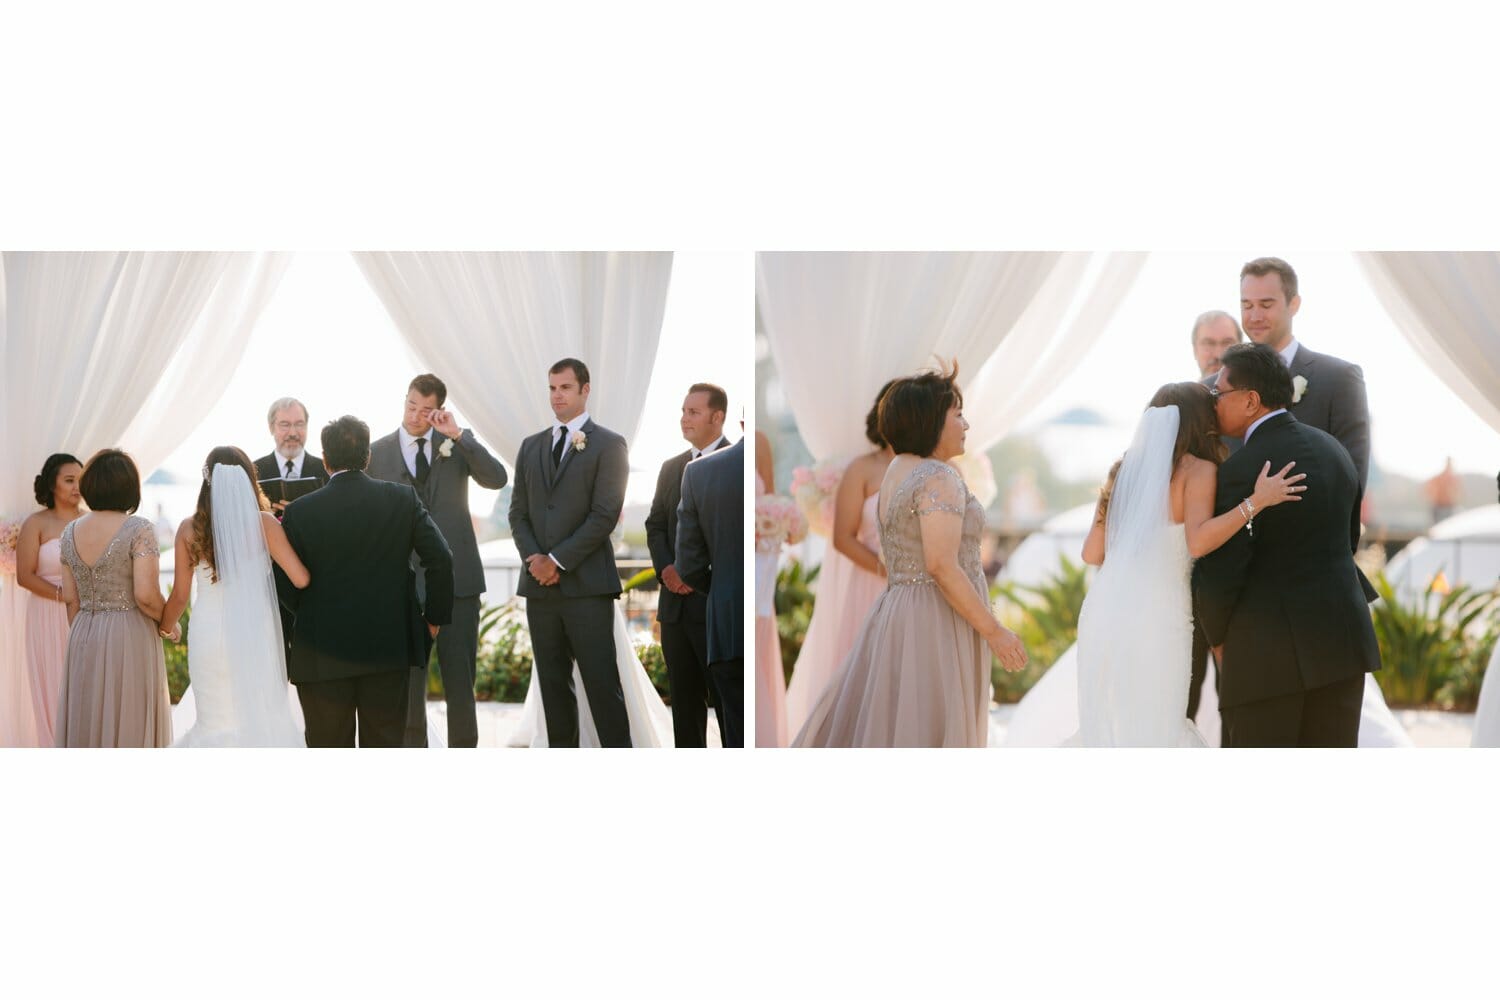
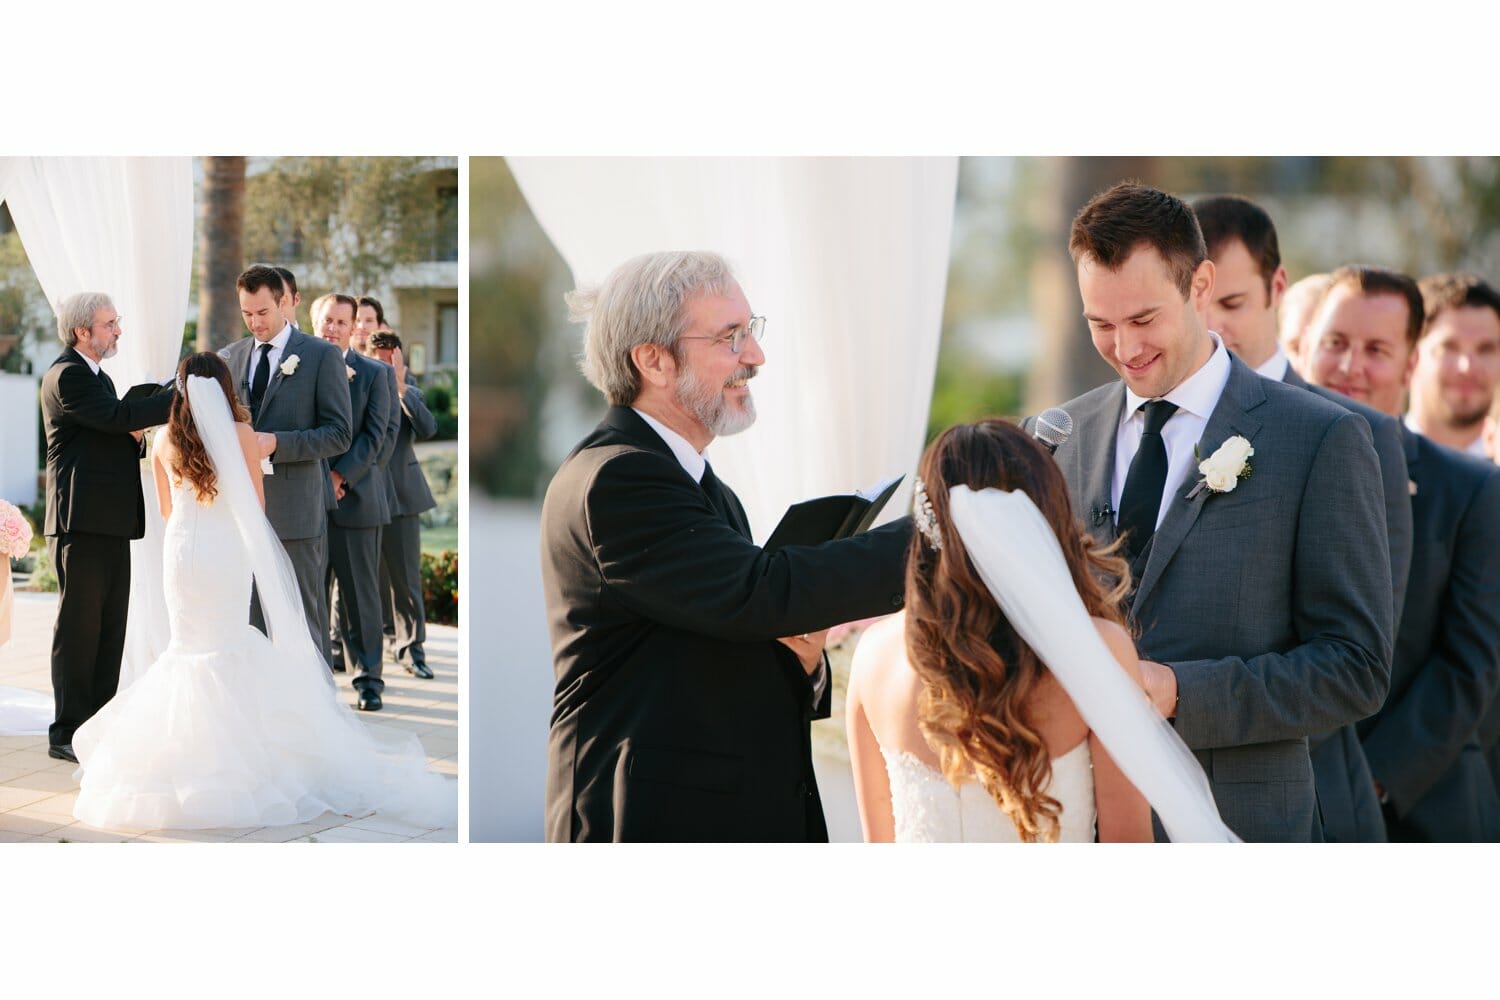
Capture the reactions of the groom:
Settings:70-200mm 1/200(vary), 2.8f, ISO 100
Reactions of the groom seeing his wife:
The second image with her in the shot should always be captured.
Settings:70-200mm 1/200(vary), 2.8f, ISO 100
The back of the dress down the isle is very important. You’ll need to have your wide and 70-200 ready to switch when the bride is handed off:
Settings:35mm 1/200(vary), 2.8f, ISO 100
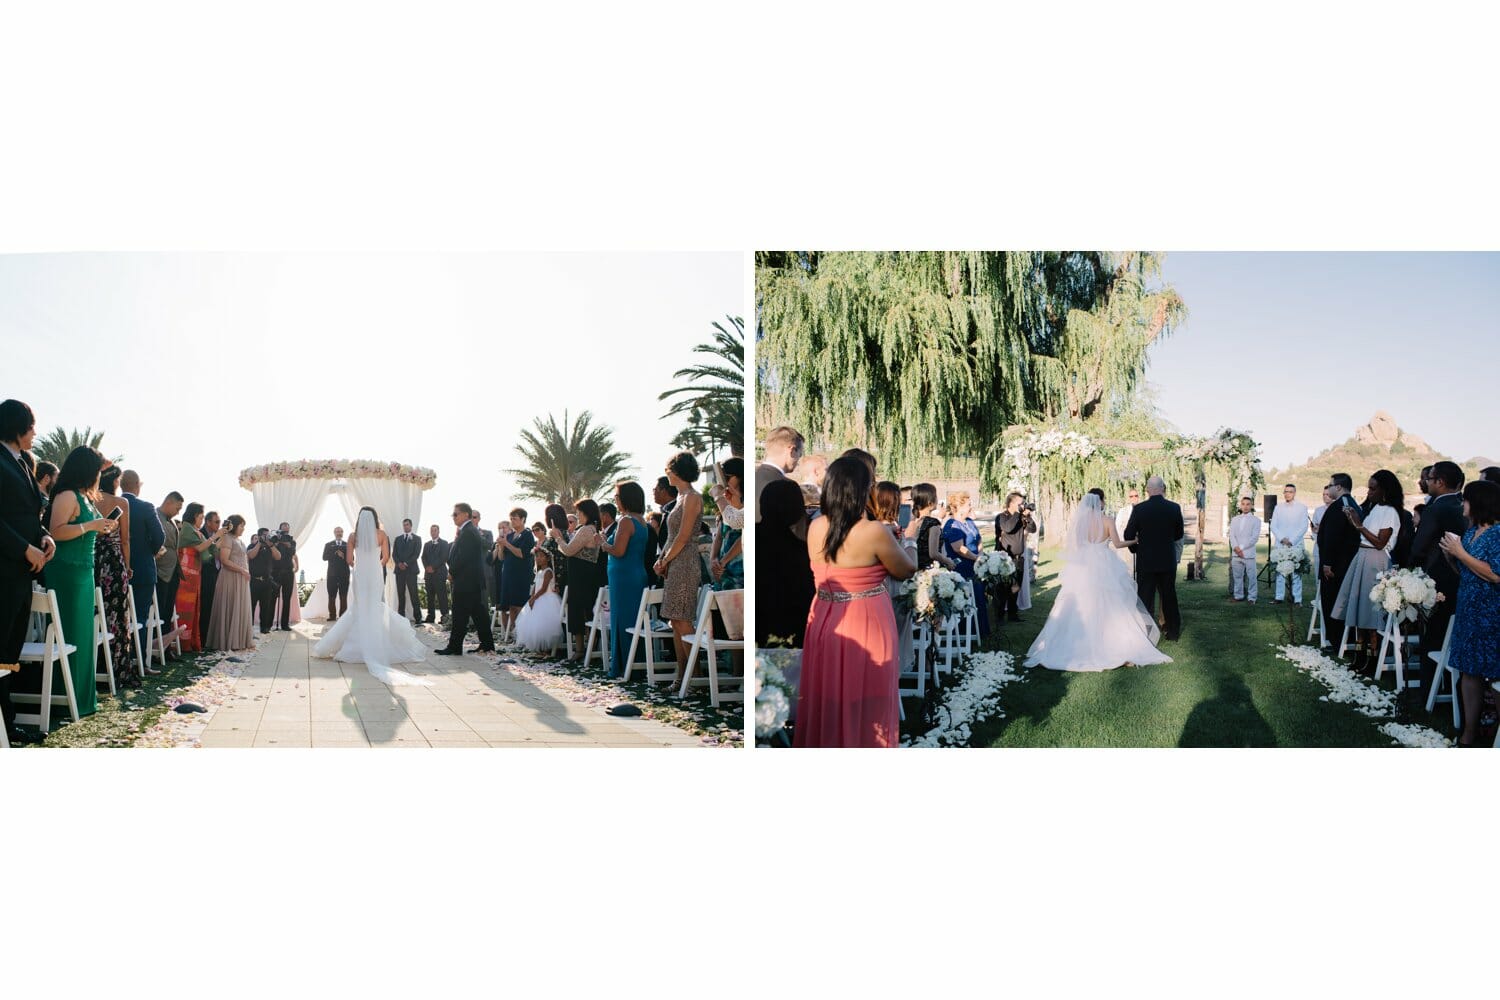
This is the bride being handed off, make sure you capture this moment:
Settings:70-200mm 1/200(vary), 2.8f, ISO 100
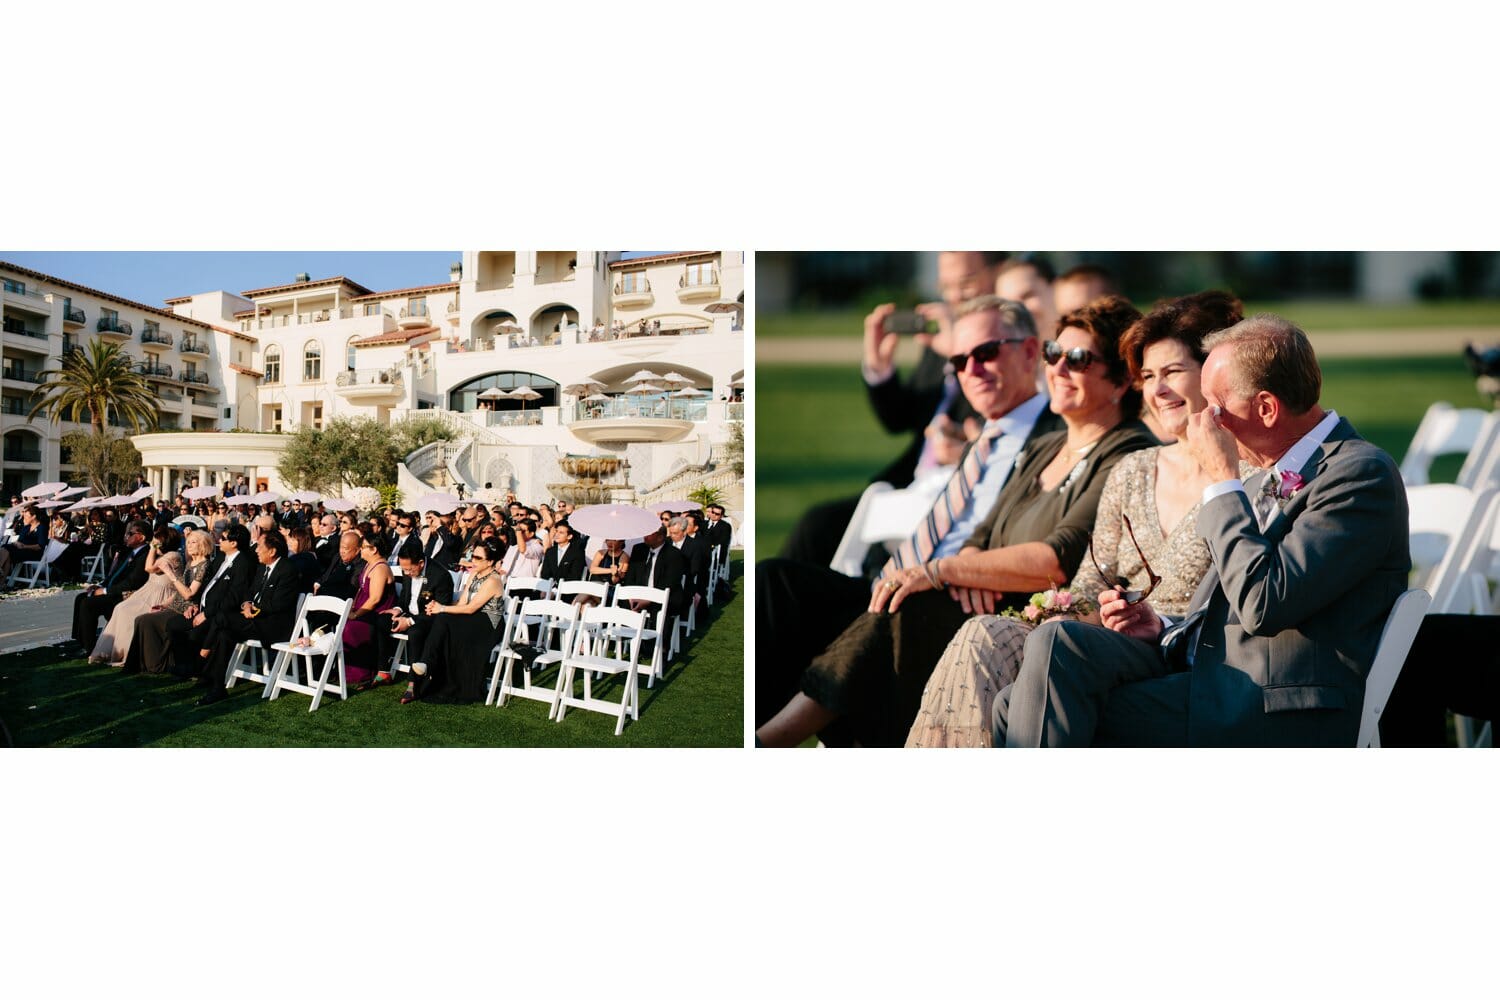
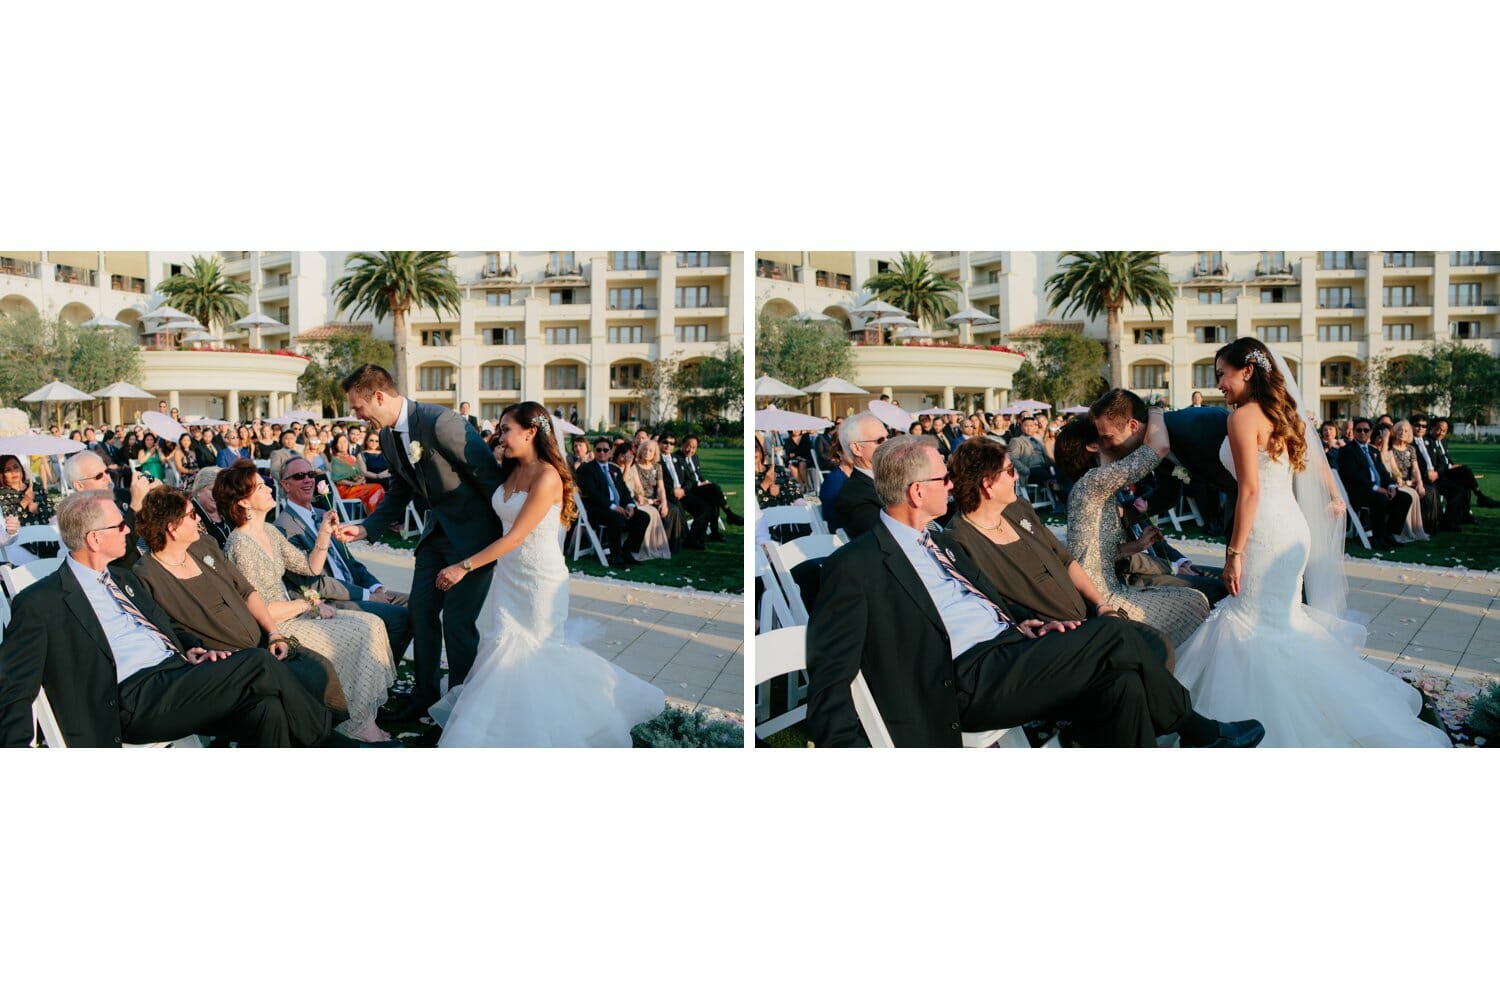
Don’t forget the family watching and the setting:
Settings:70-200mm 1/200(vary), 2.8f, ISO 100 and Settings: 35mm 1/200(vary), 3.5+f, ISO 100
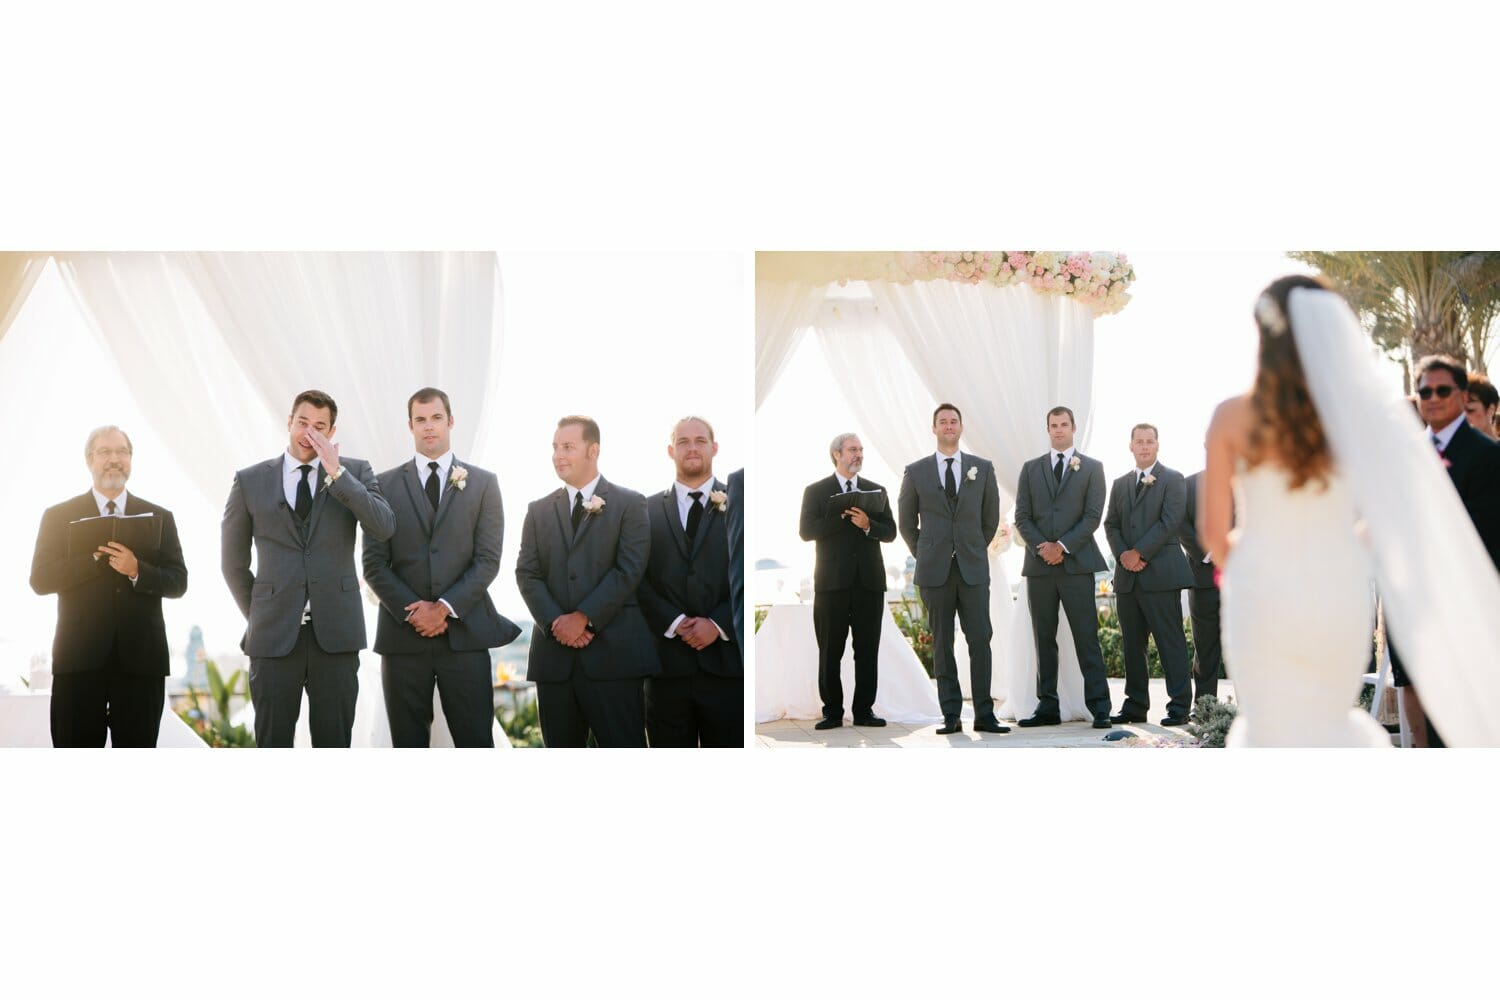
Make sure to get all the groomsmen in line:
Settings:70-200mm 1/200(vary), 2.8f, ISO 100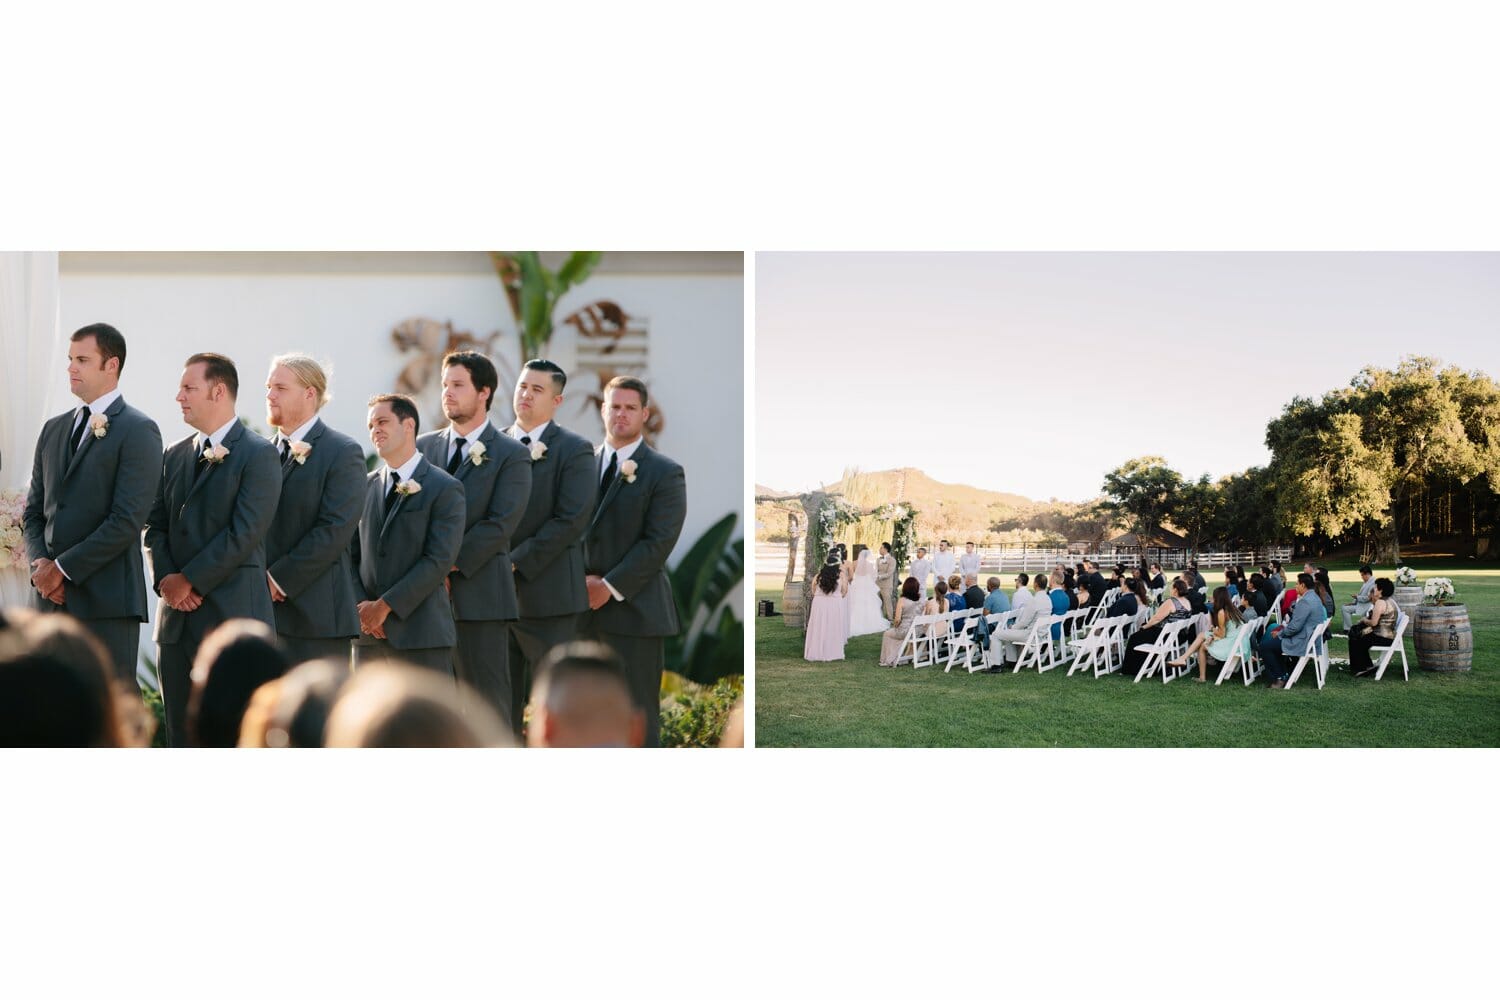
Focus on groom’s reactions, the lead will focus on the bride. However, keep an eye on the lead, don’t assume they have the shot, know it. And if they don’t have it, take it and make sure.
Settings:70-200mm 1/200(vary), 2.8f, ISO 100
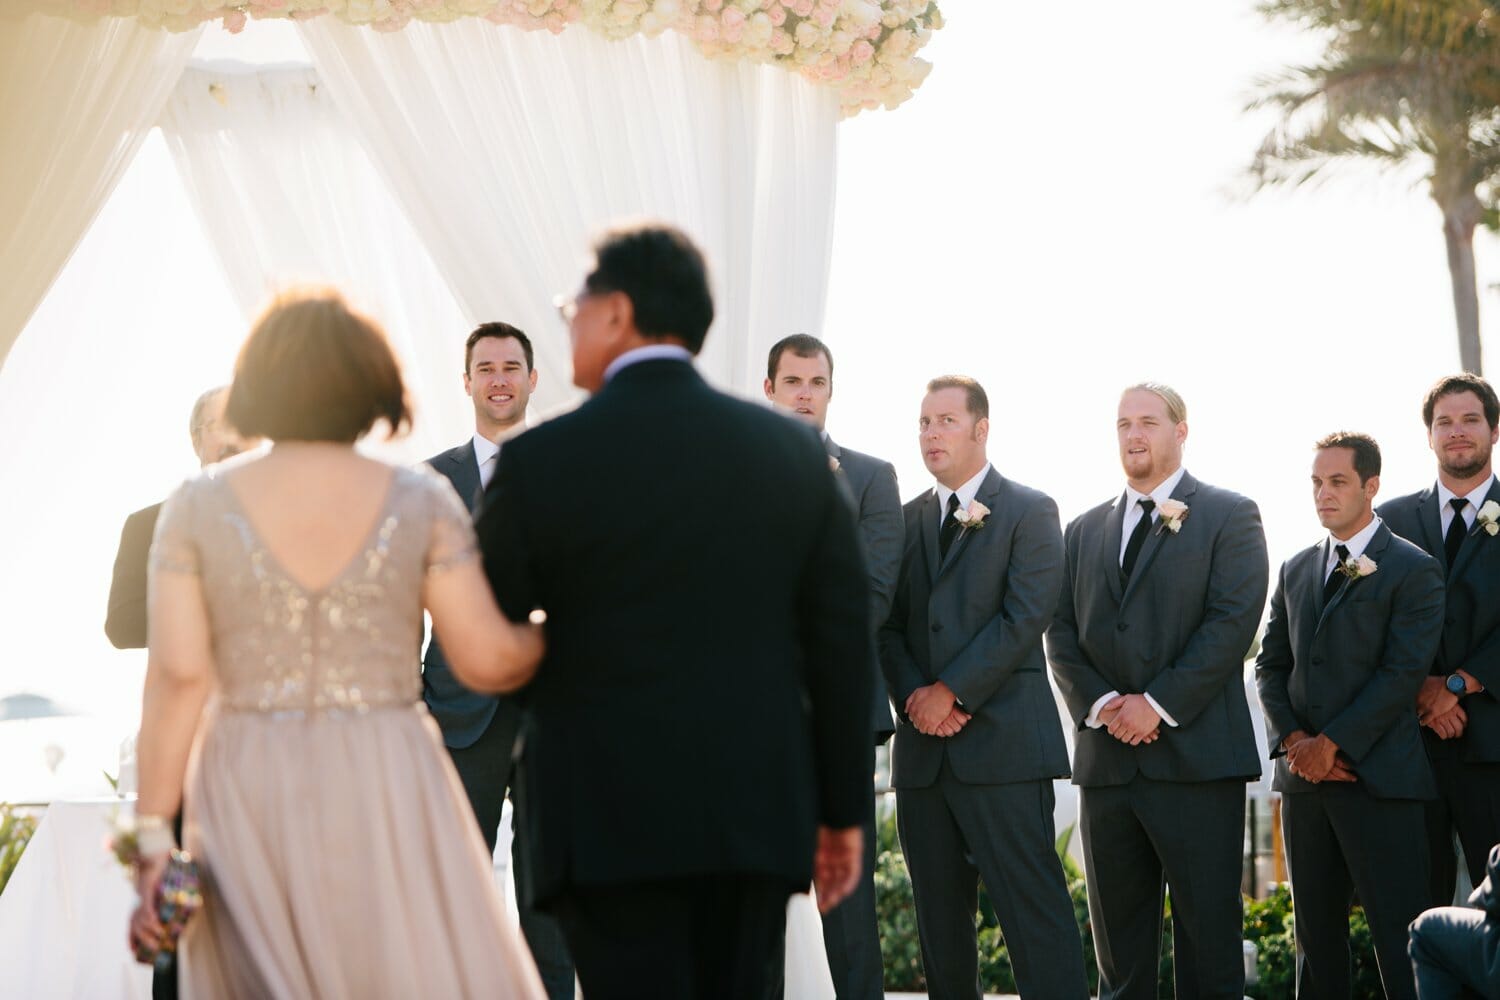
Be ready for the couple to greet or give presents to their parents.
Settings:35mm 1/200(vary), 2.8f, ISO 100
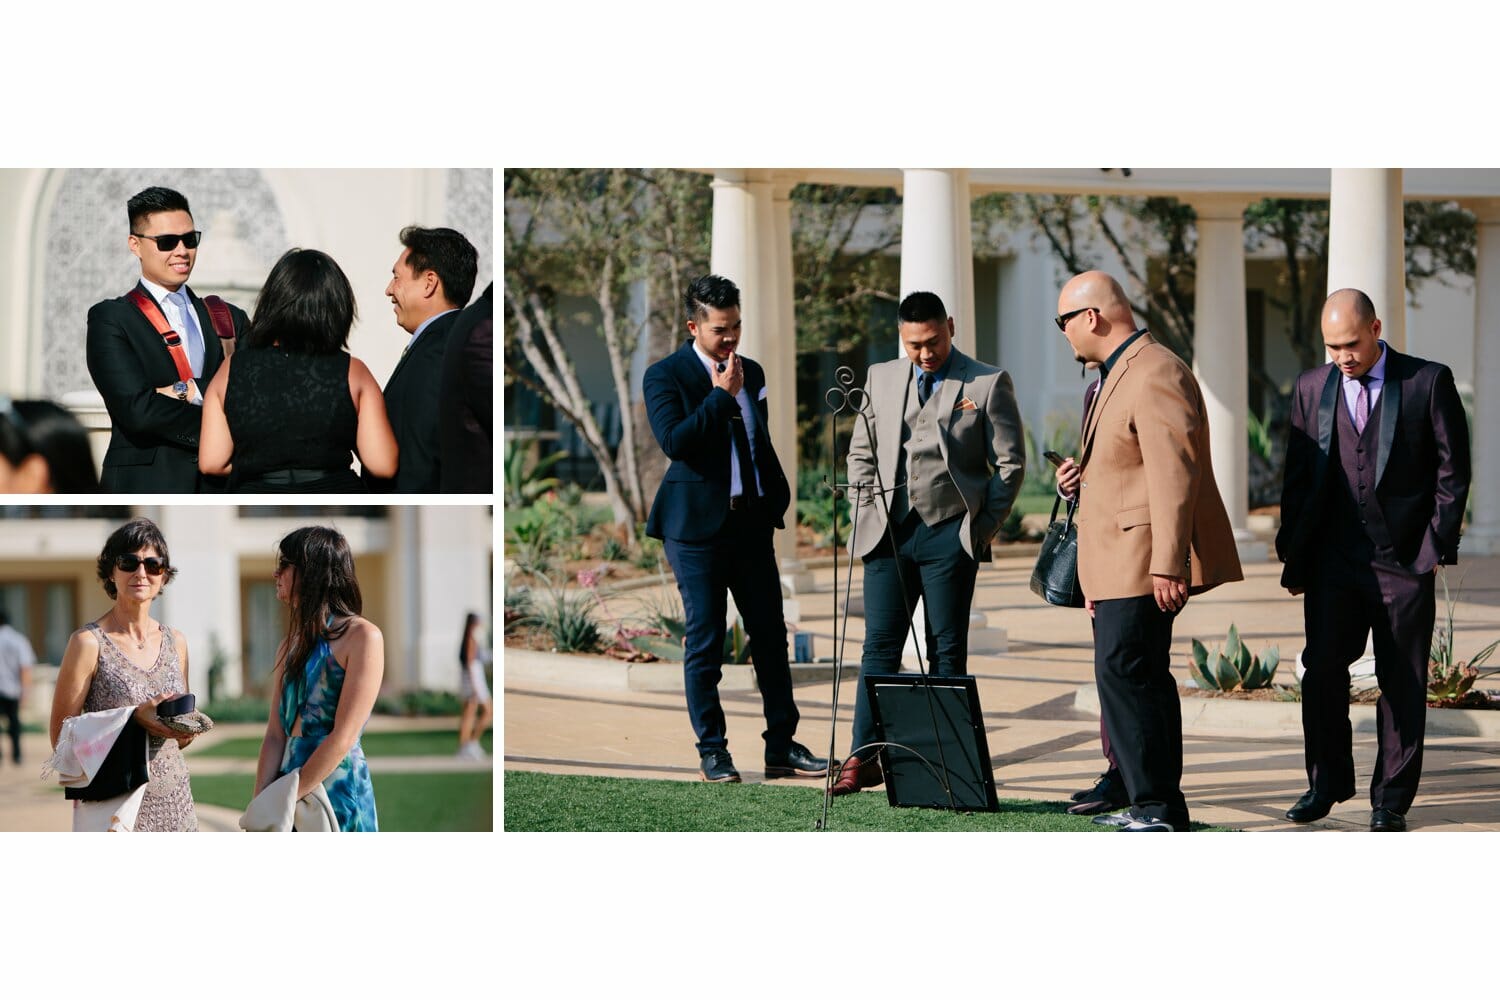
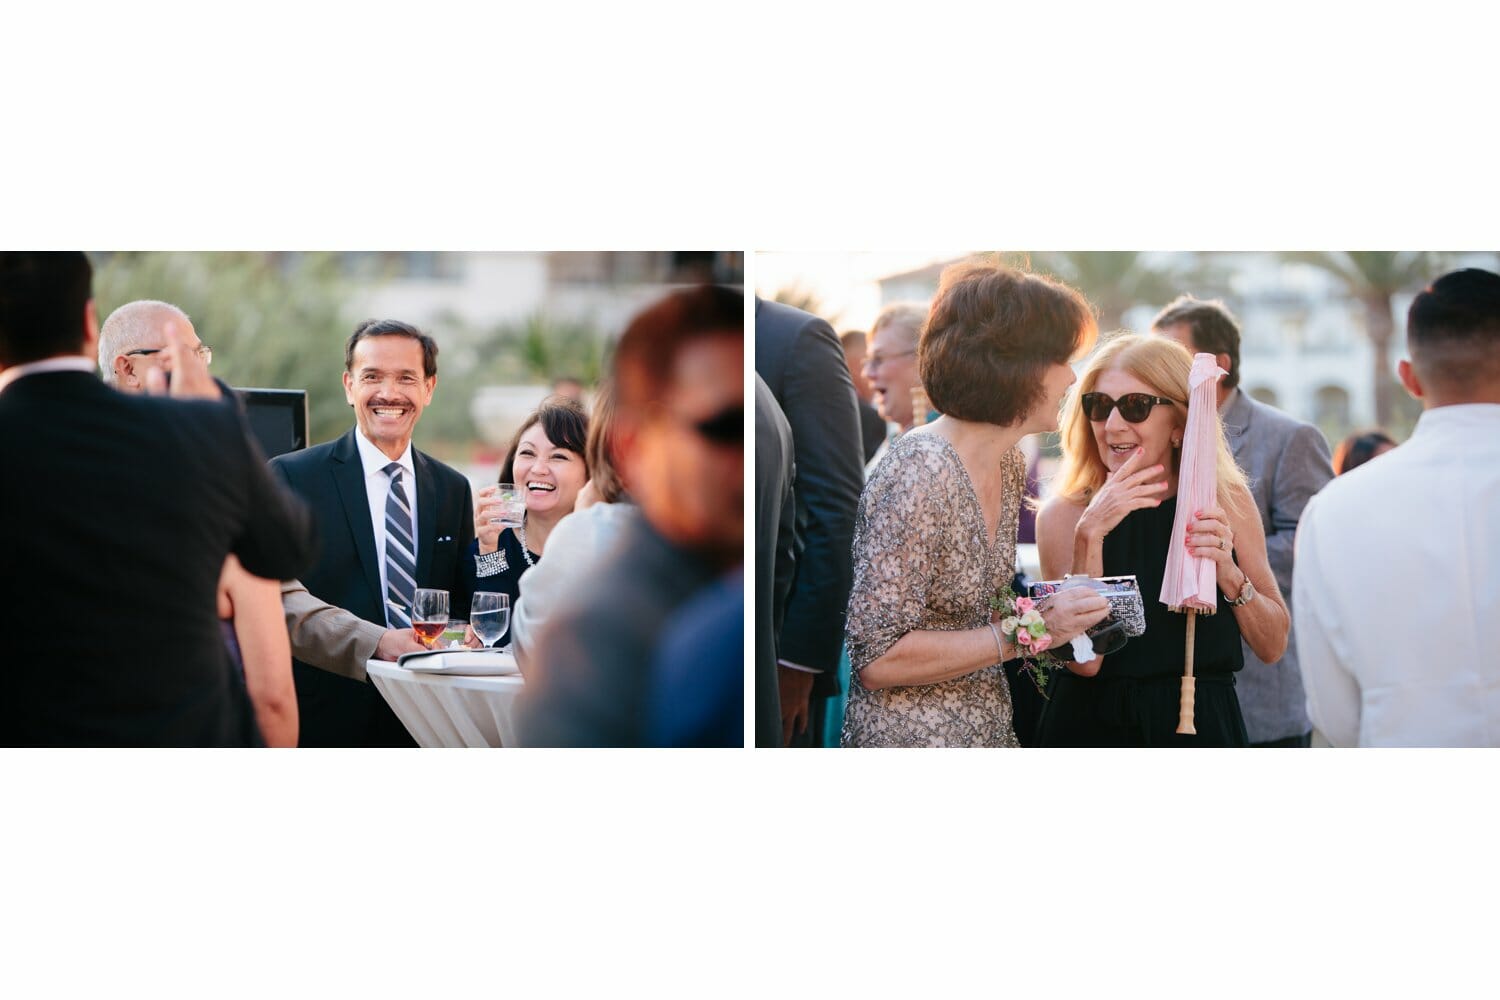
Cocktail hour & Reception time:
After the ceremony and family photos, the lead photographer may be off doing bride and groom portraits after the ceremony, which is your turn to capture the reception details and candids during the cocktail hour.
A technique we like to do is to stand in a good vantage point to see the guests, wait for the right moments and capture candids with a 70-200mm and 35mm for the right moments.
Learn who is immediately related and try to get more photos of them, obviously the couple will want photos of their immediate family first. Generally capture the best moments, and everyone there, but family is a priority.
Settings:70-200mm 1/200(vary), 2.8f, ISO 100
Settings:70-200mm 1/200(vary), 2.8f, ISO 100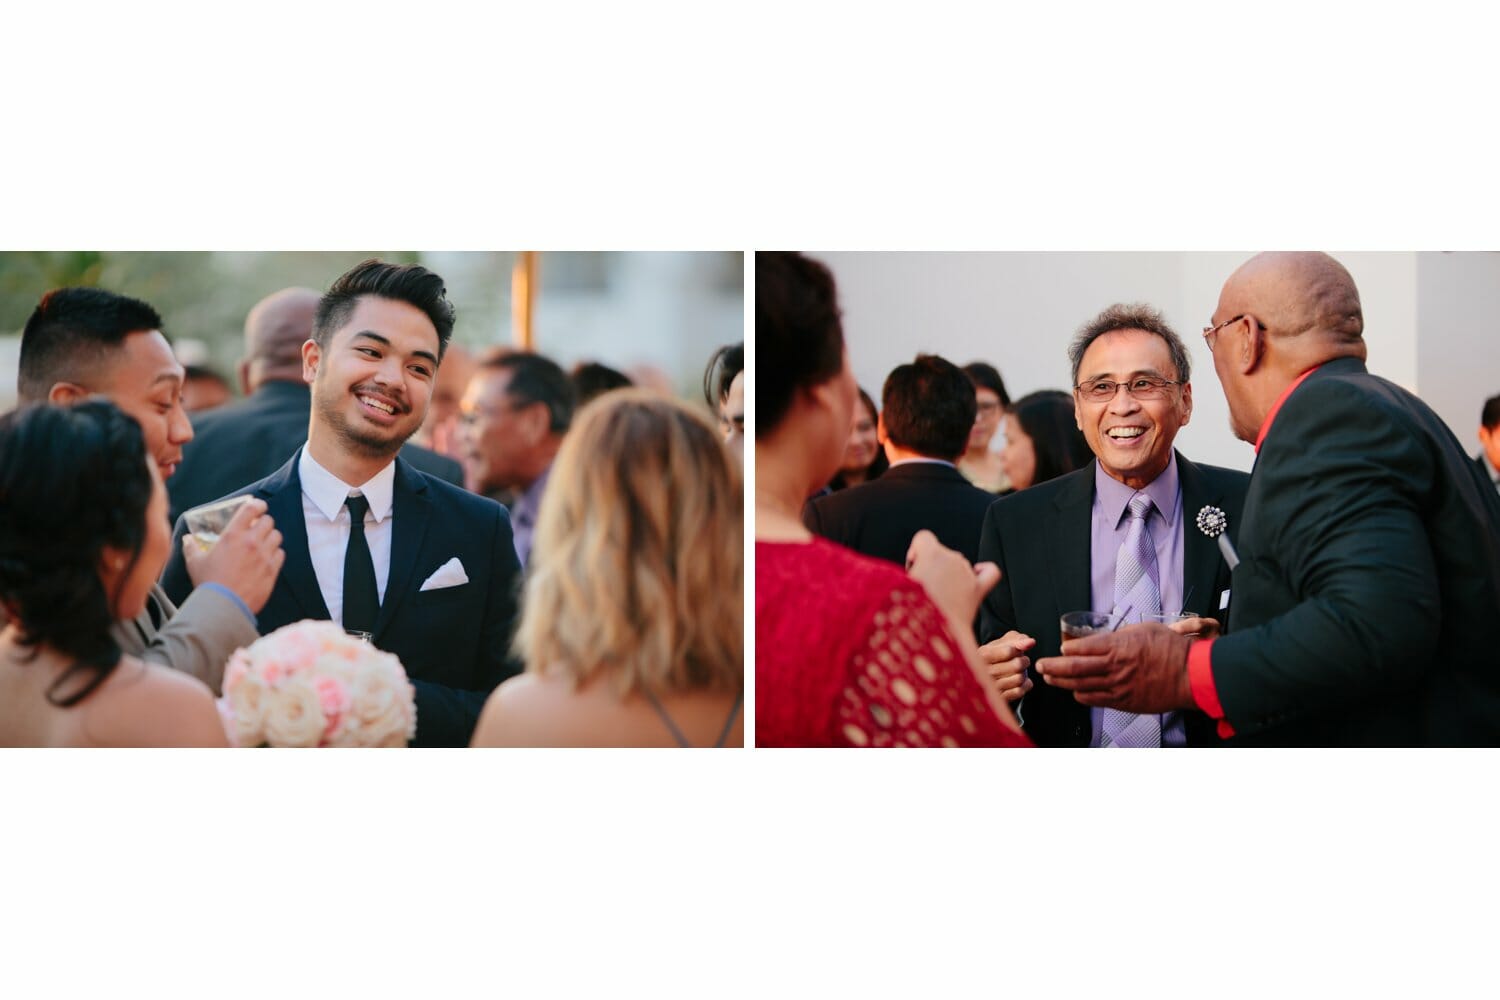
Posed shots like these are great too.
Settings:70-200mm 1/200(vary), 2.8f, ISO 100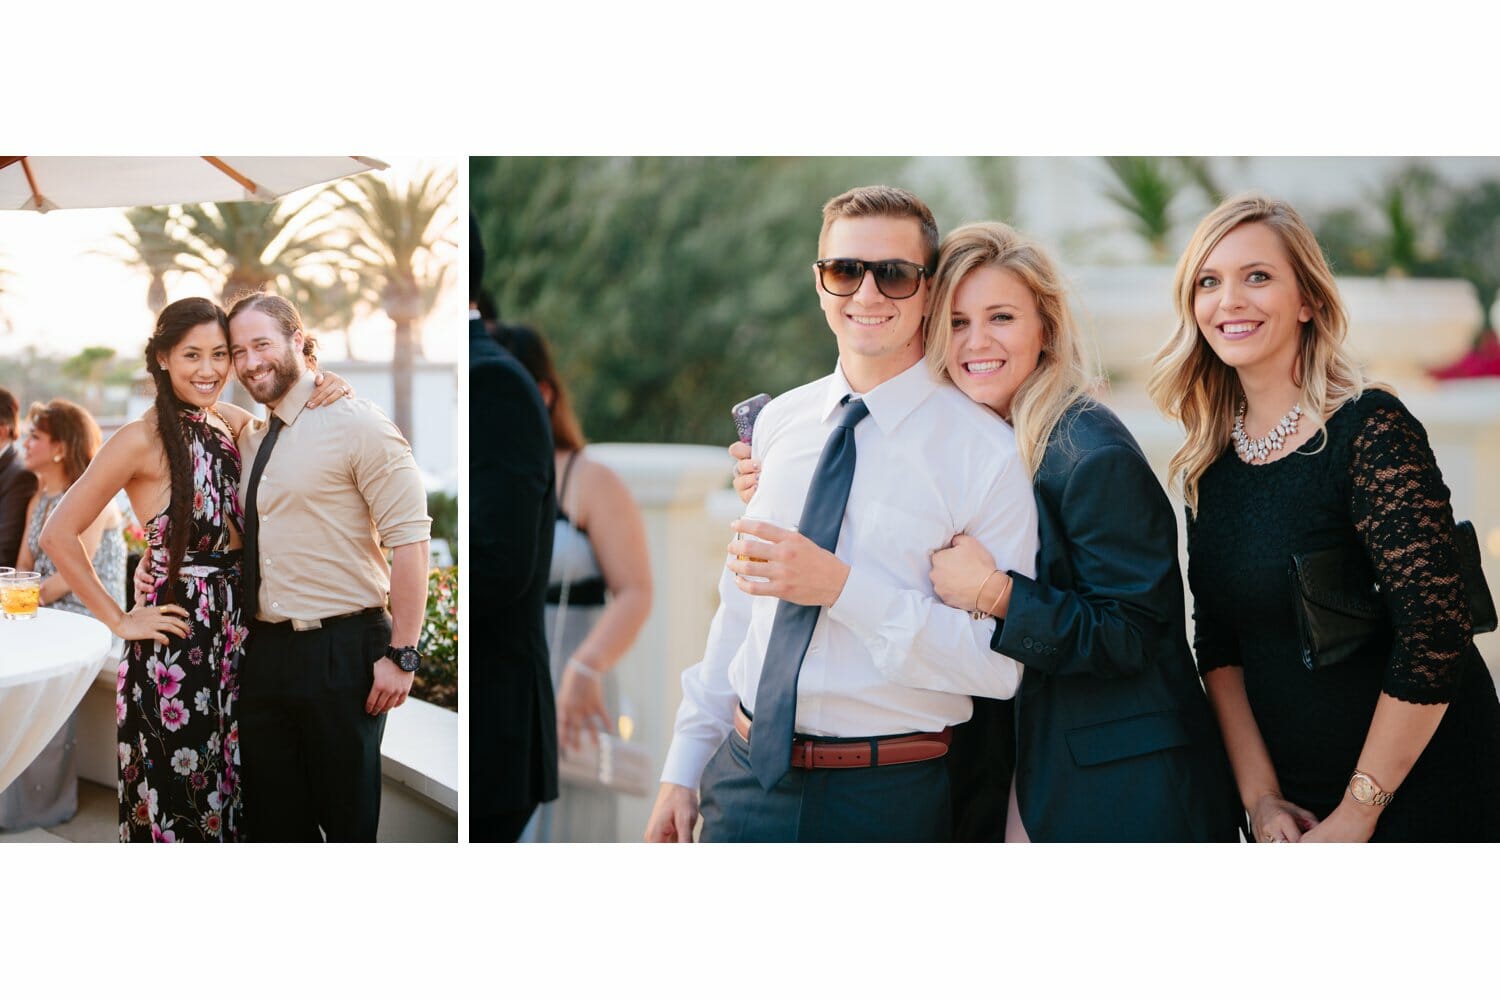
Settings:35mm 1/200(vary), 3.5+f, ISO 100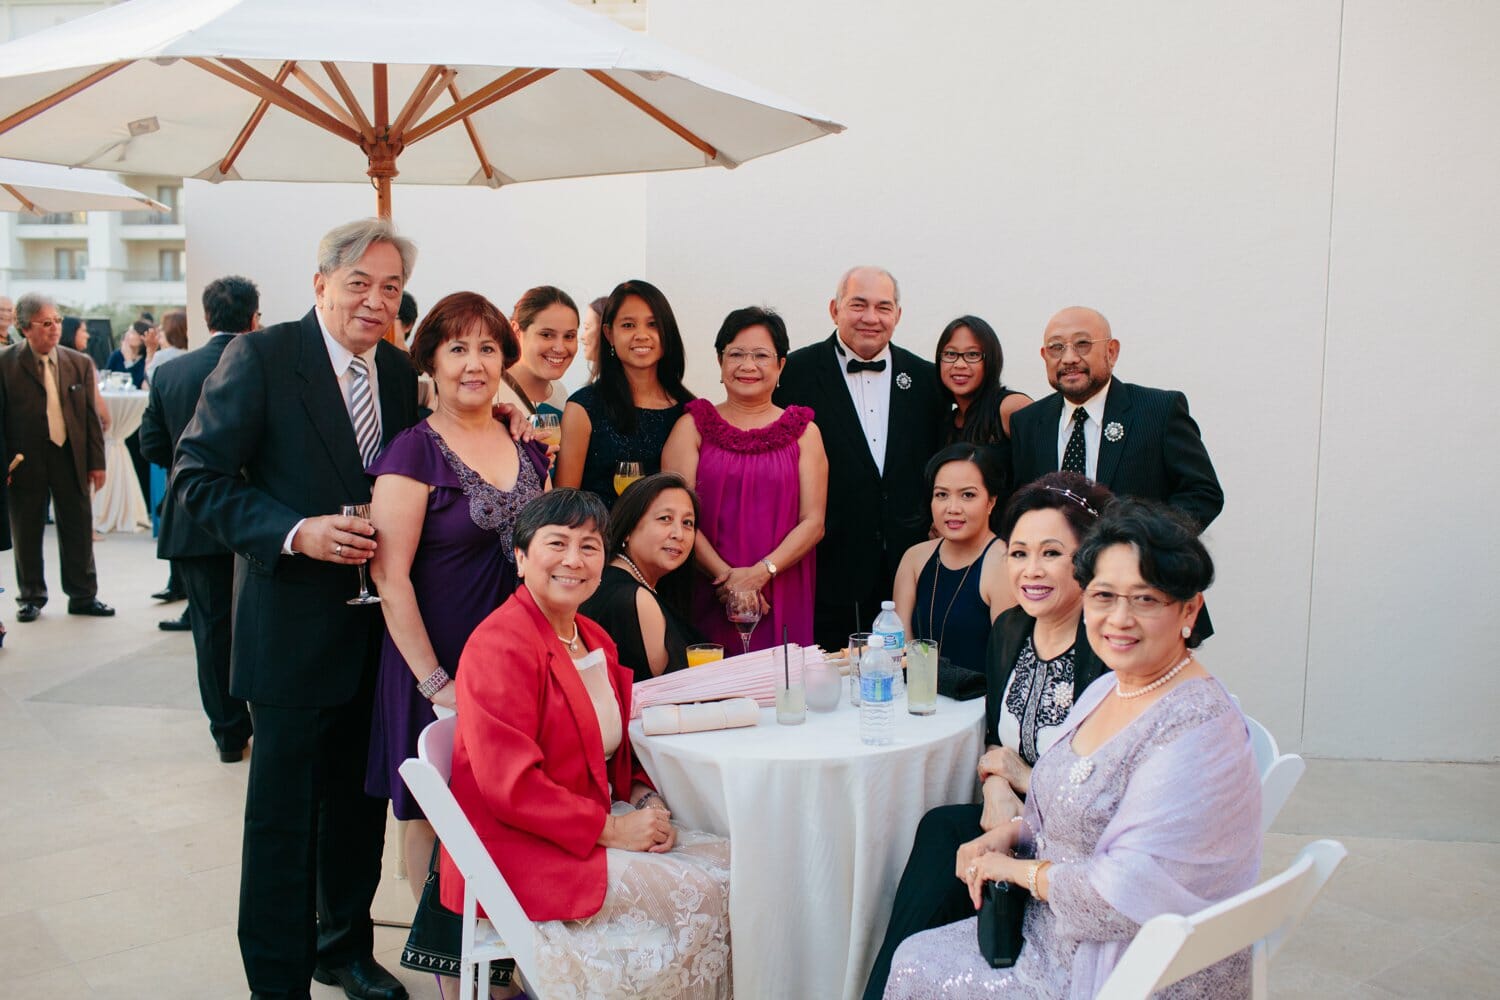
H’orderves:
If they are appealing, capture it like this:
Settings:35mm 1/200(vary), 2.8f, ISO 100
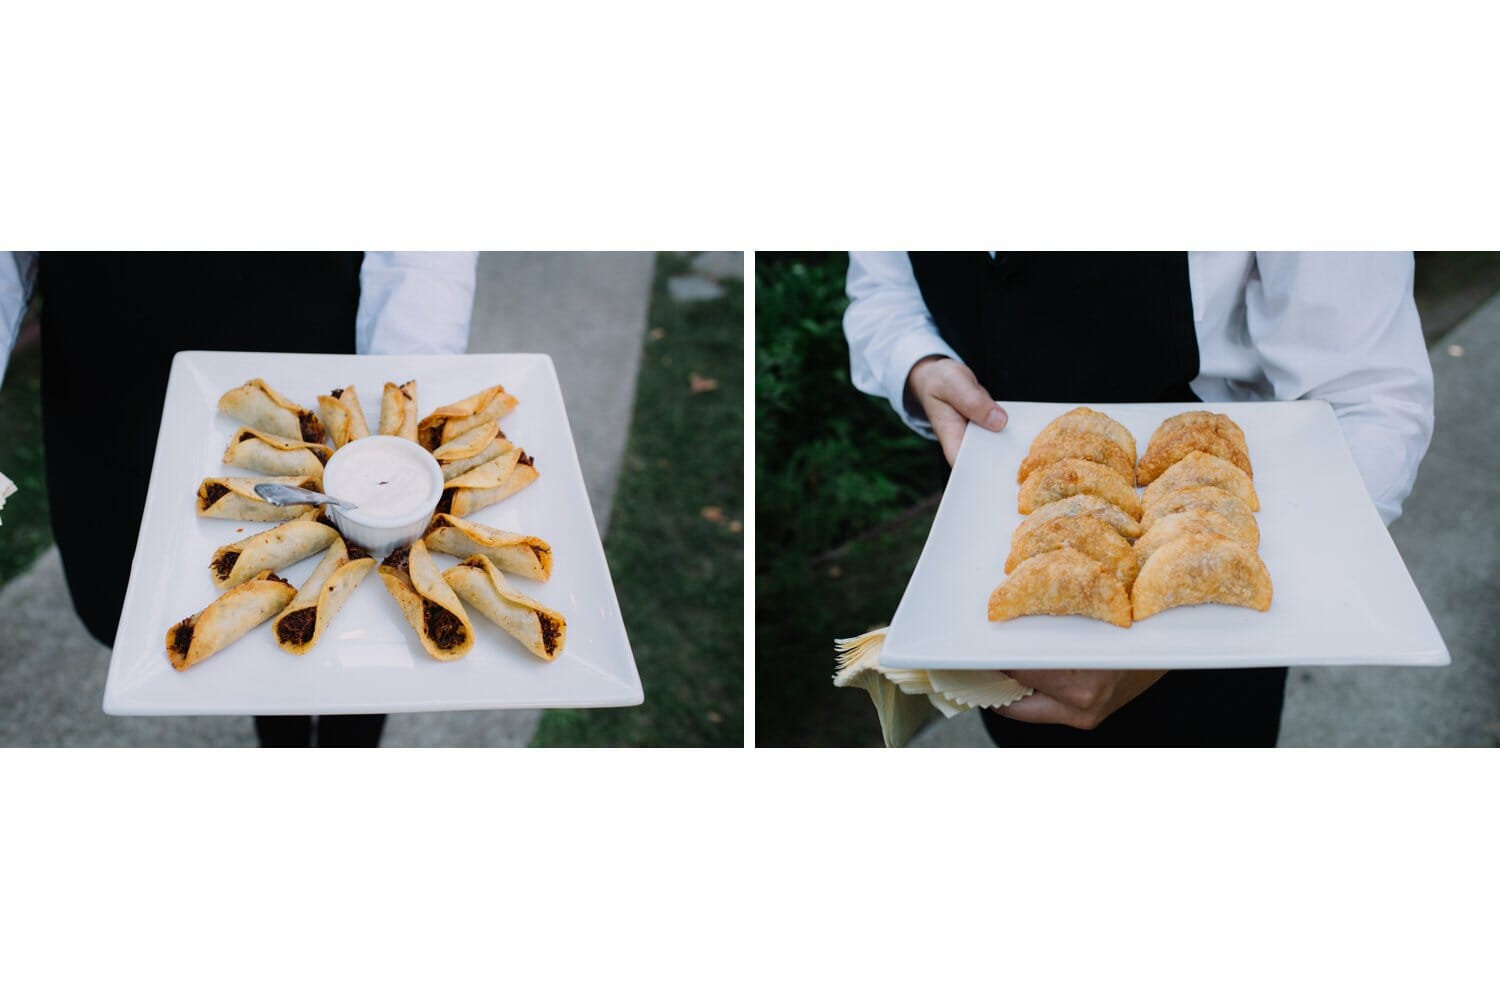
Settings:35mm 1/200(vary), 2.8f, ISO 100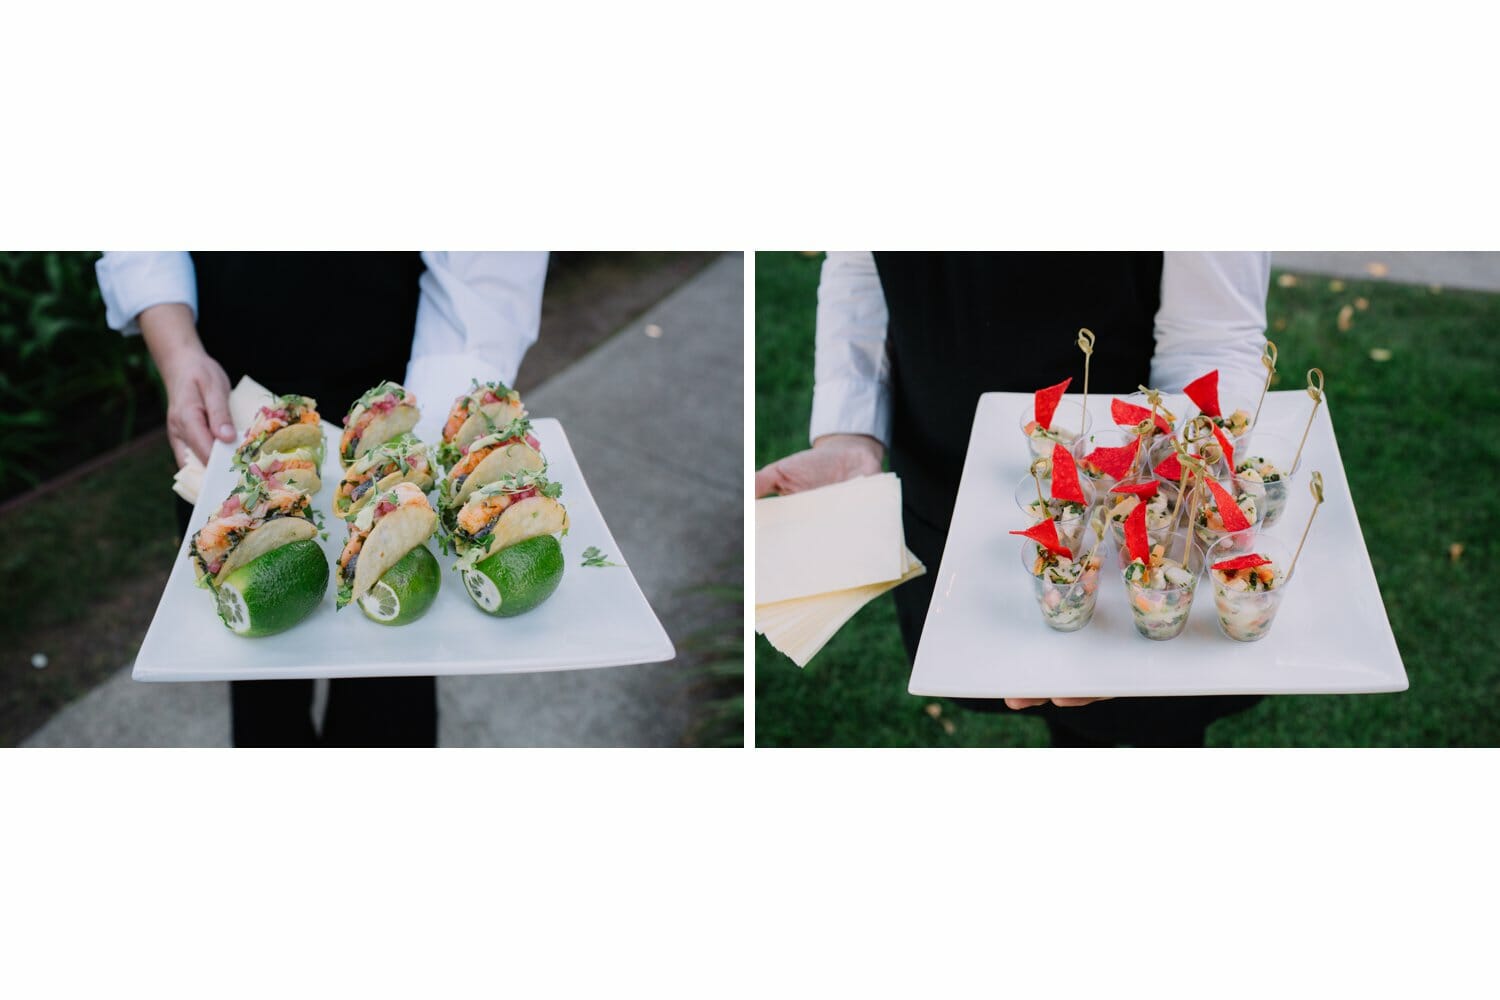
You’ll need to capture the details of the reception UNTOUCHED:
Work with the wedding coordinator or whoever to get your shots. In this time you must take control of the situation and direct in times.
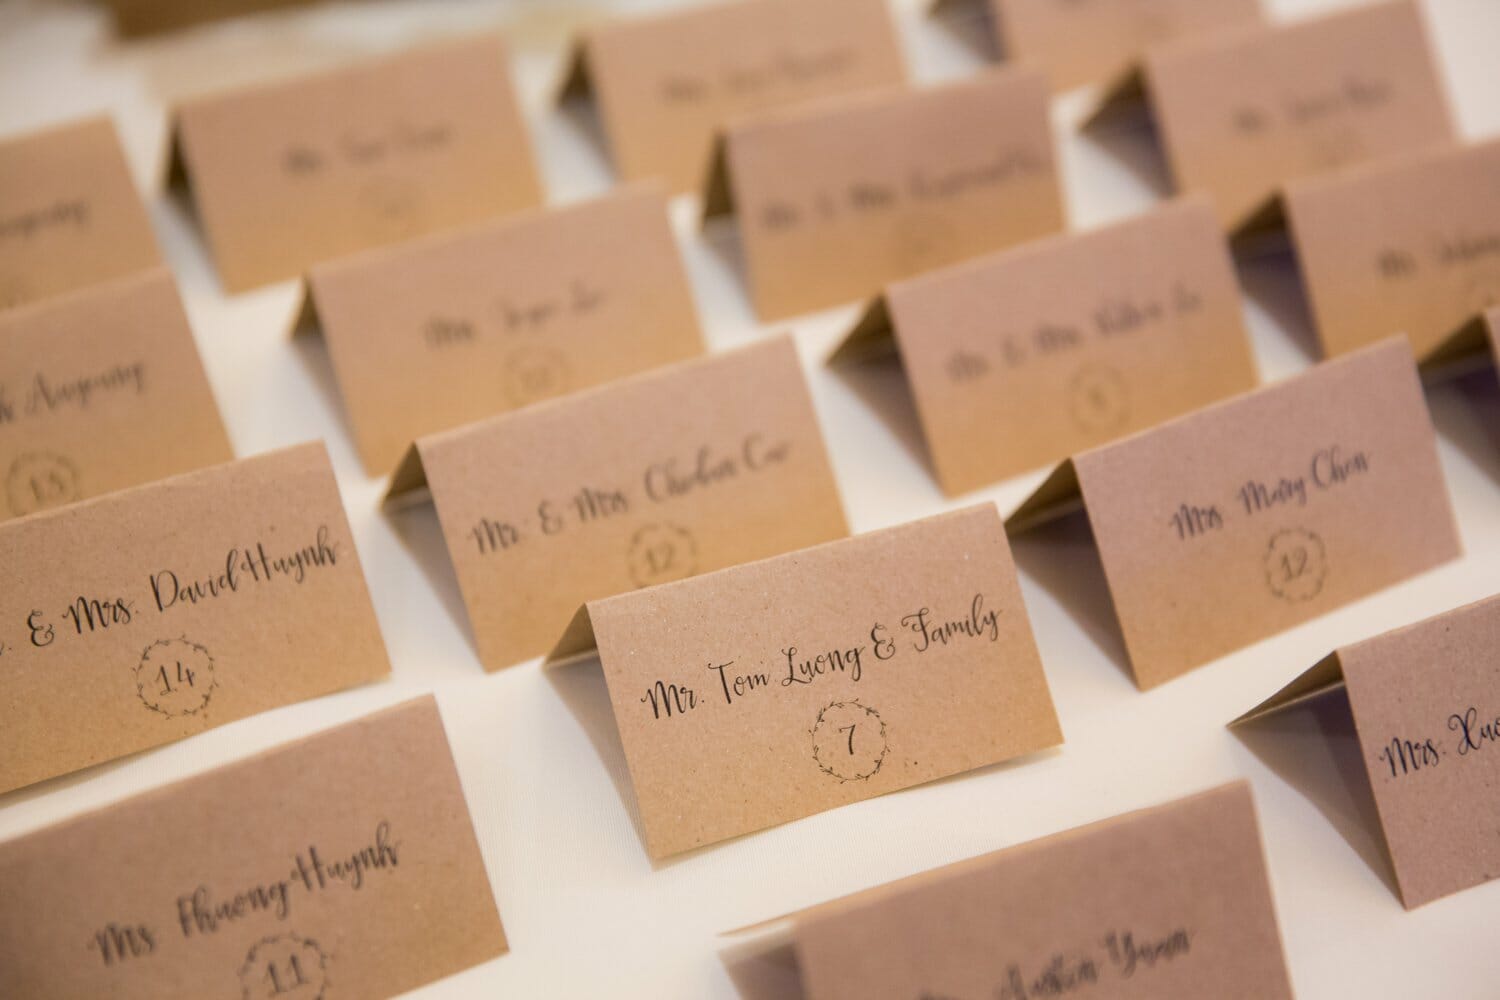
Place cards can be captured like this: f2.8 make sure to capture at least one name in focus.
The two below are decent, but not ideal.
Settings:50mm 1/200(vary), 2.8f, ISO 100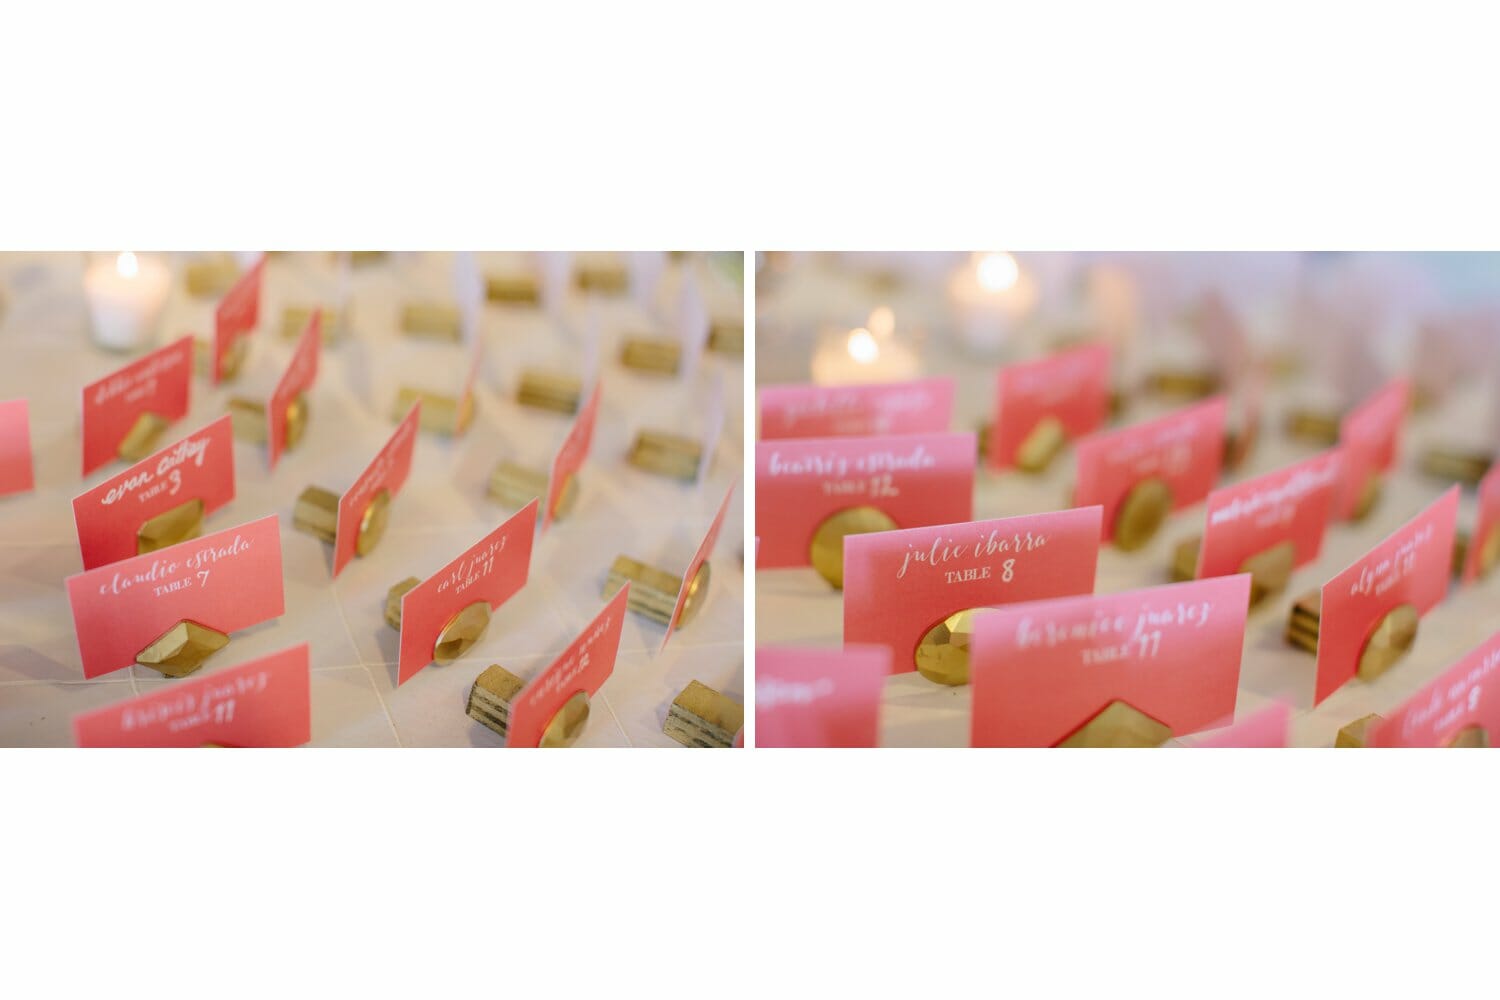
This is ideal.
Settings:50mm 1/200(vary), 2.8f, ISO 100
Details are captured like this:
Settings:50mm 1/200, 2.0-2.8f, ISO(varied)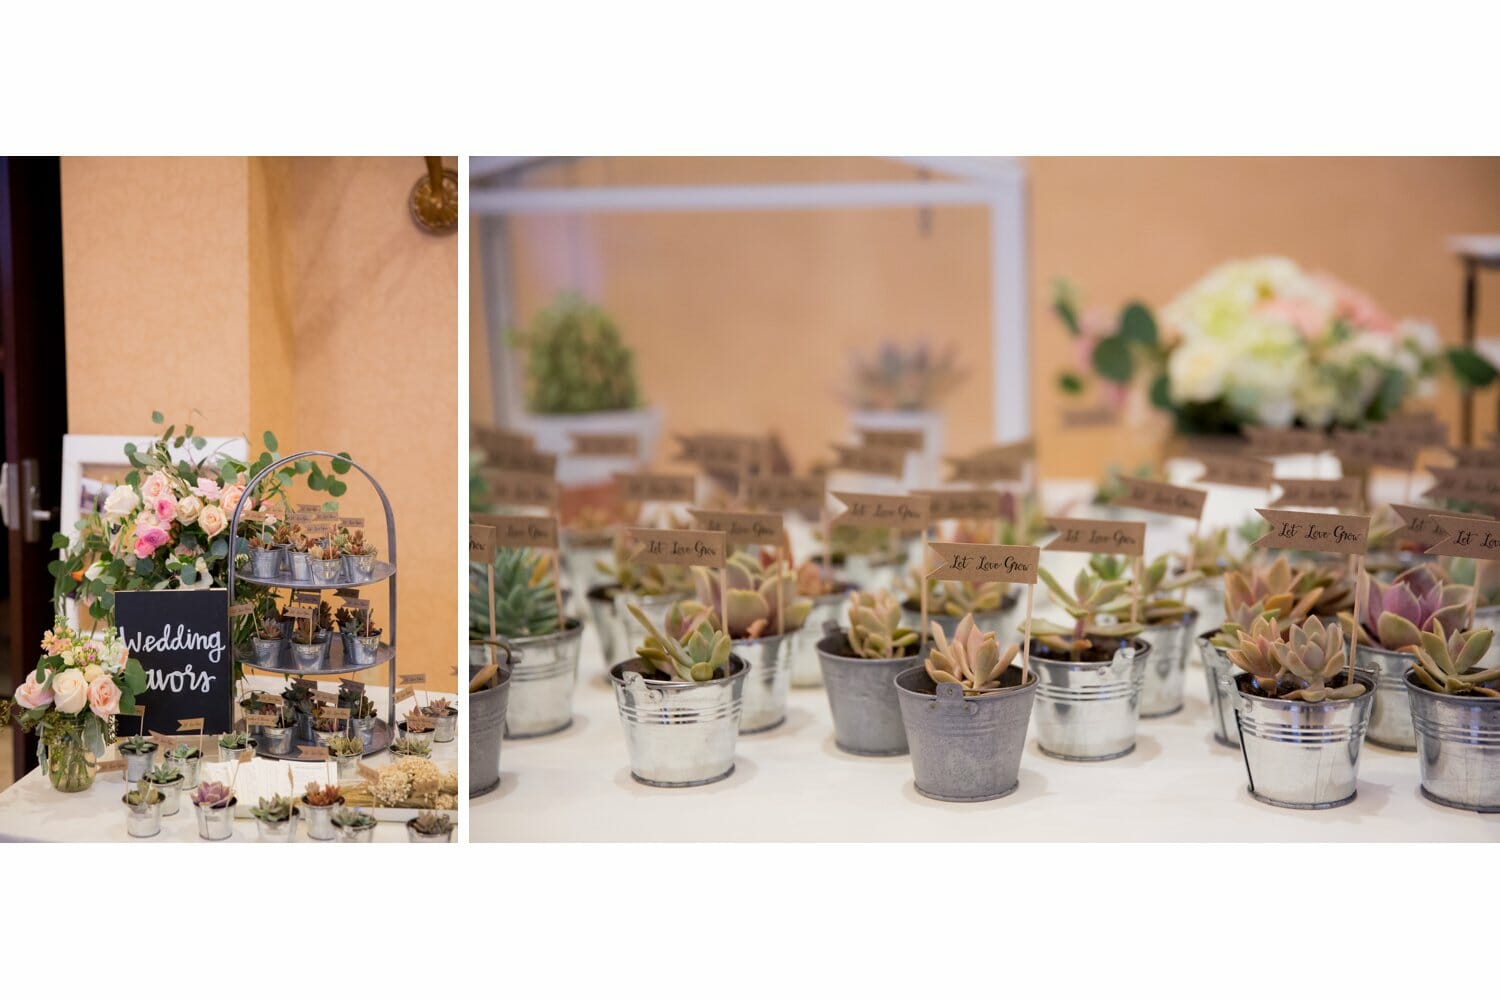
Settings:50mm 1/200, 2.0-2.8f, ISO(varied)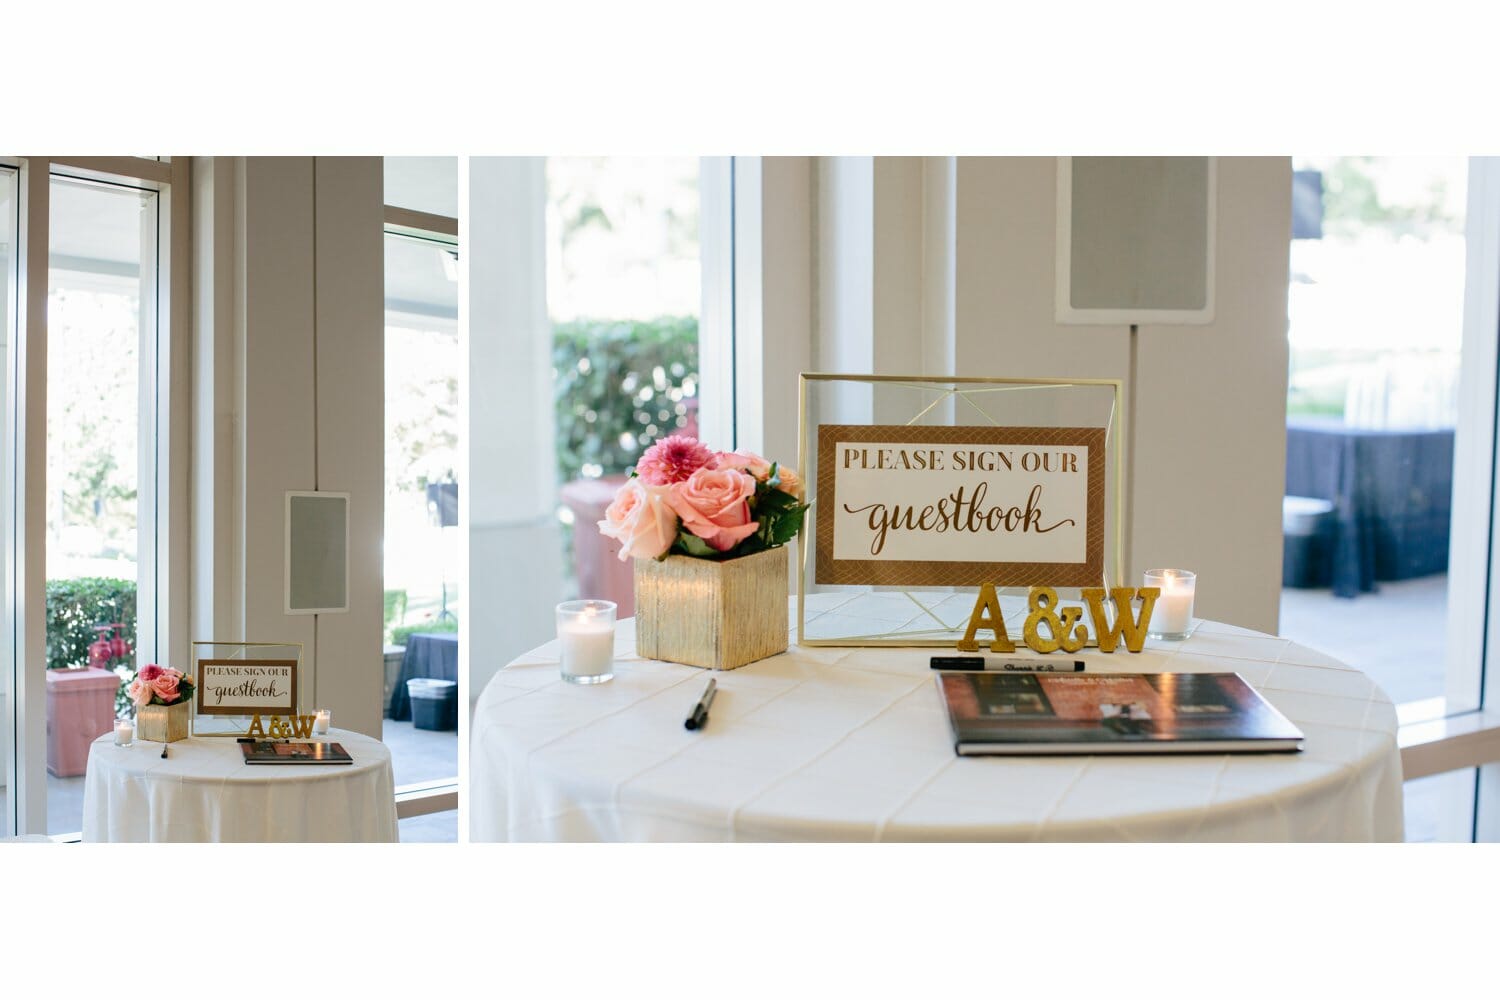
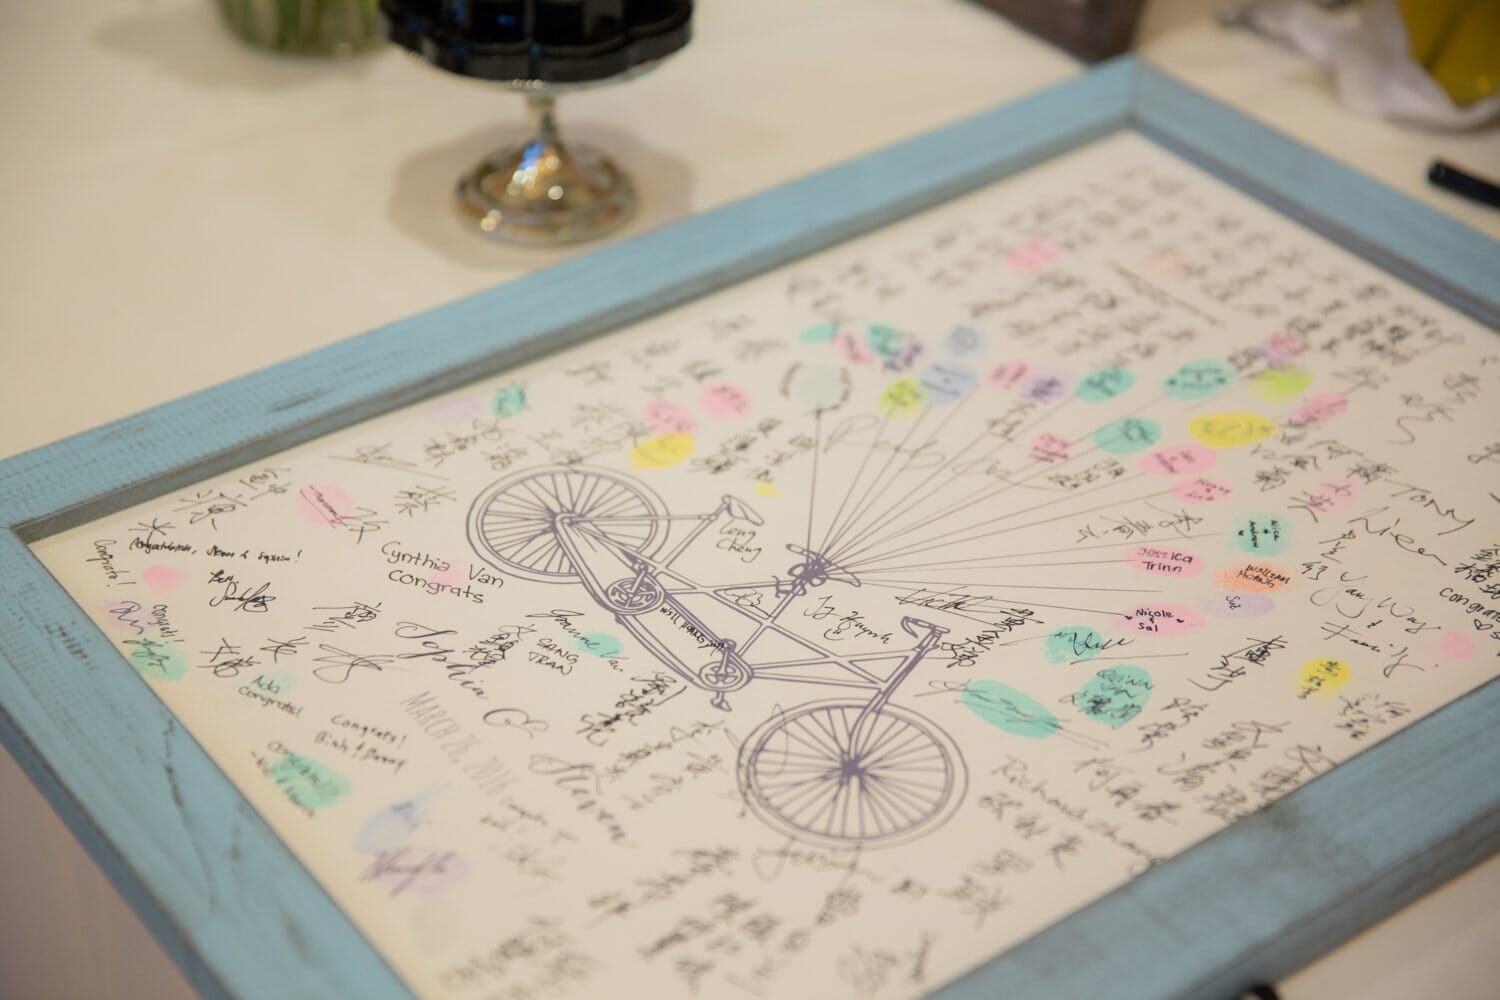
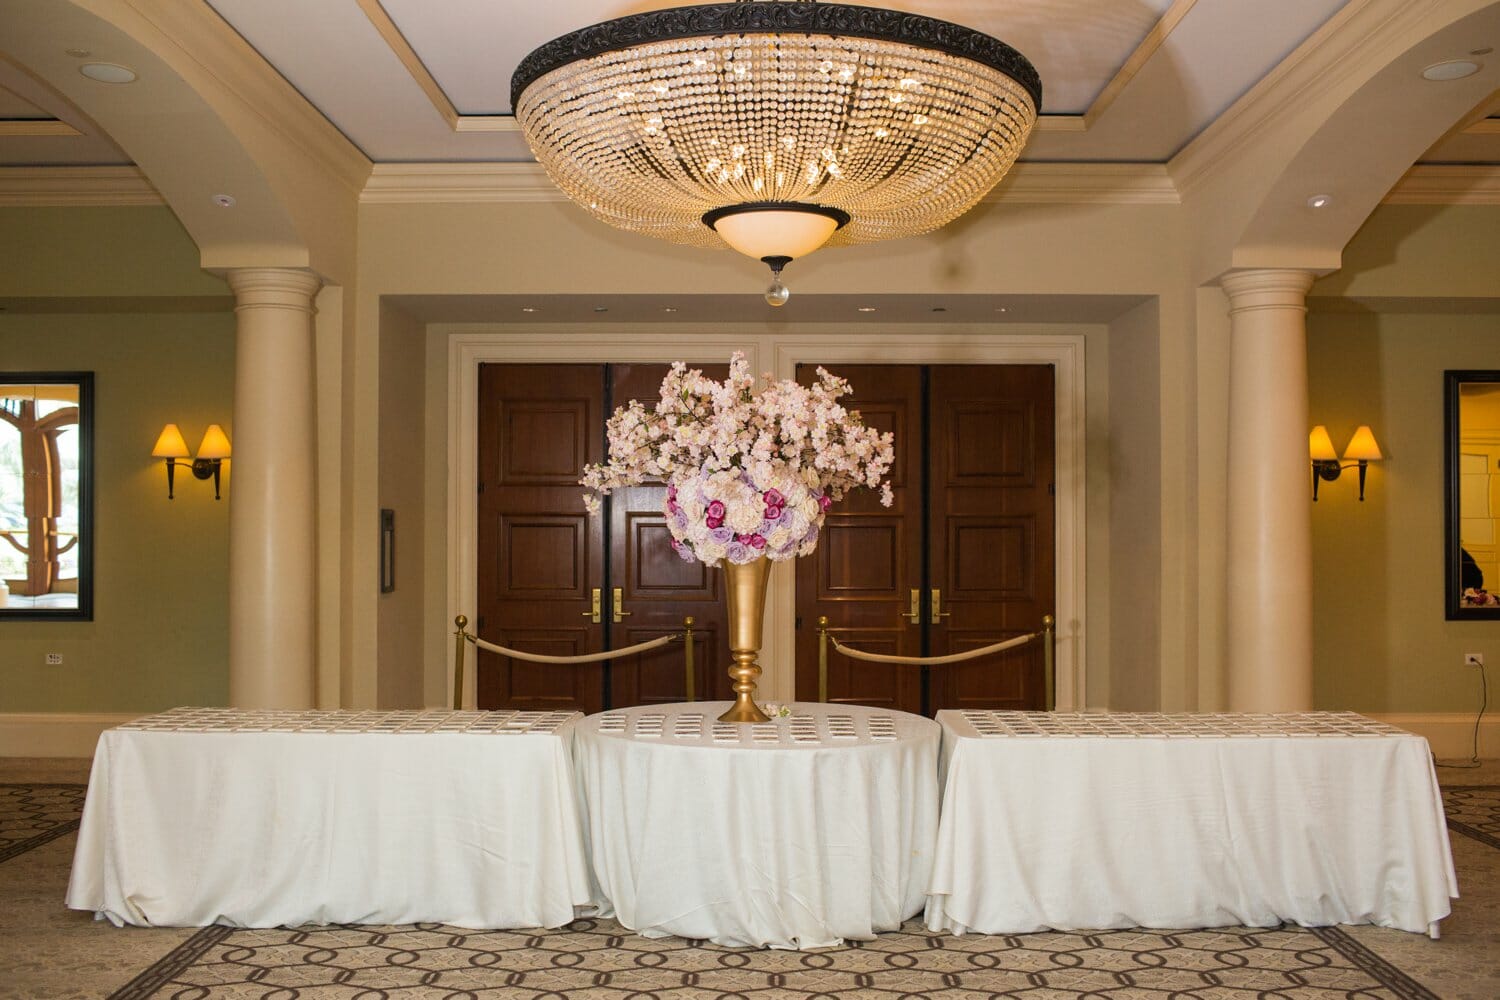
Guest framed signings should be captured like this if it’s laying on a table.
Settings:50mm 1/200, 2.0-2.8f, ISO(varied)
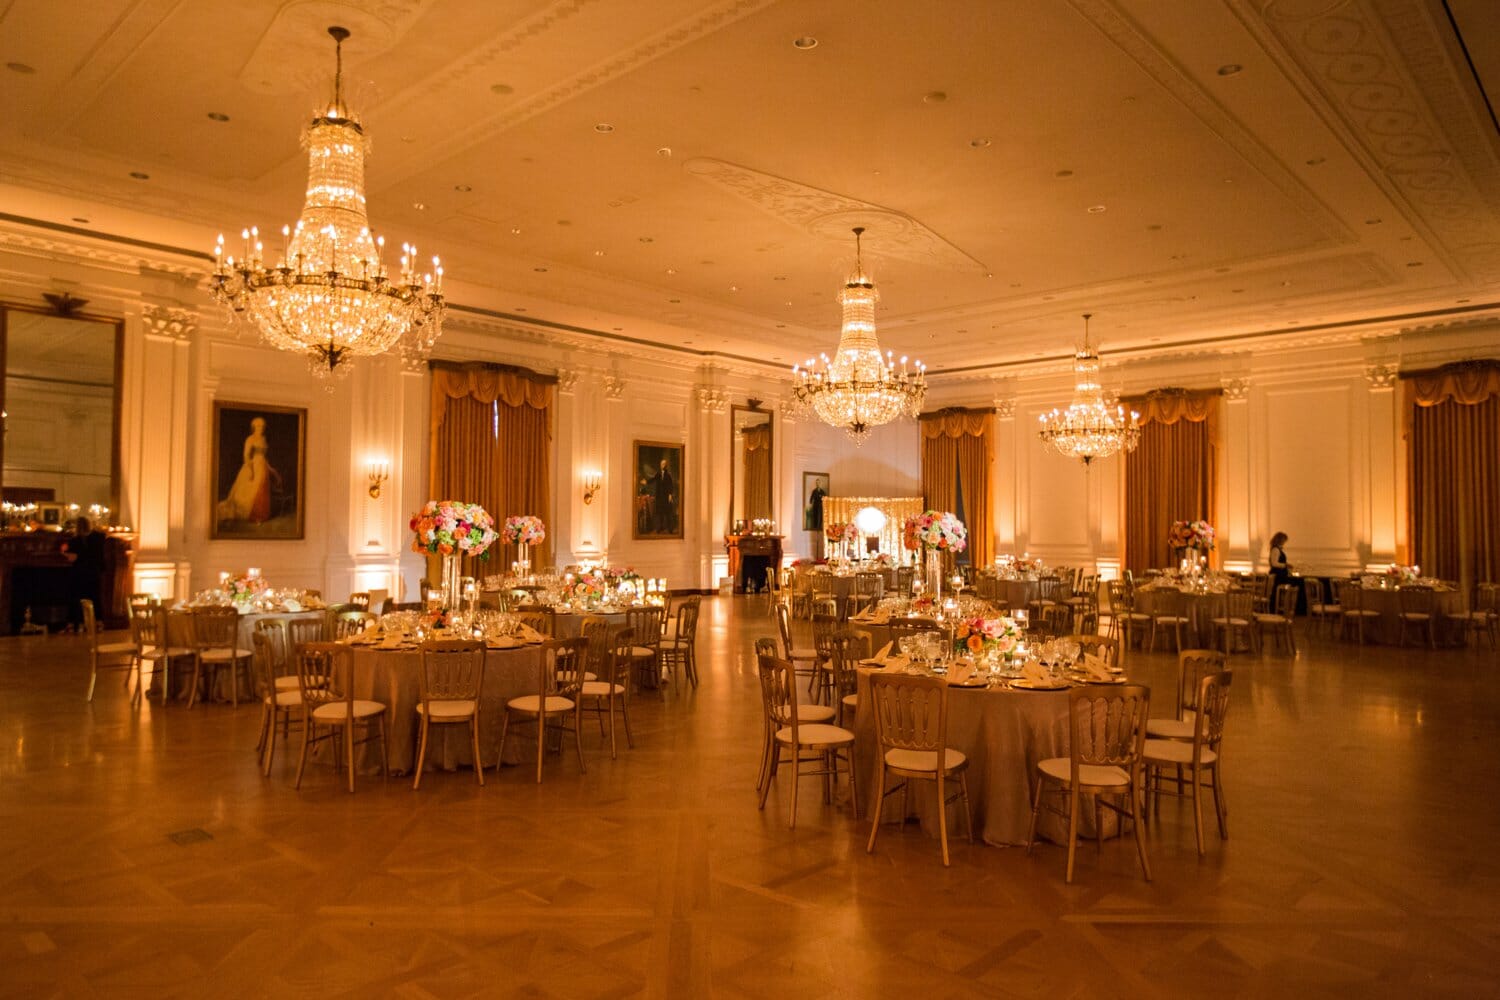
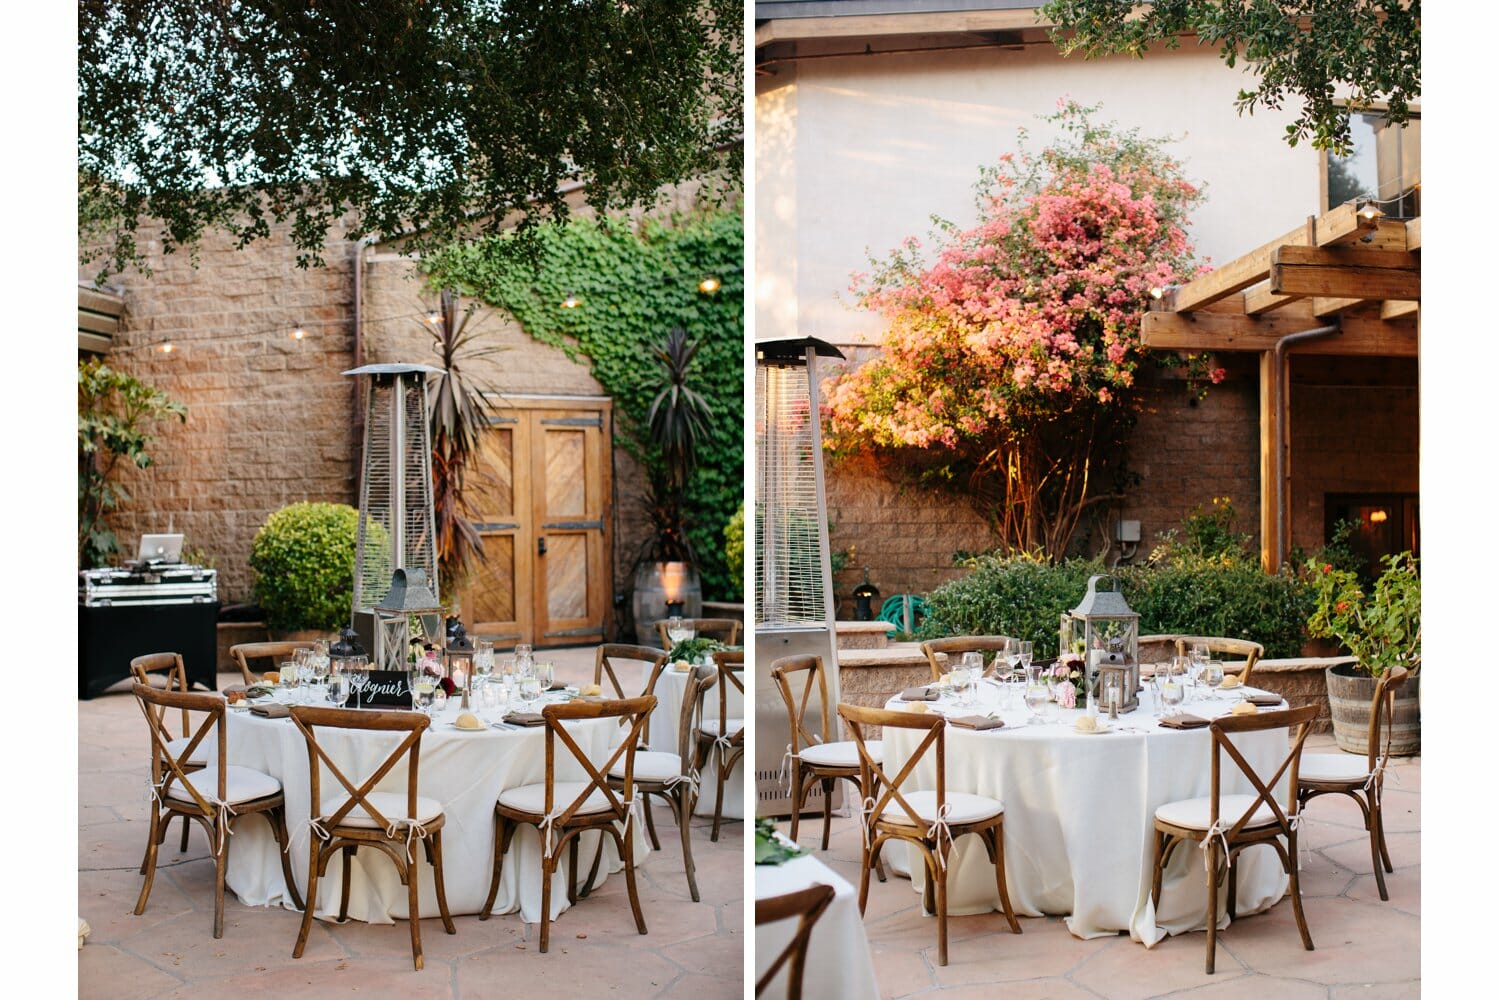
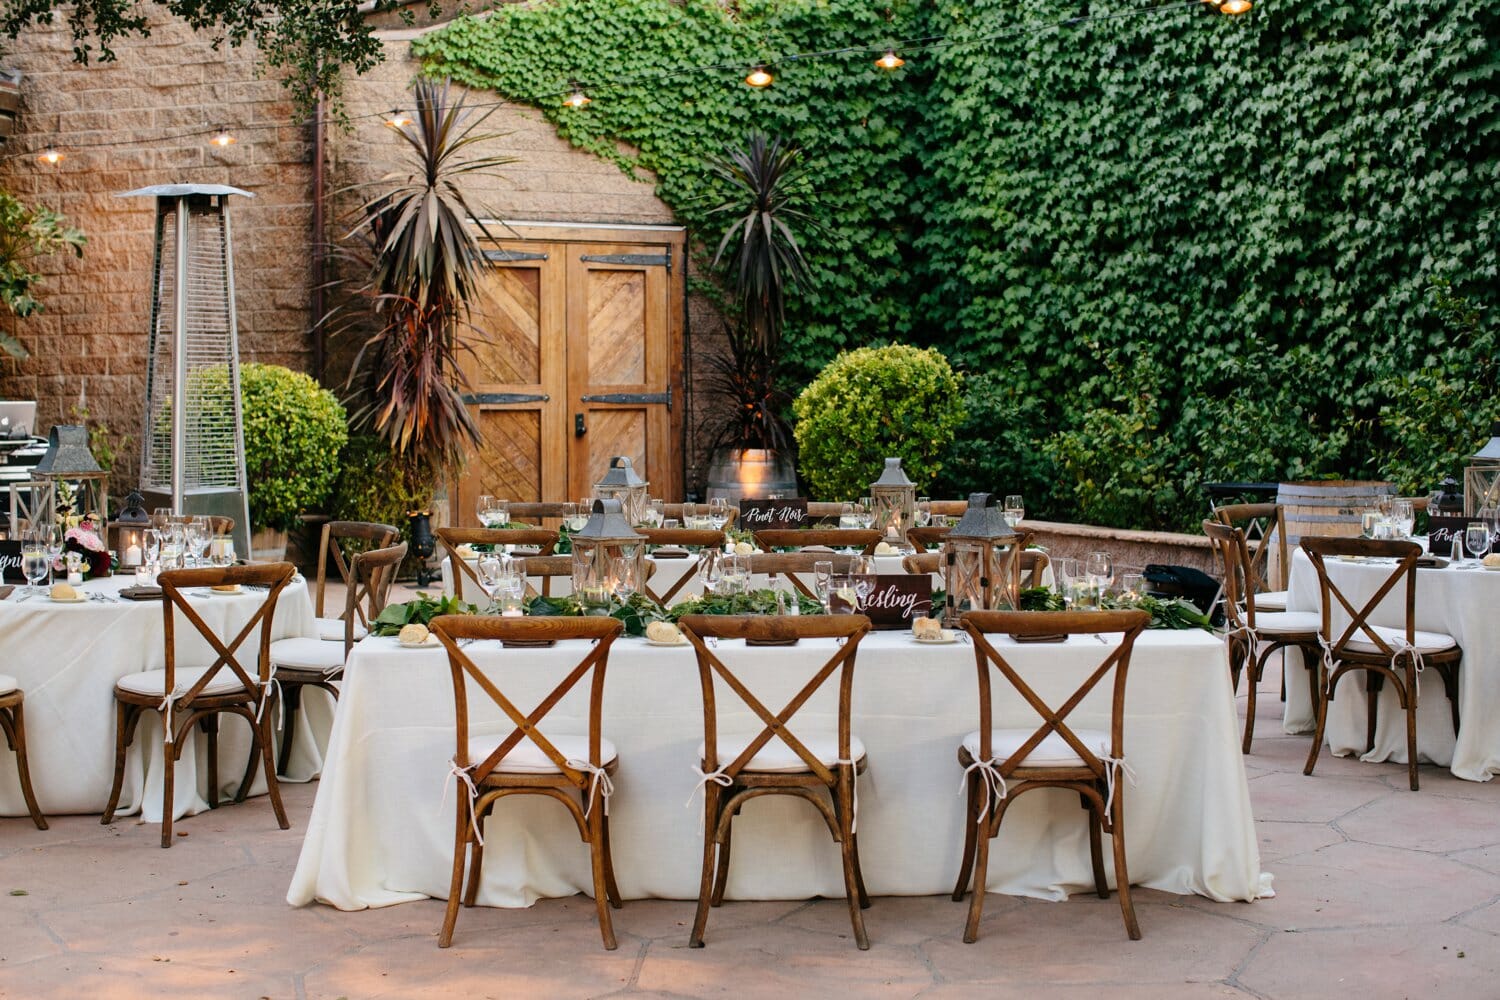
Capturing table shots needs to free from speakers, trashcans, exit signs as much as possible.
This is not ideal and shouldn’t be kept. If you are not sure about what should be kept, don’t delete it and we will train you on what to look for.
Settings: 35mm 1/200, 2.0-2.8f, ISO(varied)
This is more ideal, but it’s best to ask every service person to clear the room.
Settings: 35-24mm 1/200, 2.0-2.8f, ISO(varied)
Details on the table may be shot like this. Your camera is almost level with the details.
Settings: 50mm 1/200, 2.0-2.8f, ISO(varied)
Place settings are captured like this:
Settings: 35mm 1/200, 2.0-2.8f, ISO(varied)
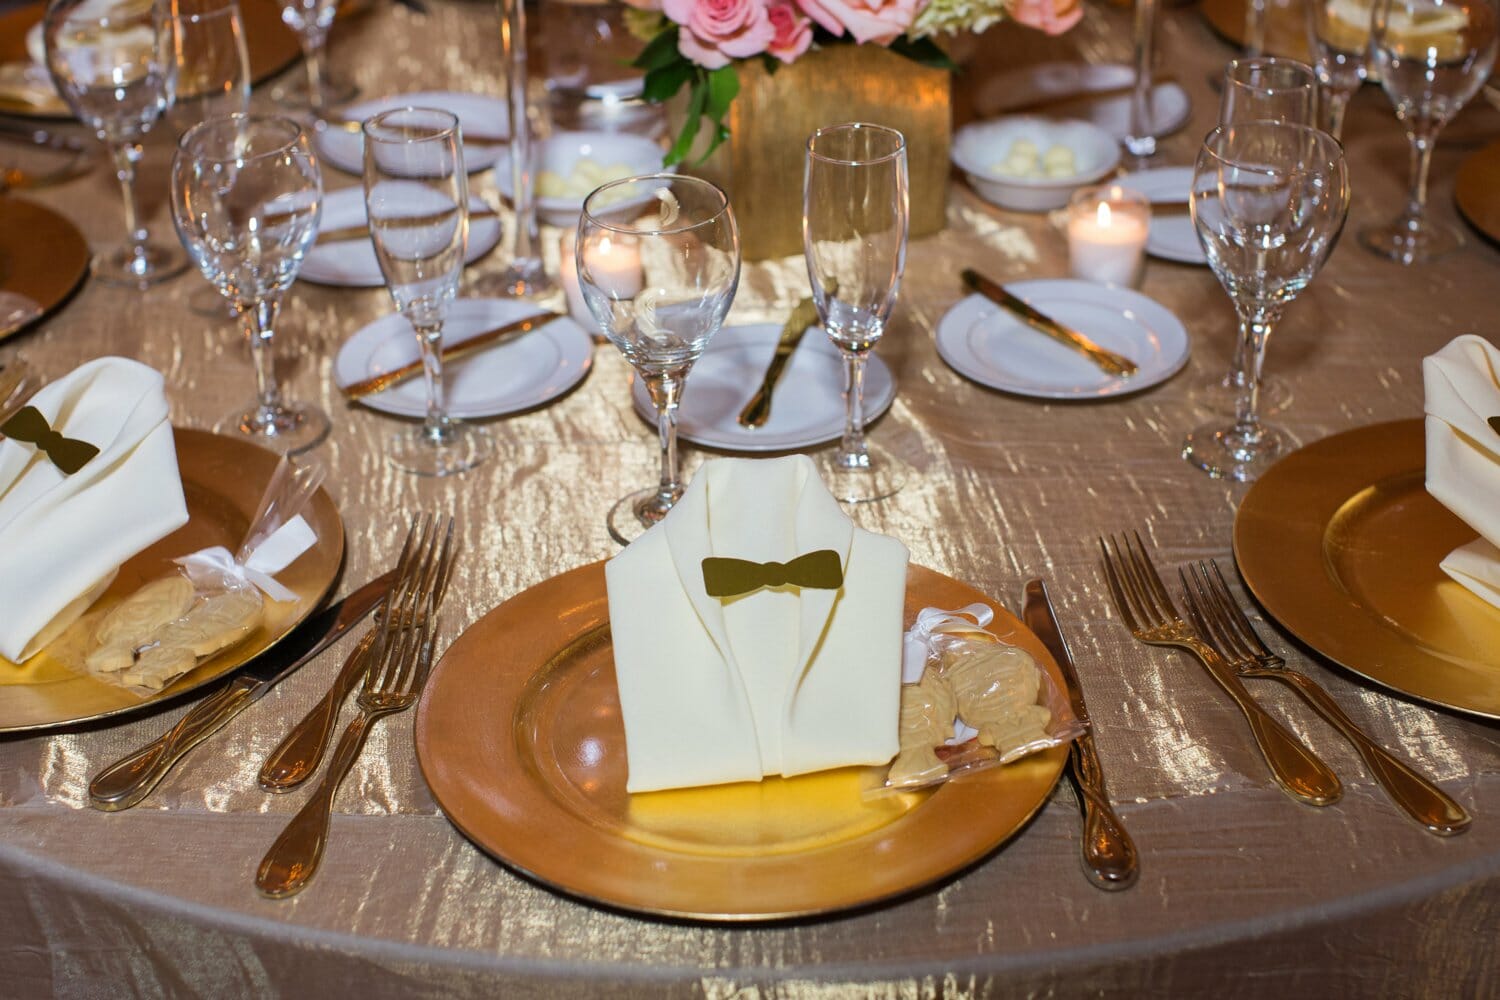
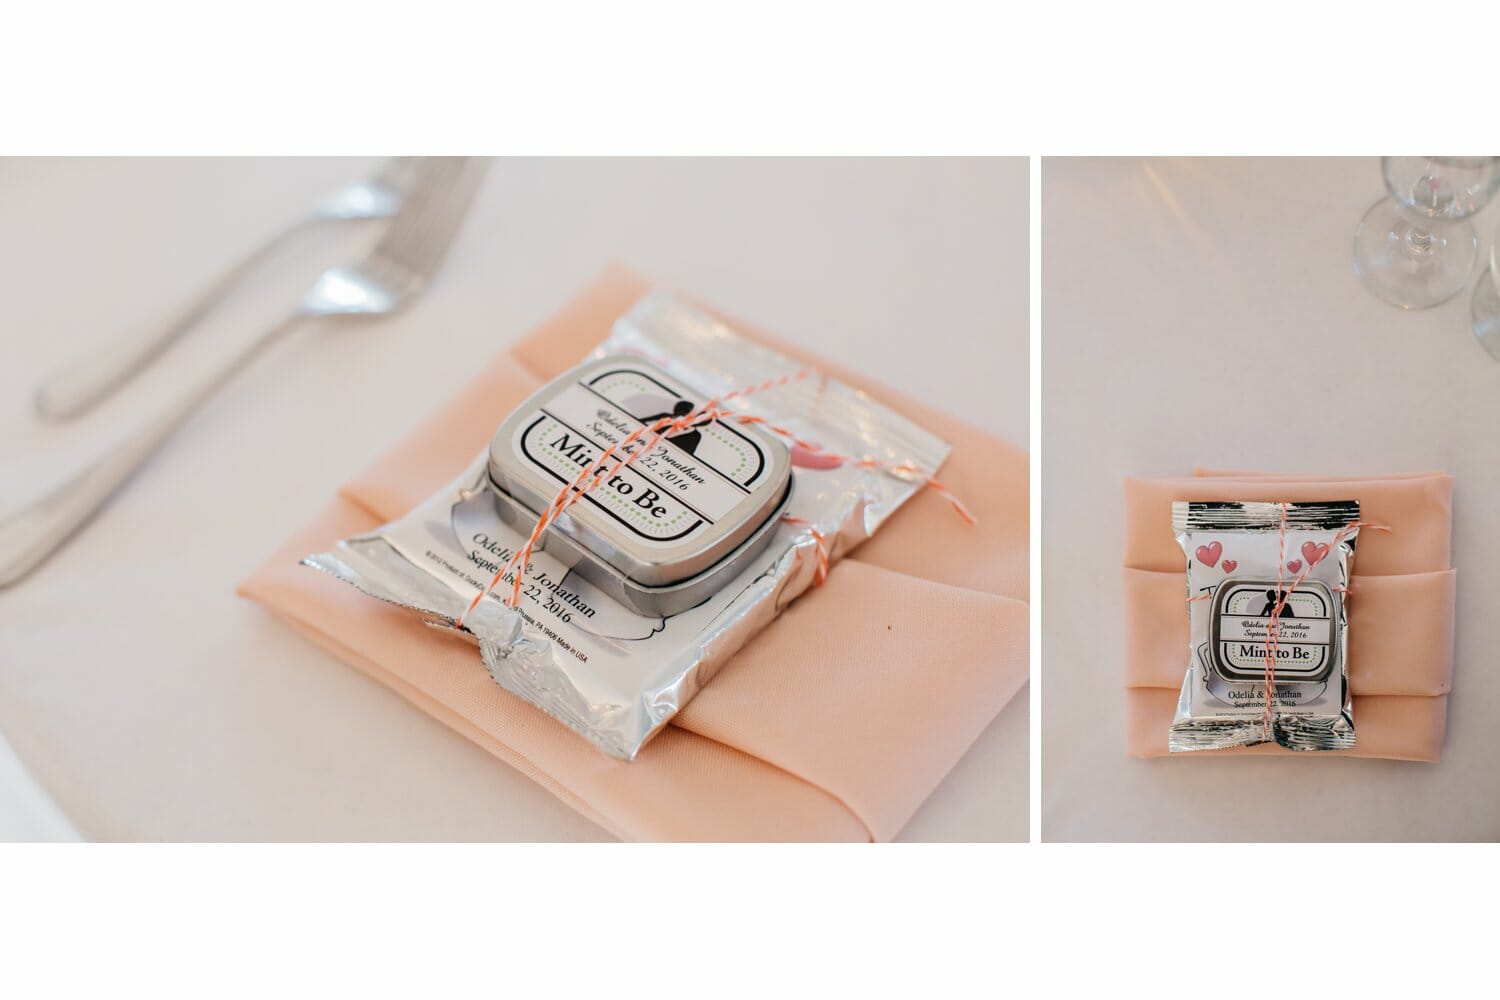
Individual details are captured like this:
Settings: 50mm 1/200, 2.0-2.8f, ISO(varied)
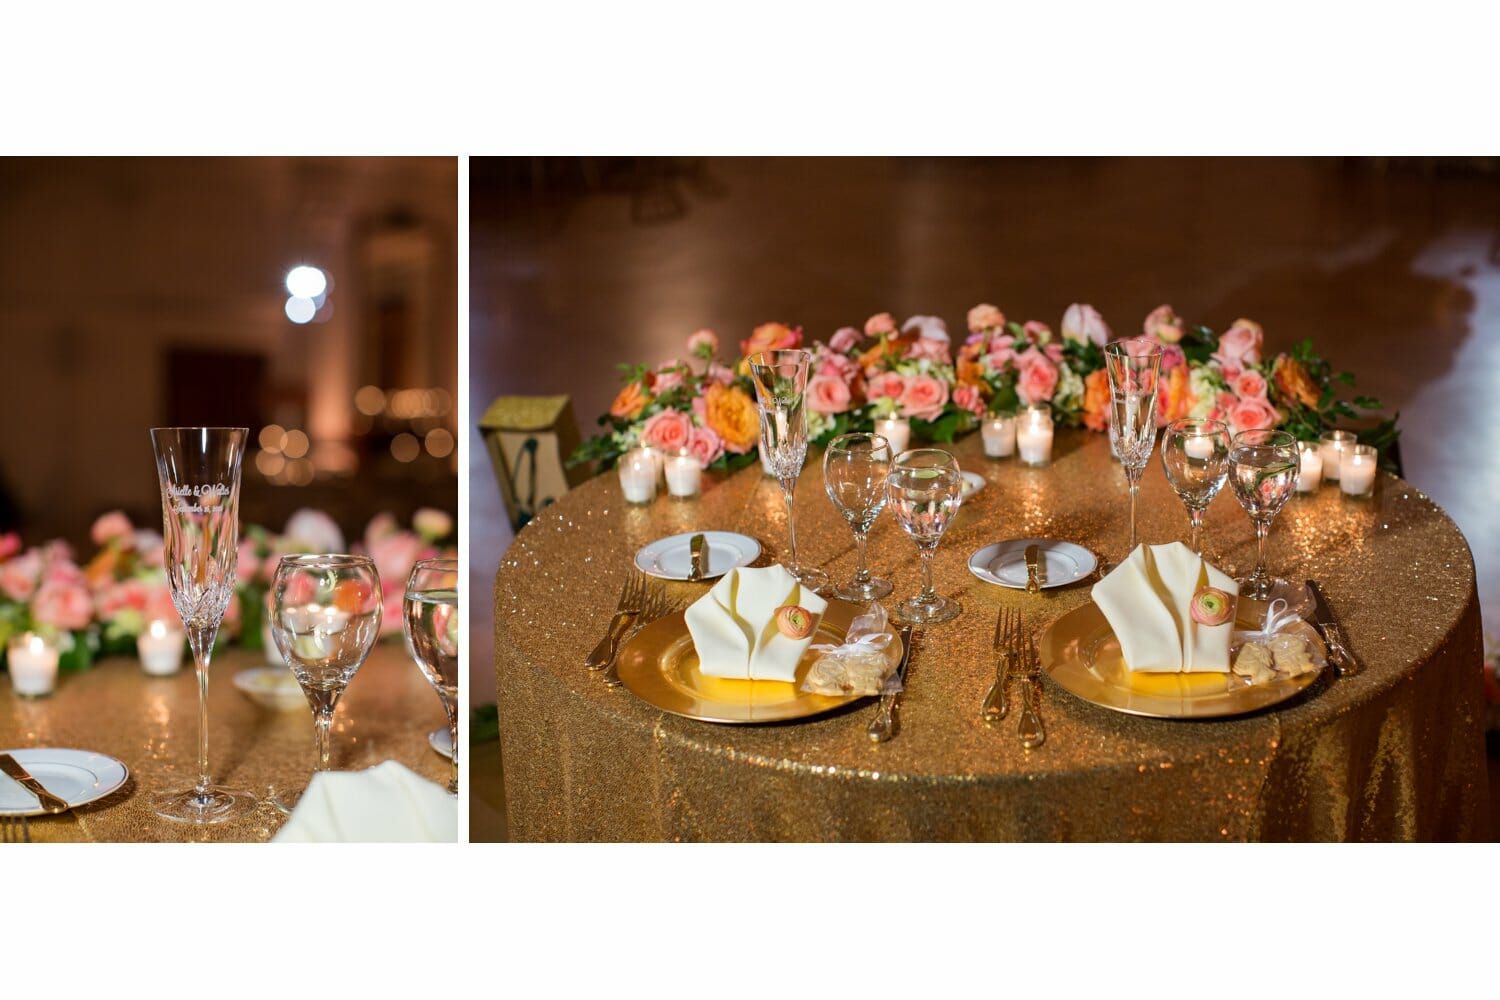
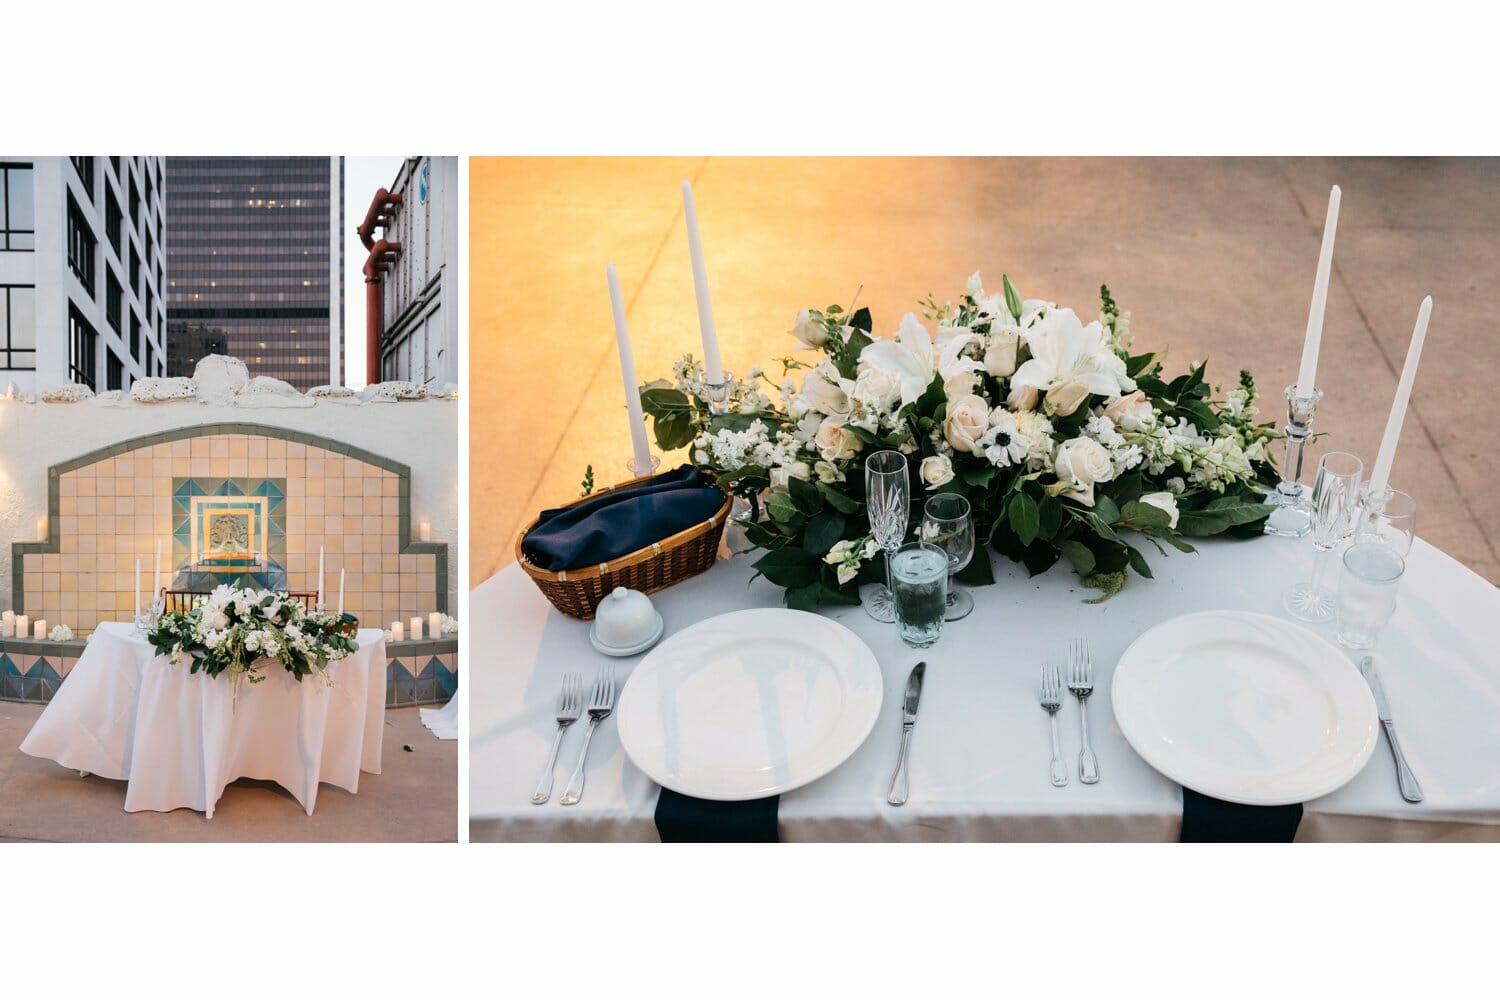
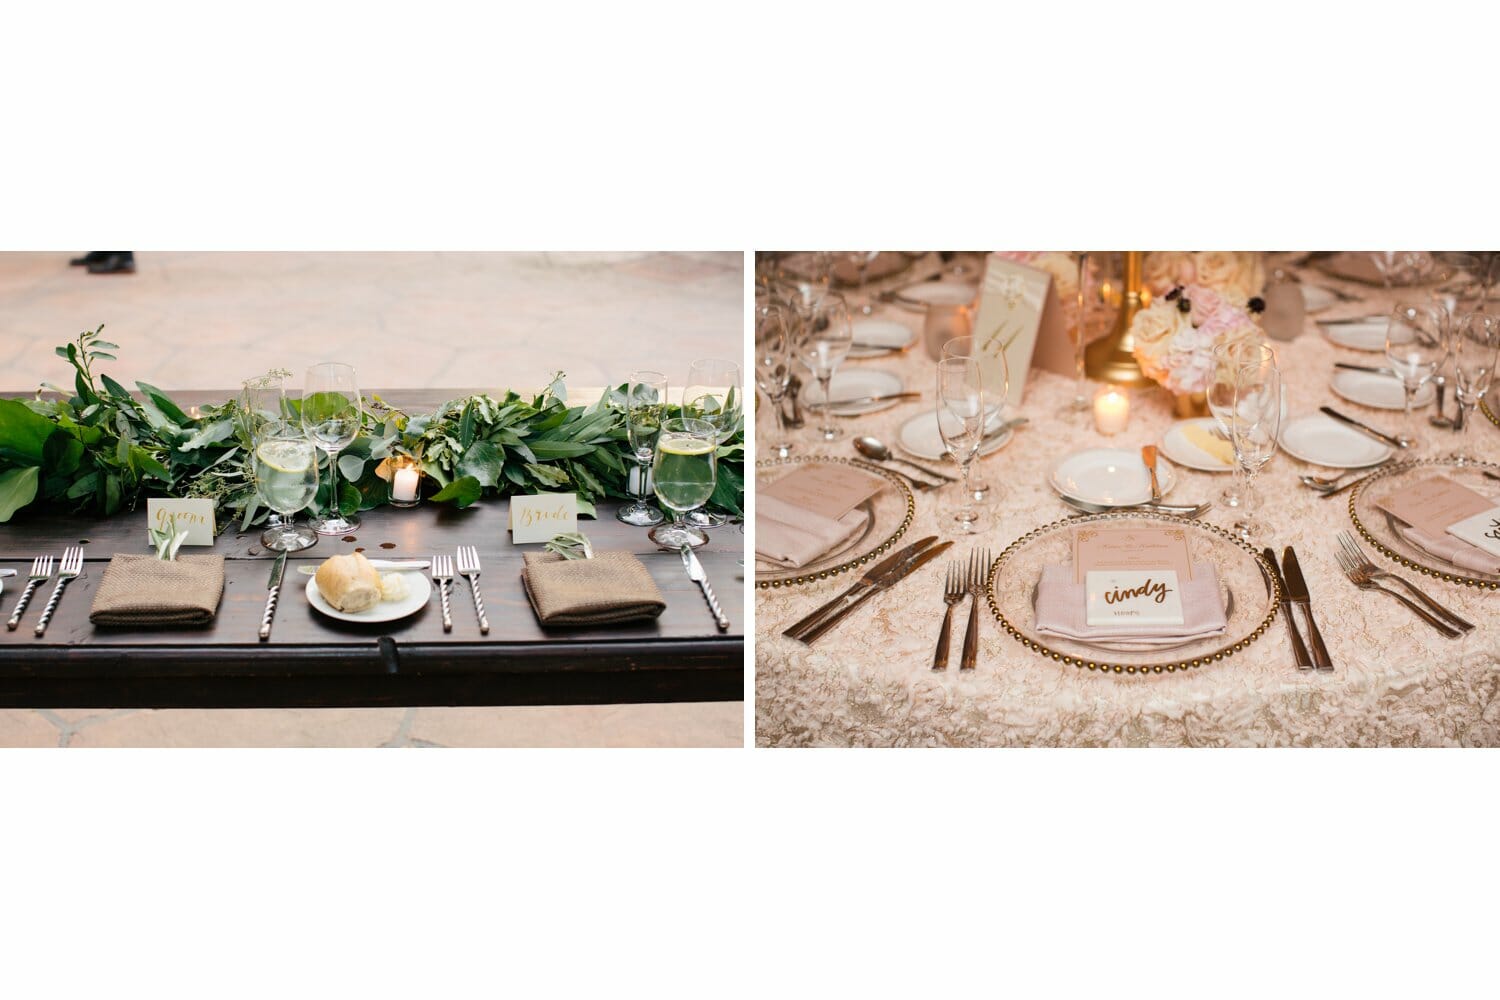
The sweetheart table details, where the bride and groom sit, can be captured like this: Some will have their names engraved on their glasses, try to capture that as well. Don’t forget the front of the sweetheart table (examples further down).
Settings: 50mm 1/200, 2.0-2.8f, ISO(varied)
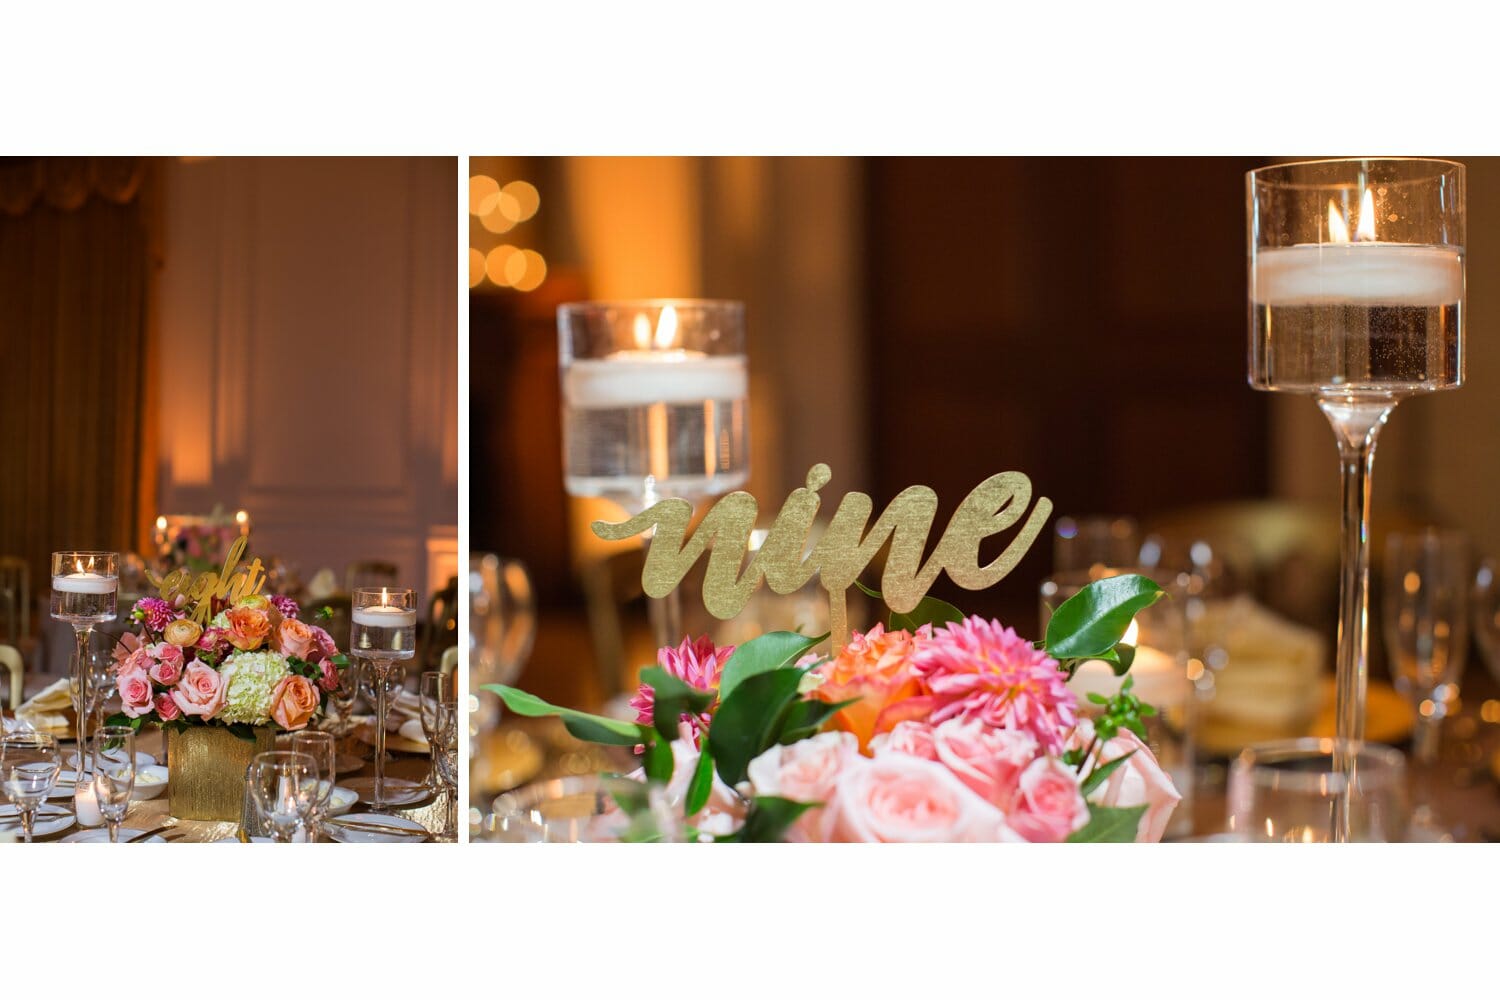
Short centerpieces may be captured like this:
Settings: 50mm 1/200, 2.0-2.8f, ISO(varied)
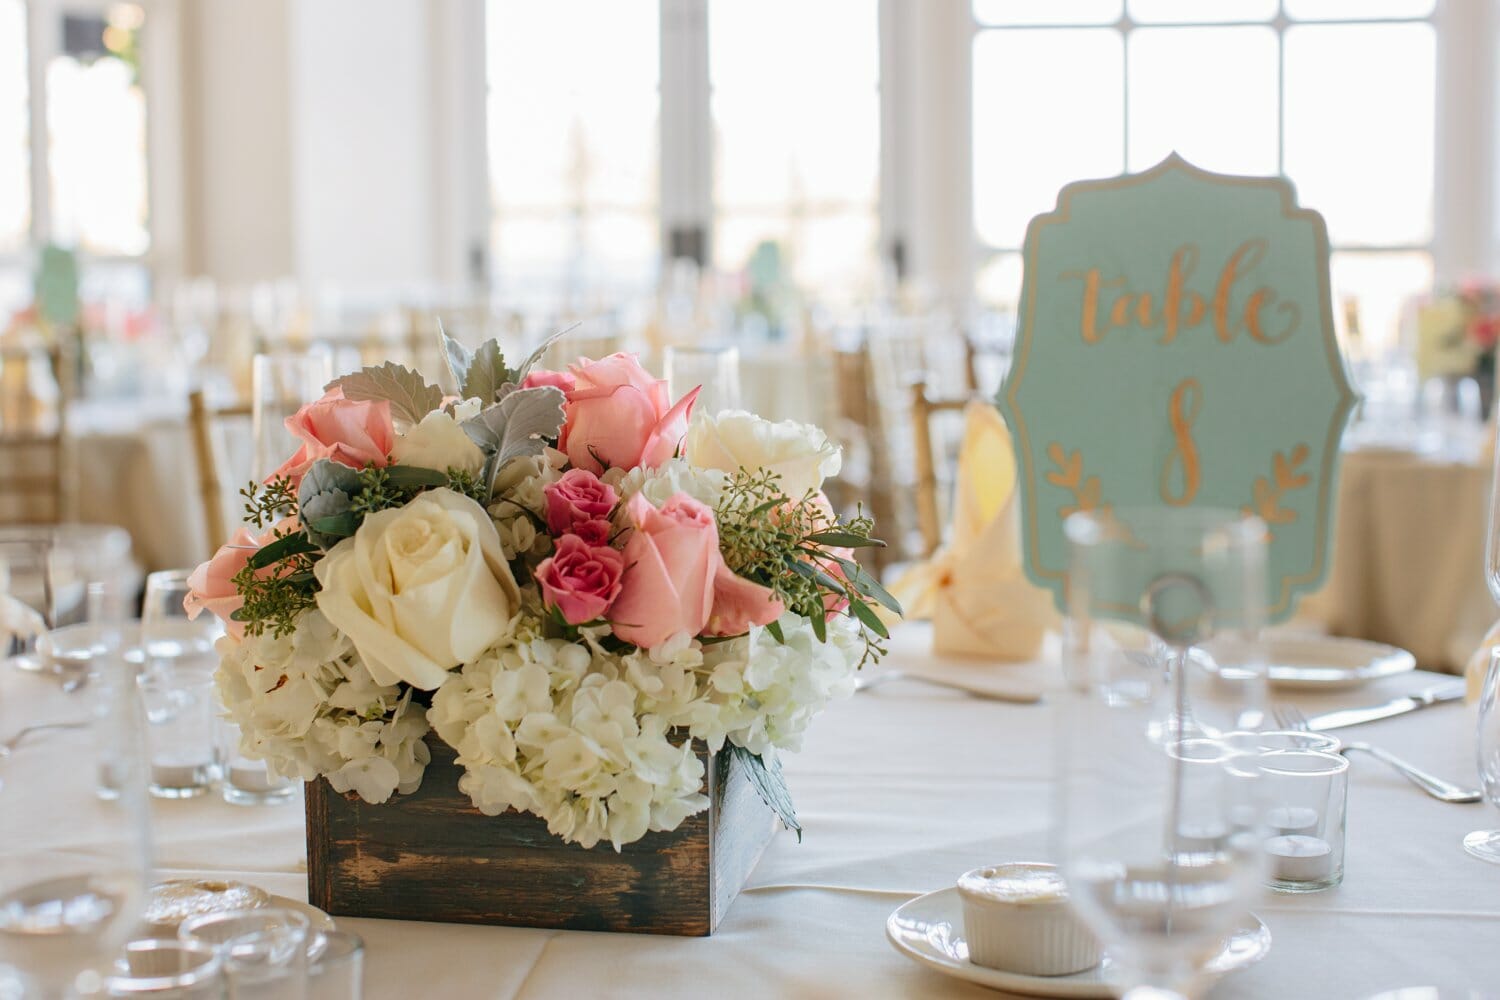
Taller centerpieces may be captured like this. However, try a horizontal shot as well.
Settings: 50mm 1/200, 2.0-2.8f, ISO(varied)
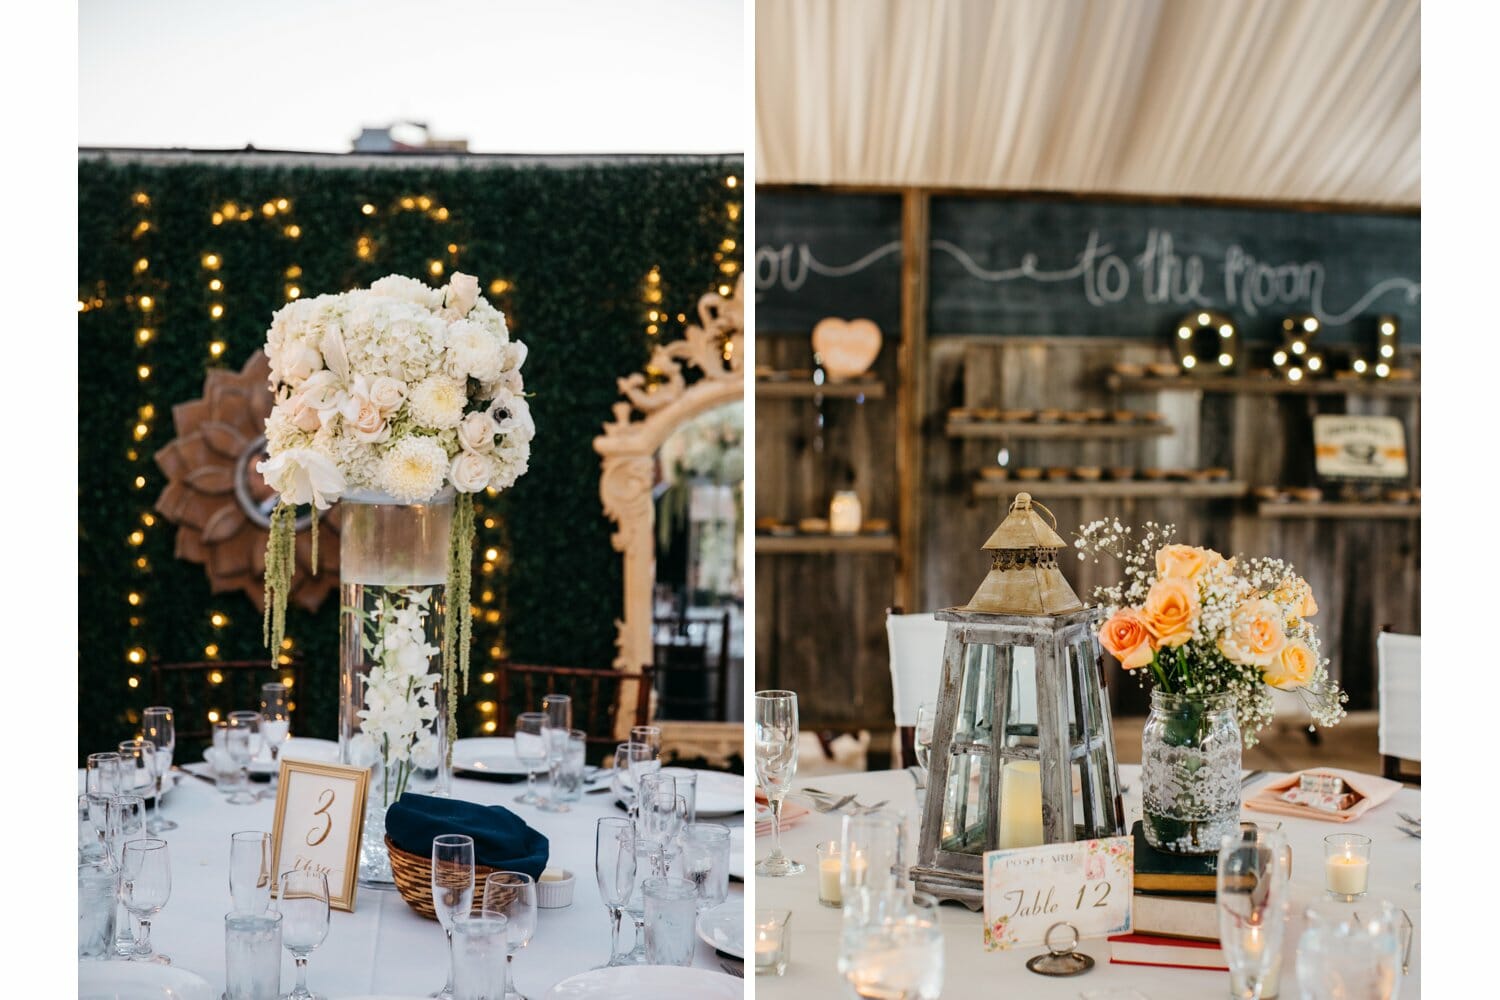
Here’s another example of the sweetheart table, front and back.
Settings: 50mm 1/200, 2.0-2.8f, ISO(varied)
Another place setting without plates.
Settings: 50-35mm 1/200, 2.0-2.8f, ISO(varied)
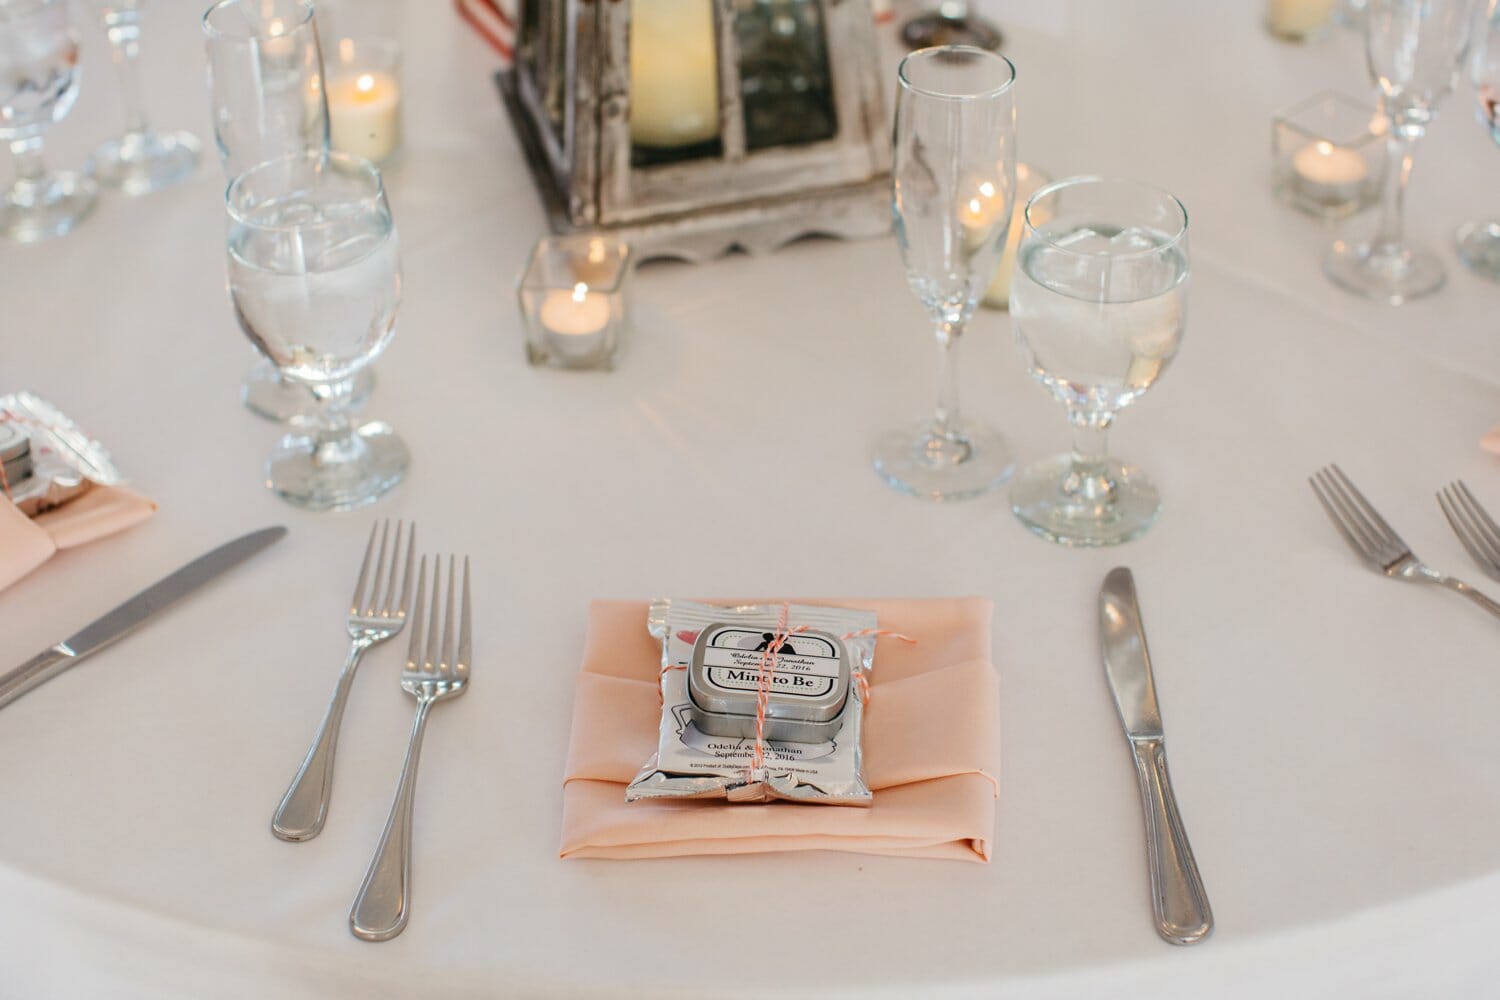
For capturing simple favors, try to capture it like the first image. It’s fuller and more balanced than the second. The second would not be kept.
Settings: 50mm 1/200, 2.0-2.8f, ISO(varied)
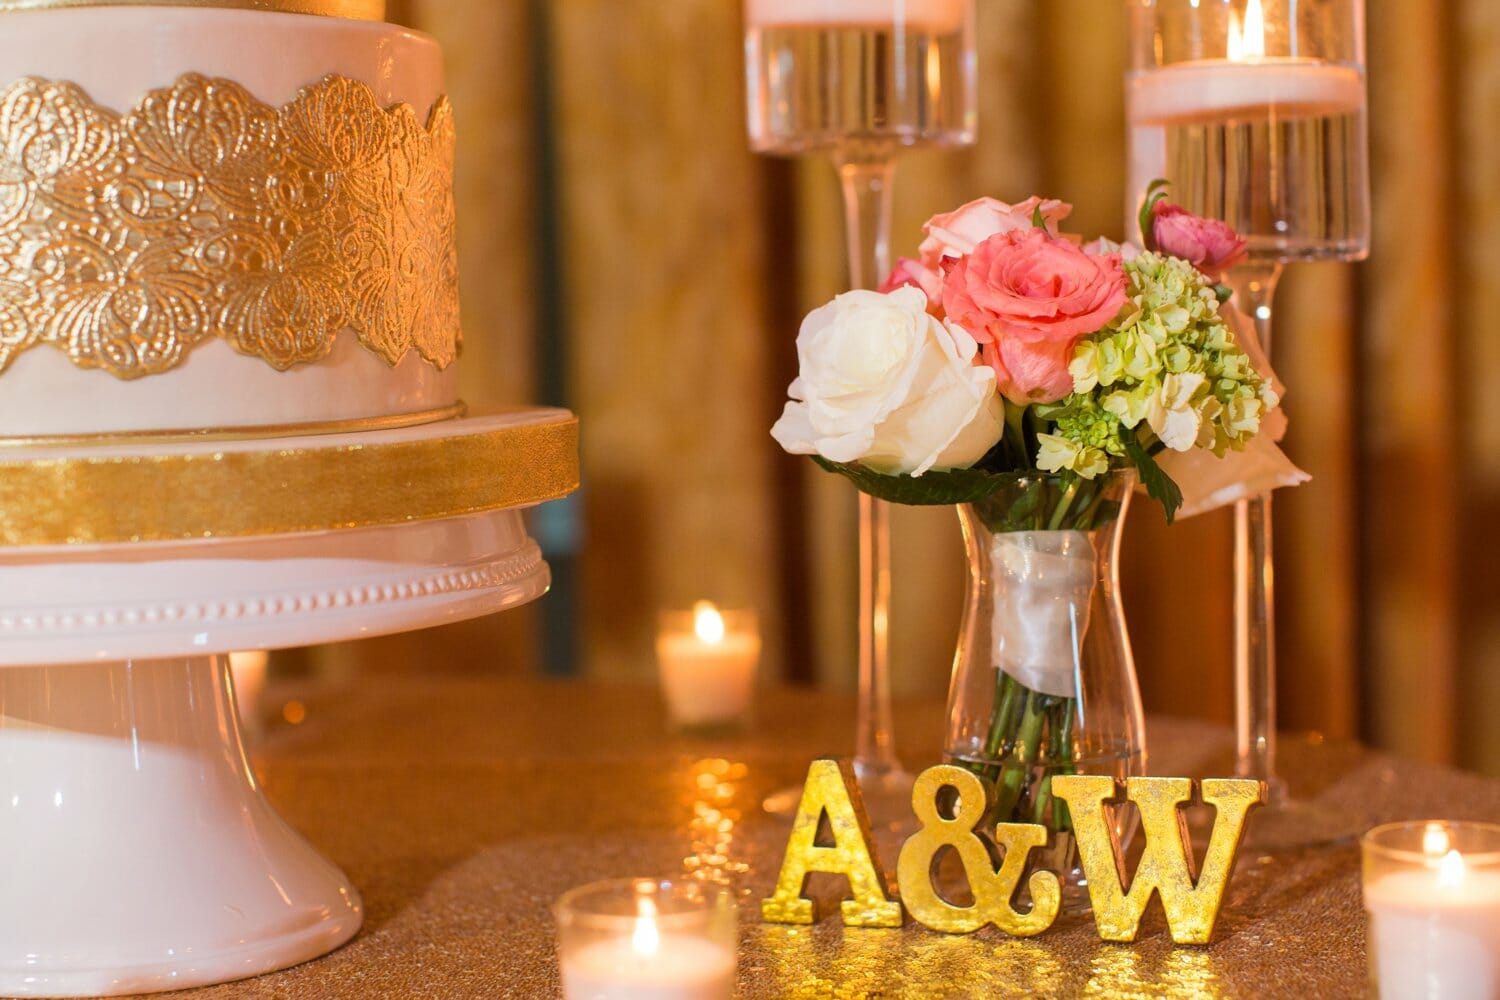
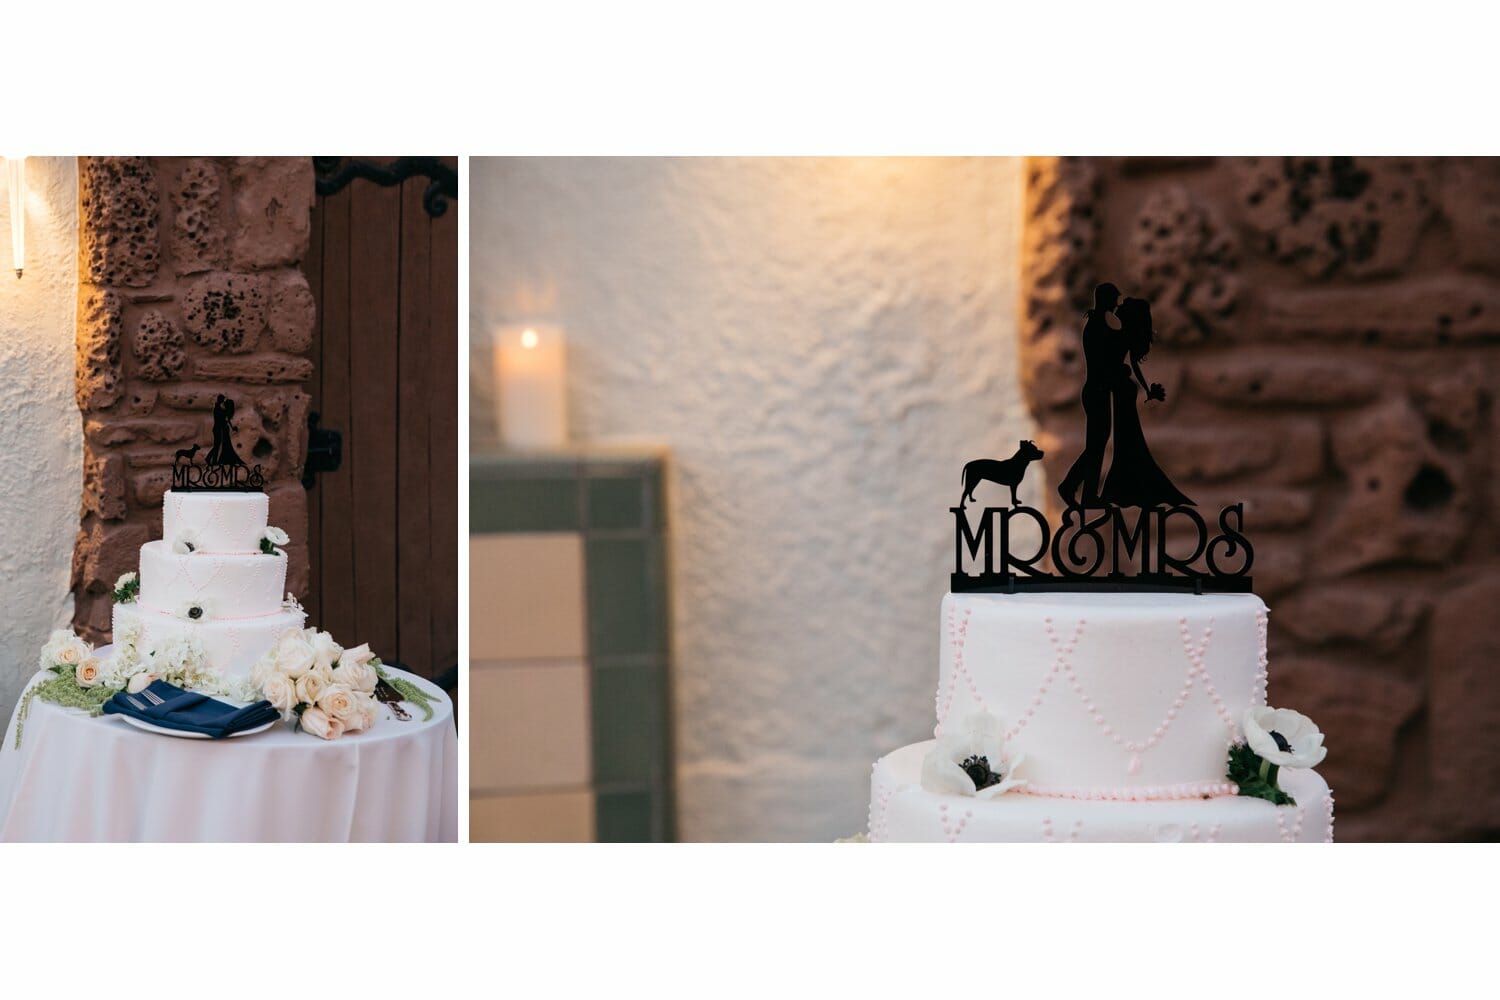
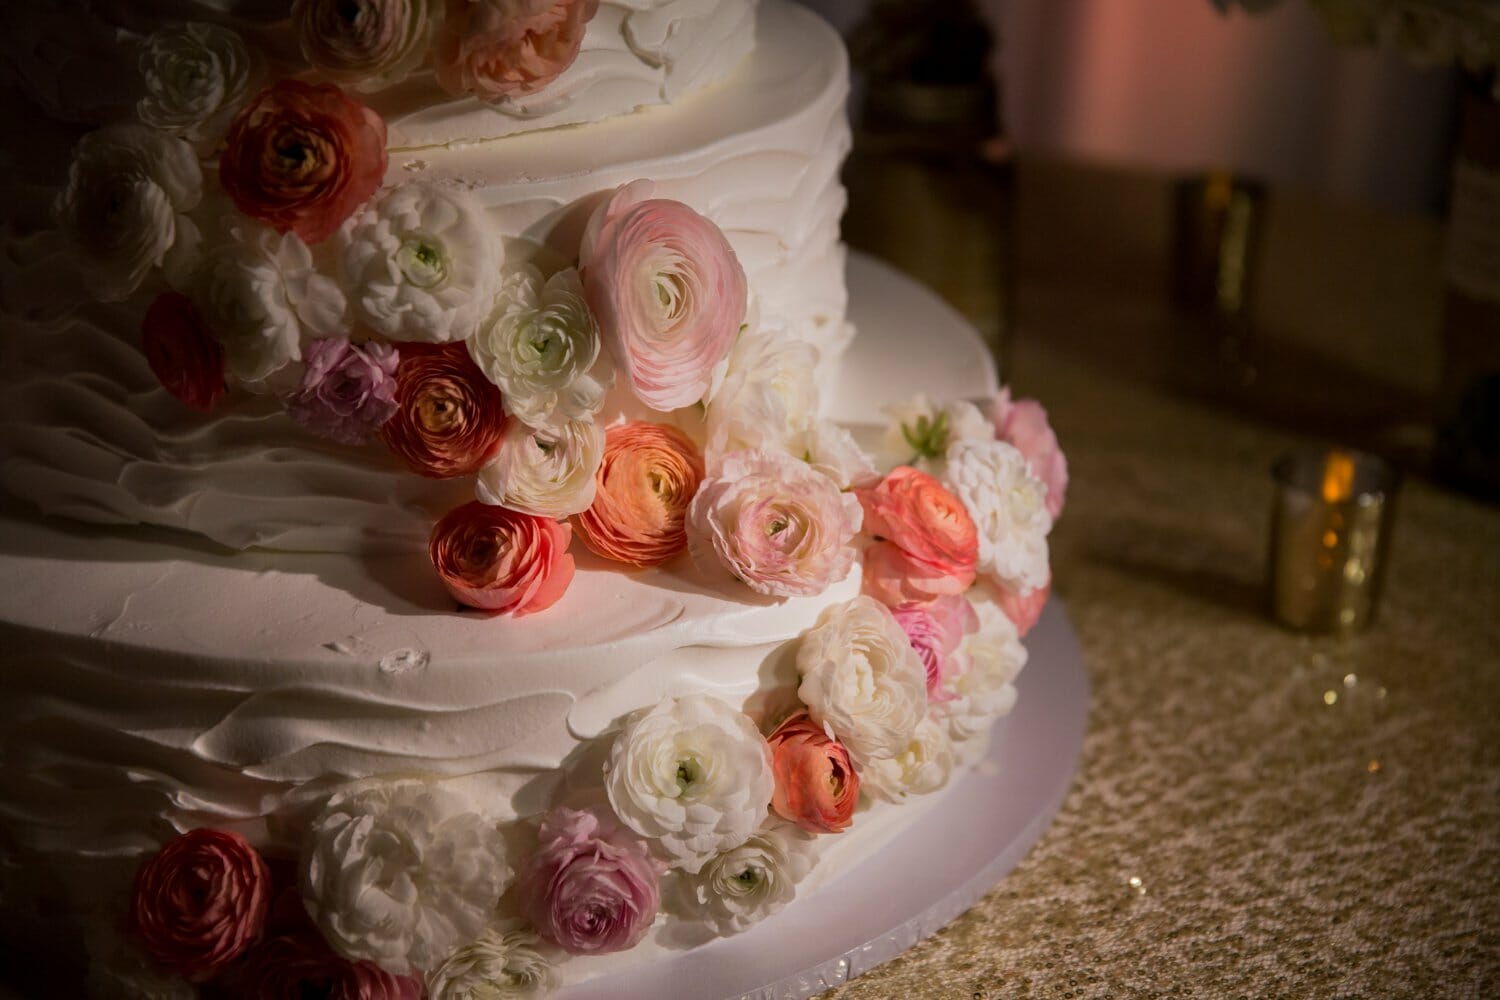
Cake shots can be captured like this: As with every detail, the whole thing first and then the close up details.
Important note: This may seem arbitrary to mention, but having a system ensures you’re consistent and don’t miss anything. You should always be conscious of what you’ve captured and how you captured it. That way if something goes wrong we can correct it, or better yet; you can.
Settings: 50mm 1/200, 2.0-2.8f, ISO(varied)
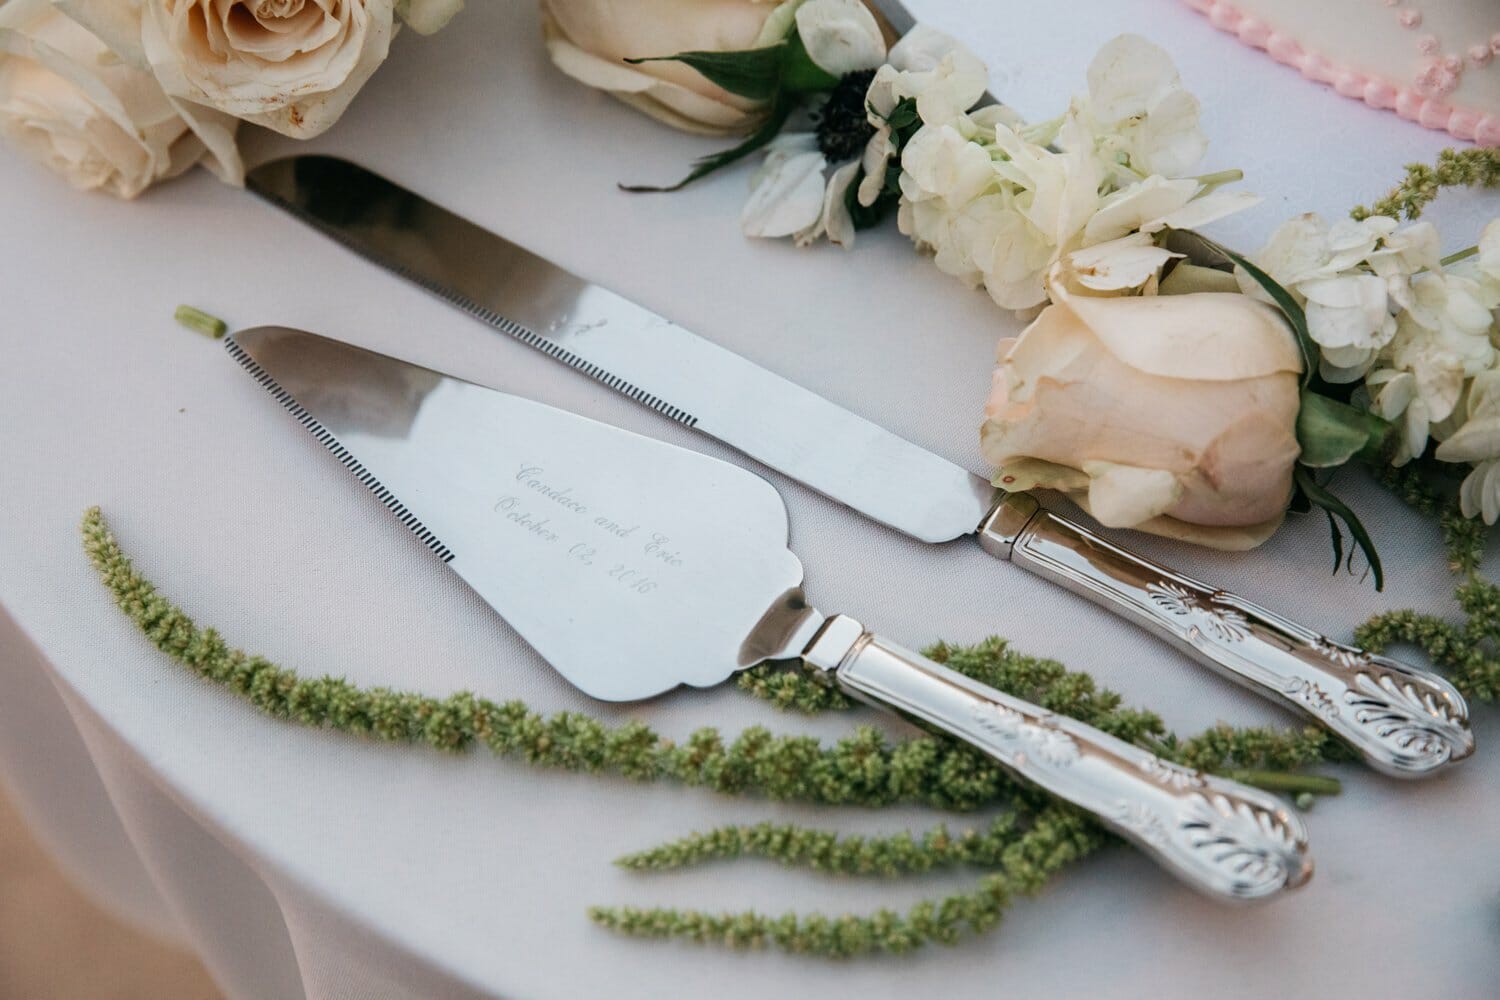
The cake cutter is usually something special, if it is capture it like this:
Settings: 50mm 1/200, 2.0-2.8f, ISO(varied)
More elaborate cake shots can be captured like this:
Settings: 50-35mm 1/200, 2.0-2.8f, ISO(varied)
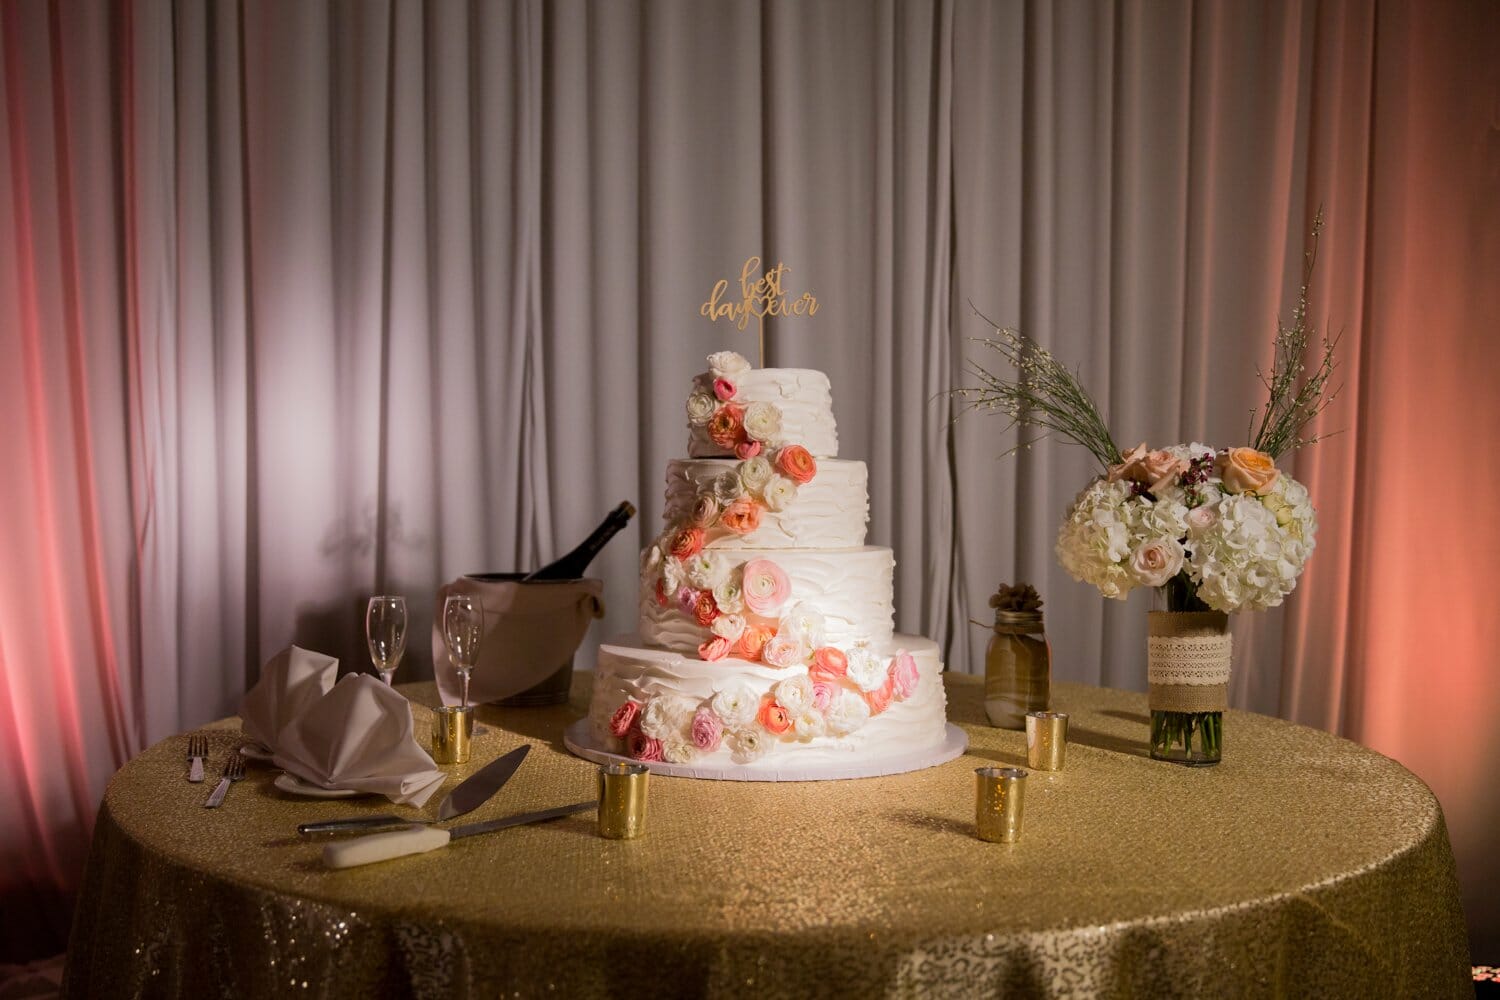
Then go in for the smaller details.
Settings: 50mm 1/200, 2.0-2.8f, ISO(varied)
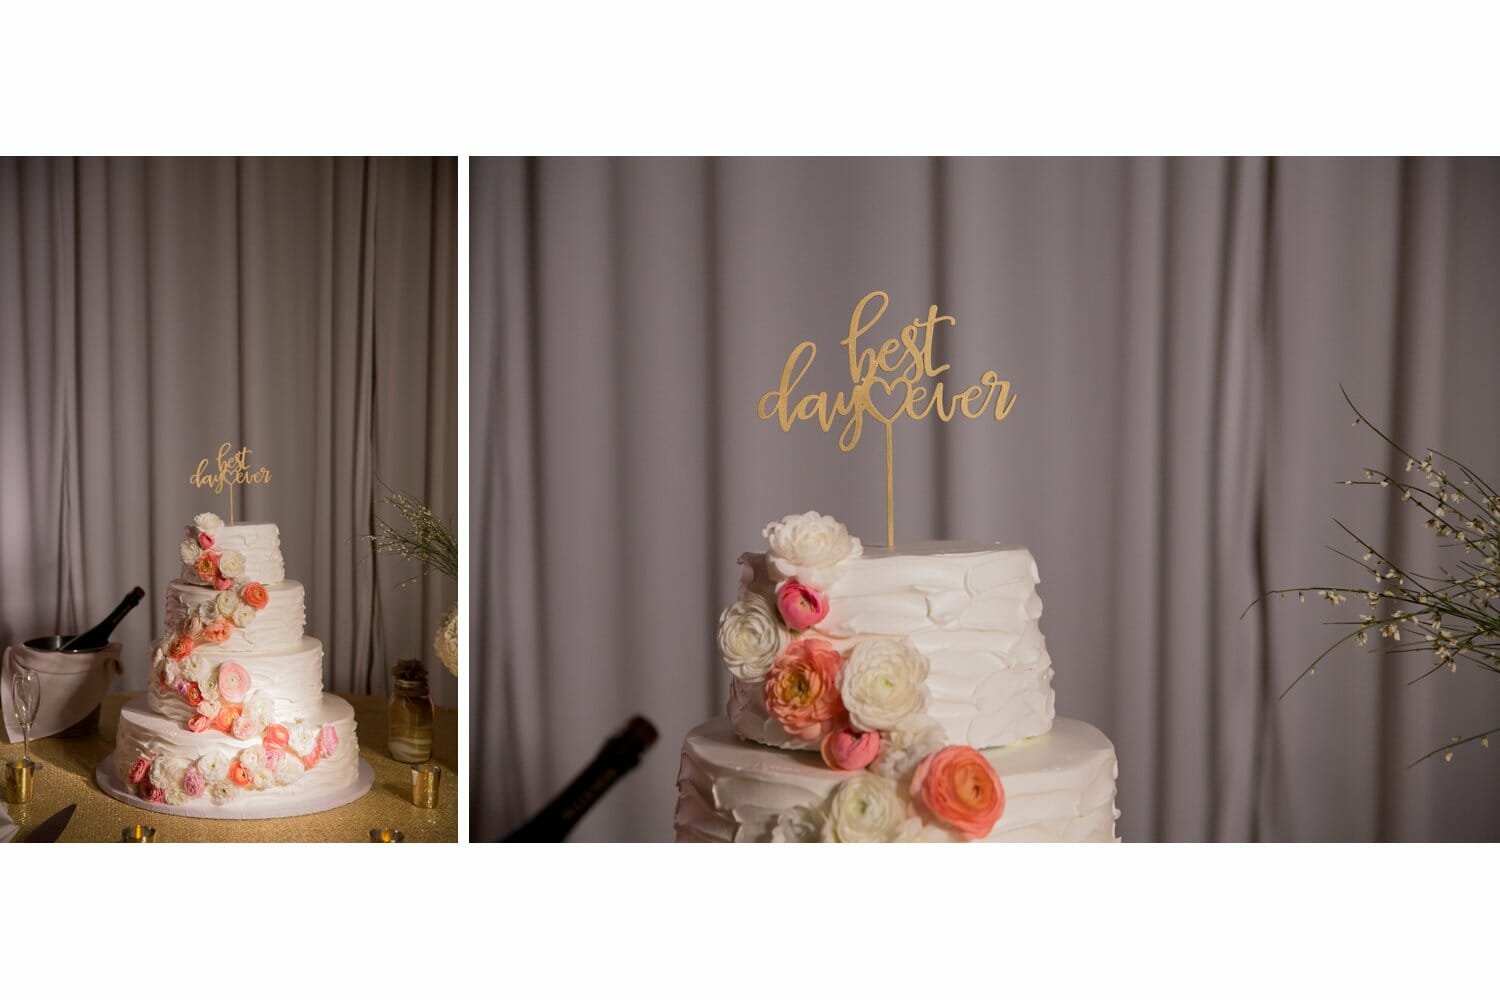 Always try to use the power of your camera and natural light before you use flash. And if you use flash learn to create a natural feel with it. Assistants are usually available to bring over a ring light if need be.
Settings: 50mm 1/200, 2.0-2.8f, ISO(varied)
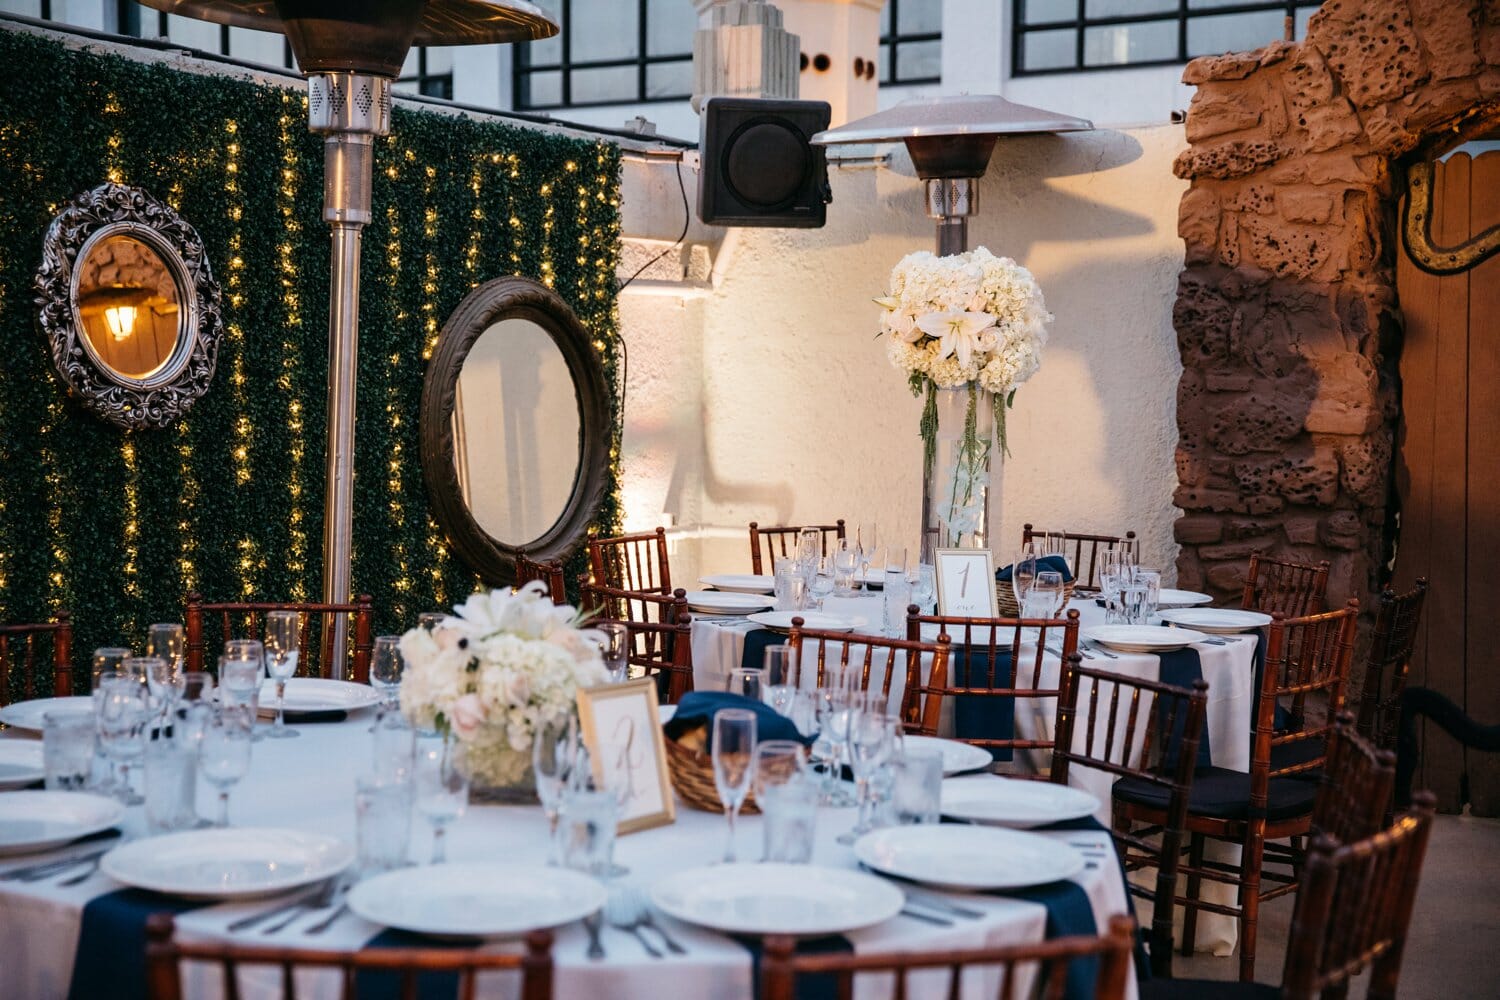
Heat lamps are sometimes unavoidable. However, when you shoot your details, try to position them in the best way.
The first image is not ideal, the second is better. But if you turn the second shot more to the right, you might be able to avoid it entirely. Do your best.
Settings: 50mm 1/200, 2.0-2.8f, ISO(varied)
Settings: 35mm 1/200, 2.0-2.8f, ISO(varied)
More examples of place settings.
Settings: 50mm 1/200, 2.0-2.8f, ISO(varied)
Some table card details captured:
Settings: 35mm 1/200, 2.0-2.8f, ISO(varied)
details captured:
Settings: 50mm 1/200, 2.0-2.8f, ISO(varied)